Activity 2: Edit materials
In this activity you modify the materials assigned to a design. For example, to change colors and texture size.
Prerequisites
- Ensure you have assigned different materials to the utility knife as described in Activity 1.
- Ensure you are in the Render Workspace.
- Ensure the Utility knife model is open.
Steps
Change the Glossy (Yellow) material to Glossy (Red).
Click
 Setup > Appearance.
In the Library section of the Appearance dialog scroll down to Plastic > Opaque > Plastic - Glossy (Red).
Drag the swatch from the library on to the swatch for Plastic - Glossy (Yellow) in the In this design section of the Appearance dialog.

Ensure that both the right and left sides are changed to a red color.
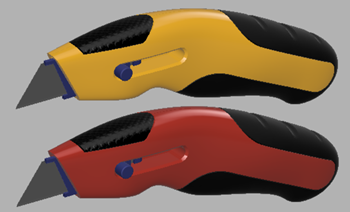 Note: Dragging one swatch on another is a quick way to change all materials assigned to one color at a time.
Edit the red material’s color, changing the color from red to orange.
Ensure the Appearance dialog is open.
Double click the swatch for Plastic - Glossy (Red) in the In This Design section to open the editor window for this material.
In the name field, change the name to Plastic - Glossy (Orange).

Drag the horizontal color slider to an orange color of your liking.
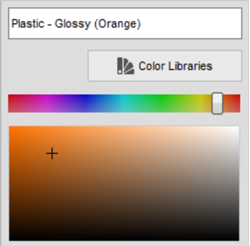
To get a specific color with a known RGB number enter it in the dialog. For this orange use 240, 114, 14, and click Done.
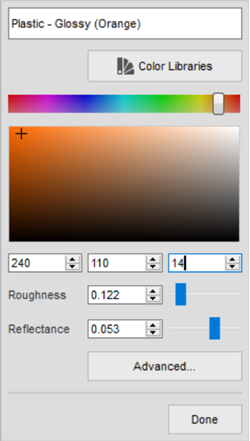
Verify both the Right and Left body components are orange. Right-click on the Orange swatch in the Appearance dialog and select Select Objects Applied To.
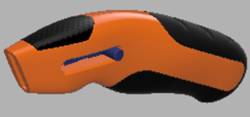
Change the Texture Polka material to blue with a texture size of 41.
Ensure the Appearance dialog is open.
Double click the swatch for Plastic - Textured – Polka in the In This Design section to open the editor window for this material.
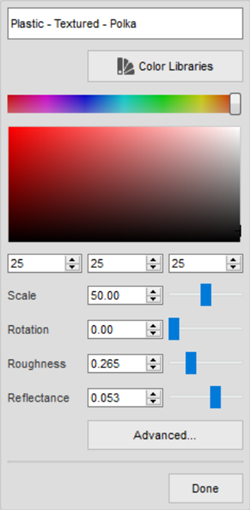
In the name field, change the name to Textured – Polka - Blue.
Using the method of your choice change the color to a blue or your choosing.
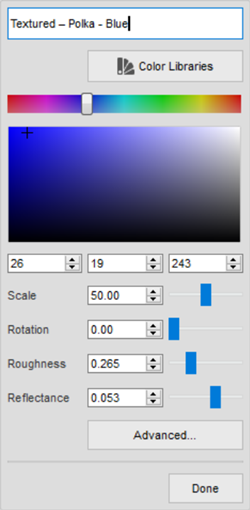
Set the Scale to 41, to adjust the size of the texture map.
Move the Rotation slider to interactively change the orientation of the texture map.
Click Done, when you are satisfied with the orientation.
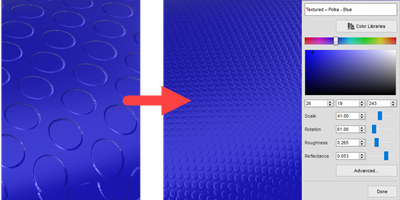
Click Close on the Appearance dialog.
Set the texture projection to Box for the Grip 2:1 component The texture projection defines how the texture is shown on the surface of the component. There are several controls you may use to manipulate the texture map.
Right-click on the Grip 2:1 component in the Browser and select Find in window.
Rotate and zoom as necessary so you can clearly see the texture on the grip.
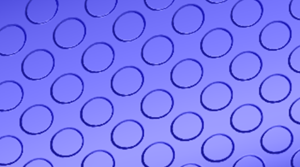
Click
 Setup > Texture Map Controls.
Select the Grip 2:1 component, in the canvas.
In the Projection Type pull-down list, select each type and play with the manipulators to see how the texture changes.
Finally select the Box Projection Type.
Use the manipulators to orient the texture map. You can rotate and translate the texture map.
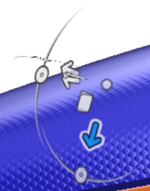
Click OK to accept your changes when you are happy with them.
Edit the material assigned to the blade and change its roughness to 0.5.
Right-click Blade:1 in the Browser and select Isolate.
Zoom and rotate as necessary to see the blade clearly.
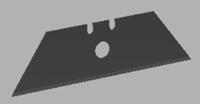
Right-click Blade:1 in the Browser and select Appearance. The blade is selected for material and appearance editing.
Double-click on the Stainless Steel – Satin material in the In This Design section, of the Appearance dialog.
Change the name to Stainless Steel - Blade by clicking on the name field.
Set the Roughness to 0.50 then click Done.
Duplicate the blade material and change the color to 75,75,75 and set the new color to the face of the blade.
Right-click on the Stainless Steel – Blade material and select Duplicate from the context menu, in the Appearance dialog, to create a new material called Stainless Steel – Blade (1).
Double-click the Stainless Steel – Blade (1) material to open the Material Editor.
Change the name of the material to Blade Face.
Change the color to 75, 75, 75, and click Done.
In the Appearance dialog, change the Apply To setting to Faces.
Drag the Blade Face material to the side of the Blade.
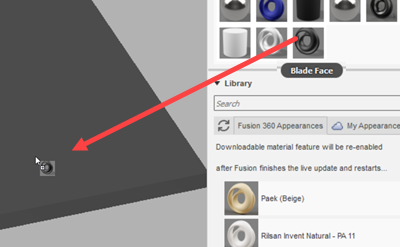
Repeat the previous step to assign Blade Face to the other side of the blade.
Click Close on the Appearance dialog.
Right-click Blade:1 in the Browser and select Unisolate.
Activity 2 summary
In this activity, you edited the color and texture of materials that were applied to the part.
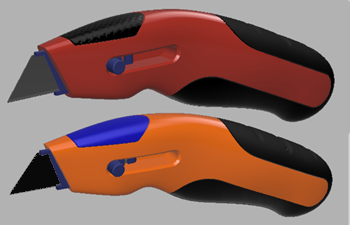
The knife started with a red body and black grip (top). The body was changed to orange, the front grip’s texture plus color were changed, and the blade’s colors were changed. (bottom).
