
Create and populate a custom table
Learn how to use the Table command to create a custom table on a sheet in the Drawing workspace in Fusion.
Create a custom table
On the toolbar, select Tables > Table
 or Tables > Custom Table
  .
.The Table dialog displays.
In the Table dialog, select Custom Table as the table Type.
The custom table displays at the cursor.
Click to place the custom table on the sheet.
The custom table displays on the sheet and the header cell is highlighted.
The Edit Table dialog displays.
In the Edit Table dialog, select the Table Direction:
- Up: Places the header at the bottom and orders rows from bottom up.
- Down: Places the header at the top and orders rows from top down.
Adjust the Text Alignment for cells, rows, and columns:
- Click a cell, then select a text alignment option from the dropdown list in the dialog.
- Click a row number, then select a text alignment option to adjust the entire row.
- Click a column label, then select a text alignment option to adjust the entire column.
Use the Edit Columns and Edit Rows tools to insert or delete columns and rows.
Click Close.
The custom table displays on the sheet.
Populate cells in a custom table
Click to select the table.
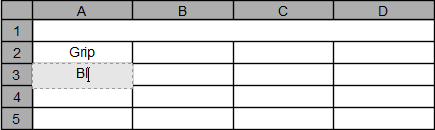
Double-click a cell.
The cursor prompt displays in the cell and the Text dialog displays.
In the Text dialog, adjust the text formatting:
- Font: Select a font from the dropdown list.
- Height: Specify text height in current units.
- Bold
- Italic
- Underline
- Text Alignment: Select a text alignment from the dropdown list.
- Symbols: Select a symbol from the flyout to insert it into the cell.
Enter text to display in the cell.
(Optional) Double-click another cell, then repeat step 3.
Click Close.
The new contents of the cells you edited display in the table on the sheet.
Copy a custom table
You can copy a custom table to the same sheet, different sheet within the same drawing, and to a different drawing.
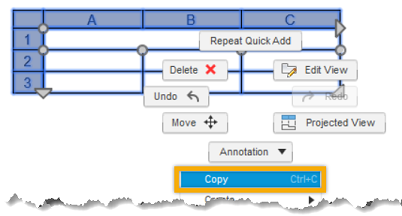
Click the custom table you want to copy to select it.
Right-click the selected table to display the menu.
Select Copy.
Right-click anywhere in the sheet you want to copy the table to and select Paste.
The Move dialog displays.
Click anywhere in the sheet to specify the base point.
Move your cursor to the desired location and click again to place the table on the sheet.
In the Move dialog, click OK.
The table is copied and displays on the sheet.
Tips
- Place a table on the bottom half of the sheet to flip the column labels to the bottom of the table. The numbered rows are ordered from bottom to top.
- Press the
Shiftkey to lock or unlock the table flipping feature. - In the Browser, you can right-click an assembly, then click Table to create a custom table.
- Click to select a cell, row number, or column label, then drag the grey round grips to resize cells, rows, and columns in the table.
- Press the
Shiftkey and click to select multiple cells in the table. - Select the table, then click and drag the blue arrow grip to break the table into multiple table sections, or to consolidate multiple sections into a single table section.
- Press
Ctrl+C(Windows) orCommand+C(MacOS) to copy the contents of selected cells. - Press
Ctrl+V(Windows) orCommand+V(MacOS) to paste the contents of your clipboard into selected cells. - Press
Enterto navigate to the next cell in a column. - Press
Tabto navigate to the next cell in a row. - Press the arrow keys to navigate to the next cell up, down, left, or right.
- You can use mathematical formulas like
sumandaverage, similar to Microsoft Excel. - Press
Ctrl+C(Windows) orCommand+C(MacOS) andCtrl+V(Windows) orCommand+V(MacOS) to copy custom tables.