Review designs in the Fusion web client
Learn how to comment, review, and mark up designs directly in the Fusion web client.
Comment on a design
You can access the Comment tool in the following two ways:
- Overview tab: Click View and comment in the comment panel.
- View tab: Click the comment icon icon
 in the top-right corner of the navigation bar.
Add your comment
Open the Comment tool.
Adjust the snapshot view.
You can modify the snapshot view included with your comment or remove it by clicking the close icon
 .
.Enter your comment in the comment box.
Click Post.
Comment on specific parts of a design
Use the Comment on Objects and Comment on Points tools to leave feedback on specific areas of a design.

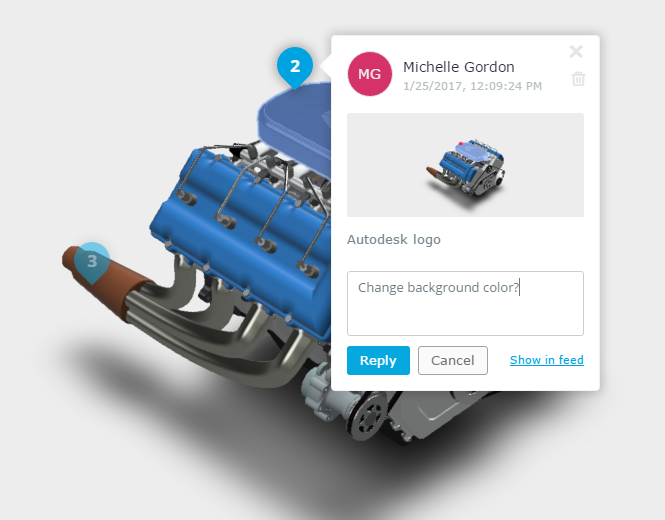
Comment on Points
Use this tool to highlight a specific point on the design:
In the toolbar at the bottom of the Viewer's canvas, click the Comment icon and select Comment On Points.
Drag the blue guides to the point where you want to leave a comment.
Click to place the marker and open the comment box.
To reposition the marker, drag the guides to a new point.
Enter your comment in the comment box.
Click Post.
Comment on Objects
Use this tool to highlight a specific object within a design.
In the toolbar at the bottom of the Viewer's canvas, click the Comment icon and select Comment On Objects.
Click the object you want to comment on.
A marker is added and the comment box opens.
Enter your comment in the comment box.
Click Post.
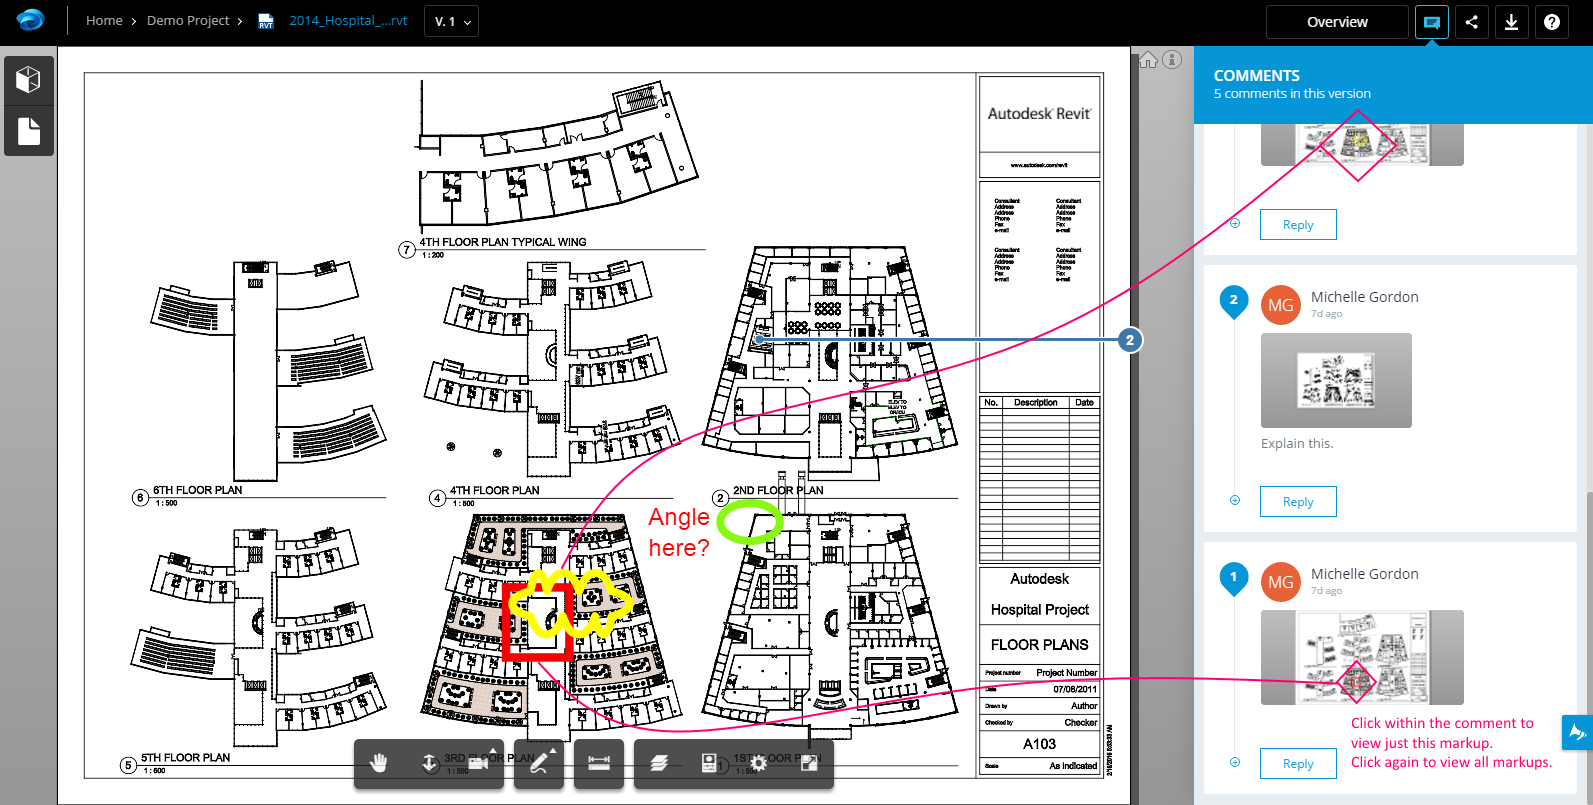
View comments
You can view all comments in the Comments panel. Click the Comments icon ![]() in the top-right corner of the navigation bar to view comments.
in the top-right corner of the navigation bar to view comments.
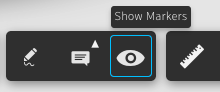
Comments on points and objects are marked by blue pins in the canvas. You have the option to show or hide these markers by clicking Show Markers in the toolbar.
Hover over a marker to view the comment.
Respond to a comment
- Click the comment marker on the canvas.
- Click Reply below the comment.
- Enter your reply in the comments box.
- Click Post.
Delete a comment
To delete a comment, click the Delete (trash can) icon in the comment.
Mark up shared designs
When someone shares a link to a design with you, you can add feedback using Markup tools in the Viewer. After making your changes, save a snapshot of your feedback and share it with others.
- Click the shared link to open the design in the Viewer.
- In the toolbar, click the Markup icon
 to enter Markup Mode.
While in Markup Mode:
- The Viewer switches to Markup Mode and stays this way until you save or cancel your markup.
- A markup is saved as a comment with a snapshot of your current view, making sure others see your feedback in context.
- Other Viewer tools are unavailable in Markup Mode. Adjust your model or part view before starting your markup.
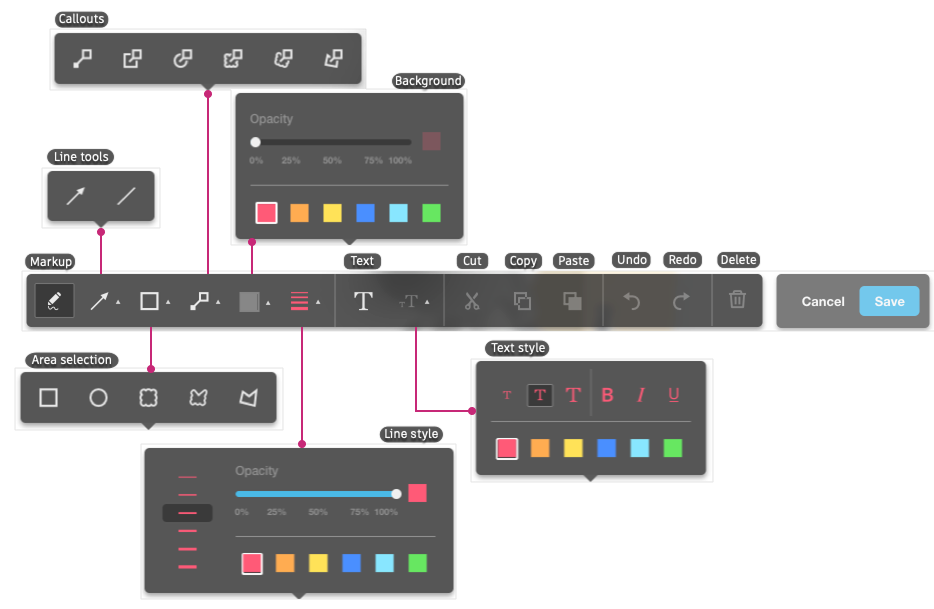
The Markup toolbar includes the following types of tools:
- Freehand
- Lines
- Area Selection
- Callouts
- Text
You can change the style and format for these using:
- Background
- Line Styles
- Text Format
You can use these tools to mark up any part of the design.
To use the drawing tools, select an option and click anywhere over your design and draw. When you save the markup, a marker is added to the design.
To add a callout, click the Callout menu, select the callout option you want. The following Callout options are available:
- Text for a point
- Text for rectangular selection
- Text for circular selection
- Text for cloud selection
- Text for custom cloud selection
- Text for polygon selection
You can set the background and background opacity for the following types of markup:
- Area Selection
- Callouts
- Text
To change the color or size of your markup:
- Select the Line Style tools.
- Set color, width, and opacity.
The selections are retained for all markup tools until you change them.
If you want to set the background color of any of these options to white, reduce opacity to zero.
To create a text box, select the Text tool and click anywhere on the screen. Type within the text box.
Use the Markup tools to mark up and add feedback to the design.
Click Save Snapshot.
Note: Markup changes you add will remain on the Viewer canvas till you click Cancel or Save Snapshot. You may add all your markup changes before saving the snapshot or save several snapshots.Provide a name for the image > Save.
Select Save File.
Browse to the folder you want to save in > Save.
Edit markups
All markup content can be moved and resized using the handles of the markup. You can also cut, copy, and paste markups, undo and redo actions on them, and delete them. You can edit text within the text boxes until you save the mark up. Click within the text box and make changes to your text.
When you are done adding markups and comments, click Save. If you add a markup on the design, a blue pin is added.
Review markups
To view markup changes, click Show Markers or open the Comments panel. Hover over a marker or click the comment that includes a markup to view the markup. The design view will change to the viewpoint at which the markup was added.
View a marked up 2D file
When you open a 2D file that has been marked up in the Viewer, all markups for that change to the file will be visible. You can show or hide these markups by clicking Hide/Show Markers within the Comment & Markup Utilities. To view a specific markup and related comments, open the Comments Panel and click the comment for that markup. All other markups will be dimmed. To view all markups again, click the selected comment again.
Adding Markups to a marked up 2D file
When you click Markup to add markups, all existing markups are visible in a dimmed state and you can add markups over existing markups.