
Activity 3: Workflow and lifecycle management overview
Fusion Manage requires a separate license and can be used with Fusion or independently. Learn more.
In this activity, you’ll explore the possible lifecycle states an item can have and locate and describe the basic change order workflow.
Prerequisites
Before you can complete these activities, you must complete Tutorial 1.
Steps
Familiarize yourself with the help content on workflow management.
- Read through the topics Workflow and lifecycle management and Change order approval overview. These topics introduce you to important concepts including: workflows, lifecycle state, states; and briefly describes the change order approval workflow so that you can modify it if needs be.
Explore the Workflow Editor for the change order workflow.
Important: As you explore, it is important that you do not save any changes made (if any) to the existing change order workflow map. It is configured in such a way that it interacts with other workspaces. You should reach out to your Autodesk representative before making any changes.Open your Fusion Manage site.
Click the main Navigation menu, then select PLM Settings > Workspace Manager.
Expand the Change Orders workspace and click Workflow Editor.
Walkthrough the layout and navigation of the Workflow Editor UI as described in the Workflow Editor UI section of the help documentation.
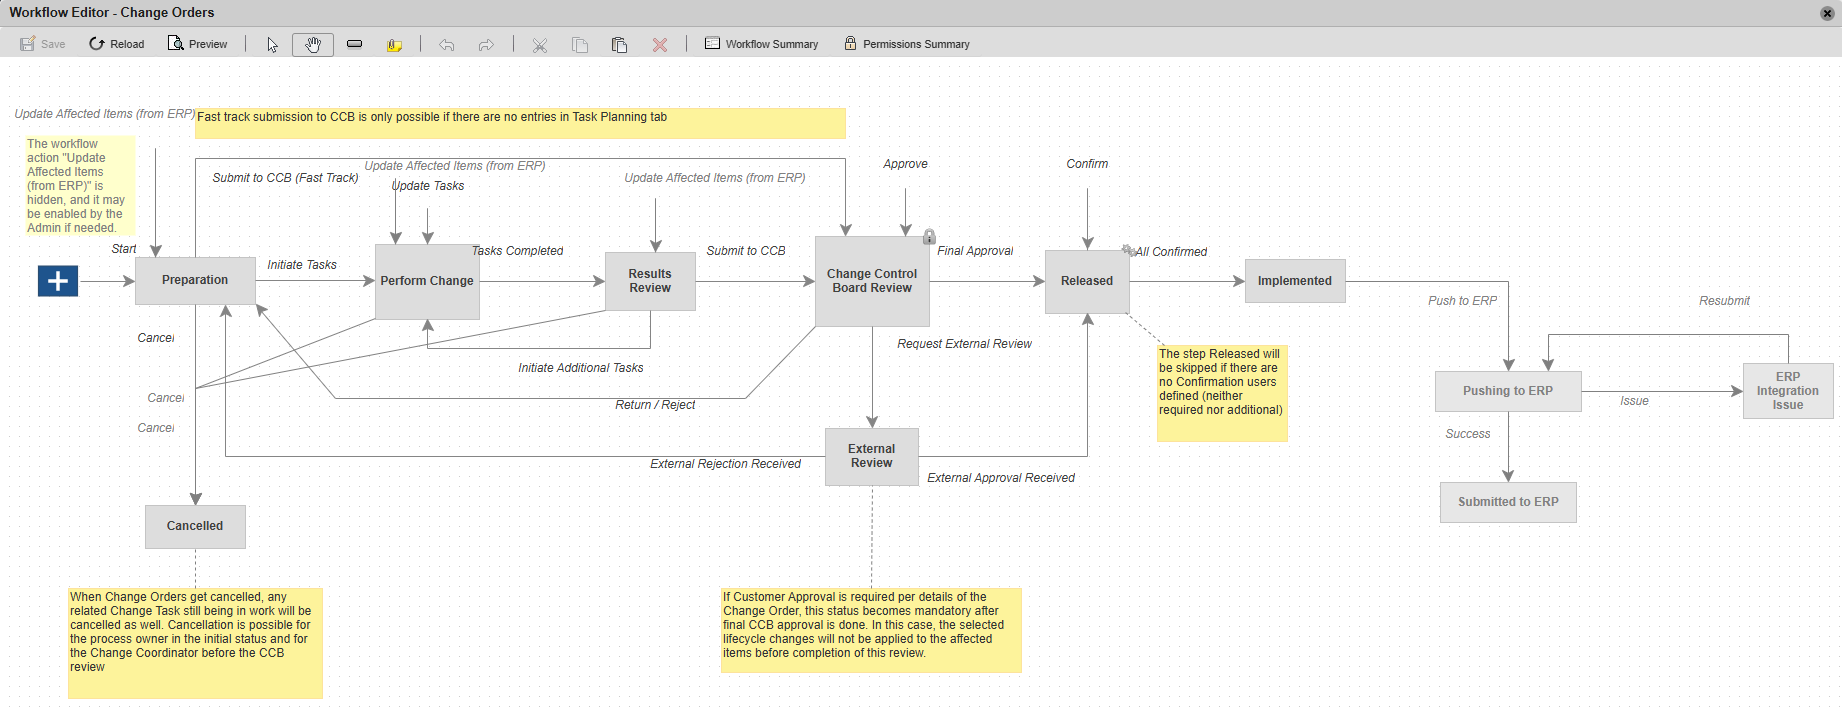
Double-click each of the workflow states and review the state properties.
For example, you could enable Reminder Notifications for the Change Control Board Review state to send reminders to reviewers to complete their task.

Double-click each of the workflow transitions and review the transition properties.
For example, notice that there are Precondition and Validation scripts that you could have to execute when a transition action is performed.
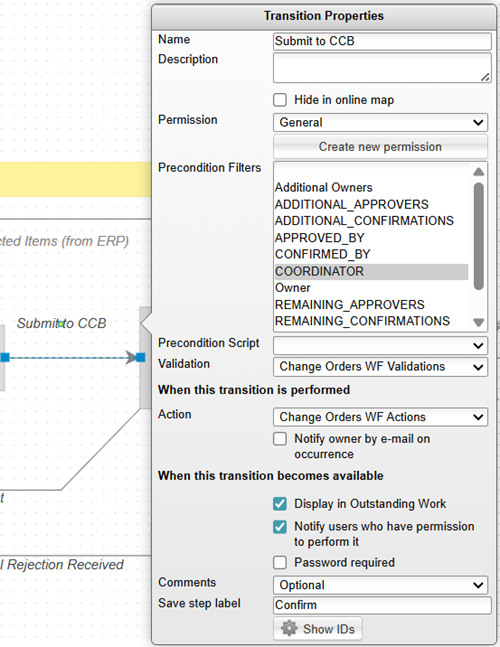 Note: Scripts are found in PLM Settings > System Configuration. See Scripting summary.
Change any workflow state name.
Double-click any state to open its properties.
Change the workflow state name, then click anywhere in the workflow mapping grid.
For instance, rename the workflow state name from Preparation to Prepare Change.
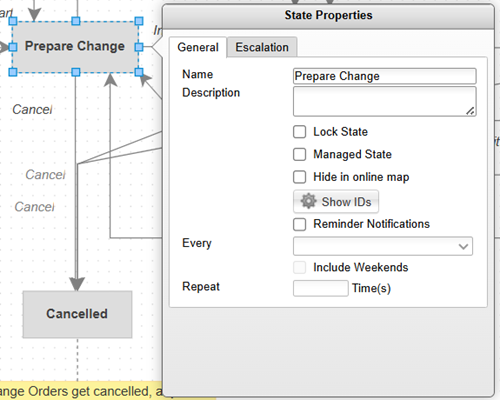
Notice that the workflow state name has been updated to Prepare Change in the workflow mapping grid.
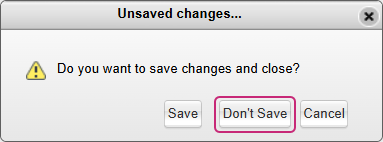
Close the workflow editor and do not save your changes.
Click Close on the workflow editor. In the prompt click Don’t Save.
Activity 3 summary
In this activity, you explored the Change Order Approval workflow to understand the possible lifecycle states for an item. You then launched the workflow editor and explored various tools available to modify a workflow.