Use Site Designer to create parking lot curbs and islands in a site design.
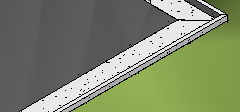
Creating curbs
When creating curbs, consider the following guidelines:
- Street curbs. To create curbs for a street, create a street (using the Locate Street tool) and choose a street family that includes curbs.
- Parking lot curbs. To create a curb around a parking lot, create the parking lot first. Then use the Locate Curb tool to create the curb.
- Curb families. Special Site Designer families for curbs define the curb width and height, gutter width and height, material, and slope projection settings. See Load Families for Site Designer.
- Host lines. Before creating curbs, use the Model Line or Detail Line tool to create curb host lines. The host line for a curb represents the face of the curb.
- Create curbs. To create curbs that are not for streets, use the Locate Curb tool, and follow the general workflow in Create Site Elements. When Site Designer creates the curb, it updates the associated toposurface and places the curb.
- Gutters. Curb families can include associated gutters. When creating a curb, select a curb family that defines gutter parameters.
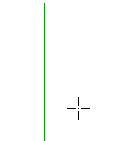
- Pick side for face of curb. When creating a free-standing curb (not a curb that surrounds a parking lot or a parking lot island), after you select the curb host line, the status bar prompts you to "Pick side for face of curb." Click in the view near the curb host line on the side of the line where the curb should face.
- Toposurface association. After you select the curb host line (and pick a side for the curb face), the Toposurface Association dialog displays. This dialog lists all toposurfaces in the model, including the existing toposurface, the proposed toposurface, parking lots, and other site elements already added to the model. Curbs always follow their associated toposurfaces. If the toposurface changes, its curbs are automatically updated accordingly. Select the toposurface with which you want to associate the curb.
- For a parking lot island, select the parking lot toposurface.
- For a curb around a parking lot, select the proposed toposurface.
- For a free-standing curb, select the proposed toposurface or another site element that it should follow.
- Joining curbs. The software does not provide a tool to join a parking lot curb with a street curb.
- Quantities. Use the Site Designer Report tool to obtain base and sub-base materials quantities. Use Revit schedules to obtain pavement quantities, as well as the total cut and fill.
When creating a curb, Site Designer does the following:
- Calculates the elevation of the points on the curb host line.
- Determines the street section box.
- Projects slopes to tie to the base toposurface.
- Builds a new proposed toposurface.
- Creates a curb that follows the host line and adjusts to the terrain elevation changes.
Parking lot islands
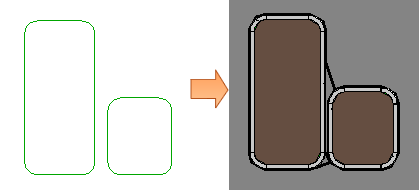
For a parking lot island, create a curb that uses a closed loop for its host line. When generating the island, Site Designer adds an infill or a capping toposurface.
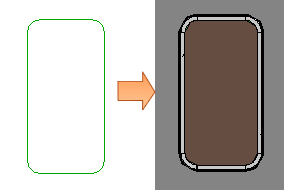
If the closed loop for a parking lot island includes a concave shape or inner corner, unexpected results may occur as Site Designer tries to fill in the concave shape with the toposurface.
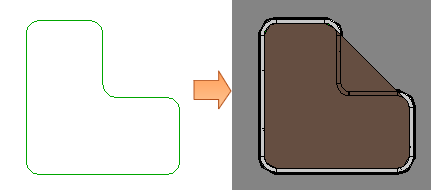
In this case, try creating 2 closed loops to approximate the desired shape of the island. In the civil engineering plan, the engineer can refine and clarify these details to achieve the design intent.
