In a section view, you can change the height of a room graphically by adjusting the upper and lower boundaries of the room.
When you change the boundaries of a room graphically, Revit automatically updates the corresponding room parameters: Upper Limit, Limit Offset, and Base Offset.
- Open a section view that contains rooms.
- Select the room whose height you want to change.
See Select a Room.
Revit displays upper and lower arrow controls.
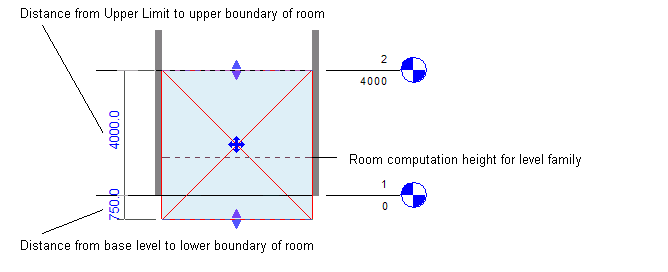
- To change the upper or lower boundary of the room, pull the corresponding control up or down.
Revit displays listening dimensions to indicate the distance of the upper and lower boundaries from the upper limit and base level of the room. You can enter a value directly, if desired. See Use listening dimensions.
The dashed line across the room indicates the computation height, that is, the height at which Revit computes the area and perimeter of the room. Computation Height is a type parameter for levels. See Computation Height. The dashed line for the computation height displays only when you select the room in a section view.
If the Areas and Volumes option is turned on, the room boundary follows any sloping elements, such as roofs, walls, and ramps. If Areas and Volumes is turned off, the room boundary does not follow sloping elements.