The Spline Distribution method creates clones along a target spline in your scene.

 Modify panel > Make a selection >
Modifier List > Object-Space Modifiers > Array >
Distribution rollout >
Spline
Modify panel > Make a selection >
Modifier List > Object-Space Modifiers > Array >
Distribution rollout >
Spline
- Default menu: Make a selection > Modifiers menu > Parametric Deformers > Array > Distribution rollout > Spline
The
Spline
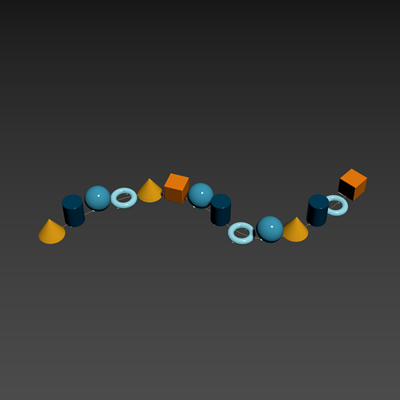
Distribution method creates clones along a target spline in your scene and provides controls to project your array onto a reference surface in your scene. The following example uses the
Spline
Distribution method to create a chain. See
Create a chain using the Array Modifier for a detailed workflow example.
Interface
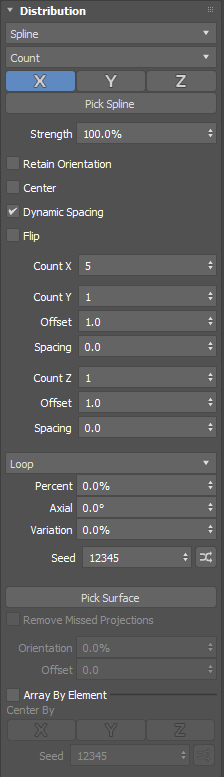
- Layout method
- Lets you select the way clones are placed along the target spline.
Note: The parameters that appear below the Layout Method drop-down list update dynamically based on your selection.
- Count
- Distributes the number of clones specified in the
Count X and
Count Y parameters along the length of the spline. In the following example,
Count X is increased incrementally until reaching a value of eight.
- Relative Offset
- Distributes a fixed number of clones along the length of a spline, starting at a knot point. In the following example,
Count X is increased incrementally until reaching a value of eight.
 Tip: When your spline has zero thickness, use the Spacing parameter to set the distance between clones.
 - Fill
- Distributes clones along the spline path from start to end.
- Knots
- Distributes clones along a target spline, placing a clone on each knot. When specific knots are selected., clones are only placed on the selected knots.
- Segments
- Distributes clones along a target spline, placing a clone on each segment. When specific segments are selected, clones are only placed on the selected segments.
- X,/Y/ Z
- Click a button to orient the array along the selected axis in object space.
- Pick Spline
- Select a reference spline from your scene. Clones take the same shape as the reference spline.
Tip: After you've selected a target spline, you can select a different target spline by doing one of the following:
- Right-click Pick Spline and select Clear Spline
- Click Pick Spline and then select a different target spline
- Strength
- Sets the position of the clones relative to the first knot of the spline.
- Retain Orientation
- When enabled, the clones retain the original object's orientation.
- Center
- Repositions the array so it is centered around the original object's origin.
- Flip
- Reverses the position and orientation of the clones along the spline.
- Count X/Count Y/Count Z
- This parameter is only available when the Layout method is set to Count or Relative Offset.
- Sets the number of clones placed along the local X/Y/Z axis.
- Offset
- Sets the distance to the next clone on the X/Y/Z axis in relative clone dimensions.
- Spacing
- Sets the distance between each clone on the X/Y/Z axis in display units.
- Position transform method
-
- Continue
- Uses the outgoing vector at the beginning or end of the spline and continues to place clones along the same trajectory.
- Loop
- (Default) Once clones reach the end of the spline path, they are placed back at the beginning, creating a loop.
- End
- Clones are stacked on top of each other at the location of the first clone.
- Remove
- Clones disappear once they reach the end of the spline path.
- Percent
- This parameter is only available when the Total Dimension or Fill layout methods are selected.
- Sets the position of the clones along the length of the spline.
- Axial
- This parameter is only available when the Total Dimension or Fill layout methods are selected.
- Sets the placement of the clones around the axis of the spline.
- Variation
- This parameter is only available when the Total Dimension or Fill layout methods are selected.
- Randomizes the position of the clones a percentage of the length of the spline.
- Seed
- Sets the random number seed for the variation value.
- Pick Surface
- Lets you pick a reference object from your scene to project your array onto.
Note: Projection is along the local -Z of the spline.
- Remove Missed Projections
- This parameter is only available when a reference object has been selected with the Pick Surface button.
- Clones that are not successfully projected onto the reference surface are removed from the scene.
- Orientation Bias
- This parameter is only available when a reference object has been selected with the Pick Surface button.
- Sets the amount the clone will use the surface as its direction normal.
- Offset
- This parameter is only available when a reference object has been selected with the Pick Surface button.
- Sets the width of the array.
- Array By Element
- If the source object has multiple elements and this option is enabled, each element is randomly used as a potential clone.
 Tip: This option can be used to create a collection of objects, like books in a bookcase or bricks in a wall.
 - Center By
- When Array By Element is enabled, Center By is also enabled.
- Sets the pivot of each clone on the X, Y, and/or Z axis to its center. Multiple axes can be selected simultaneously.
- When creating an array composed of elements to be used as clones this makes it easy to lay out the individual elements along an axis so that they don't need to reside at the same location relative to the pivot. When disabled, each element uses its relative position to the source object's pivot point.
- Seed
- Sets a random number seed for the selection of elements to be used as clones.
- Seed Randomization
- Click
 to randomize the seed value.