
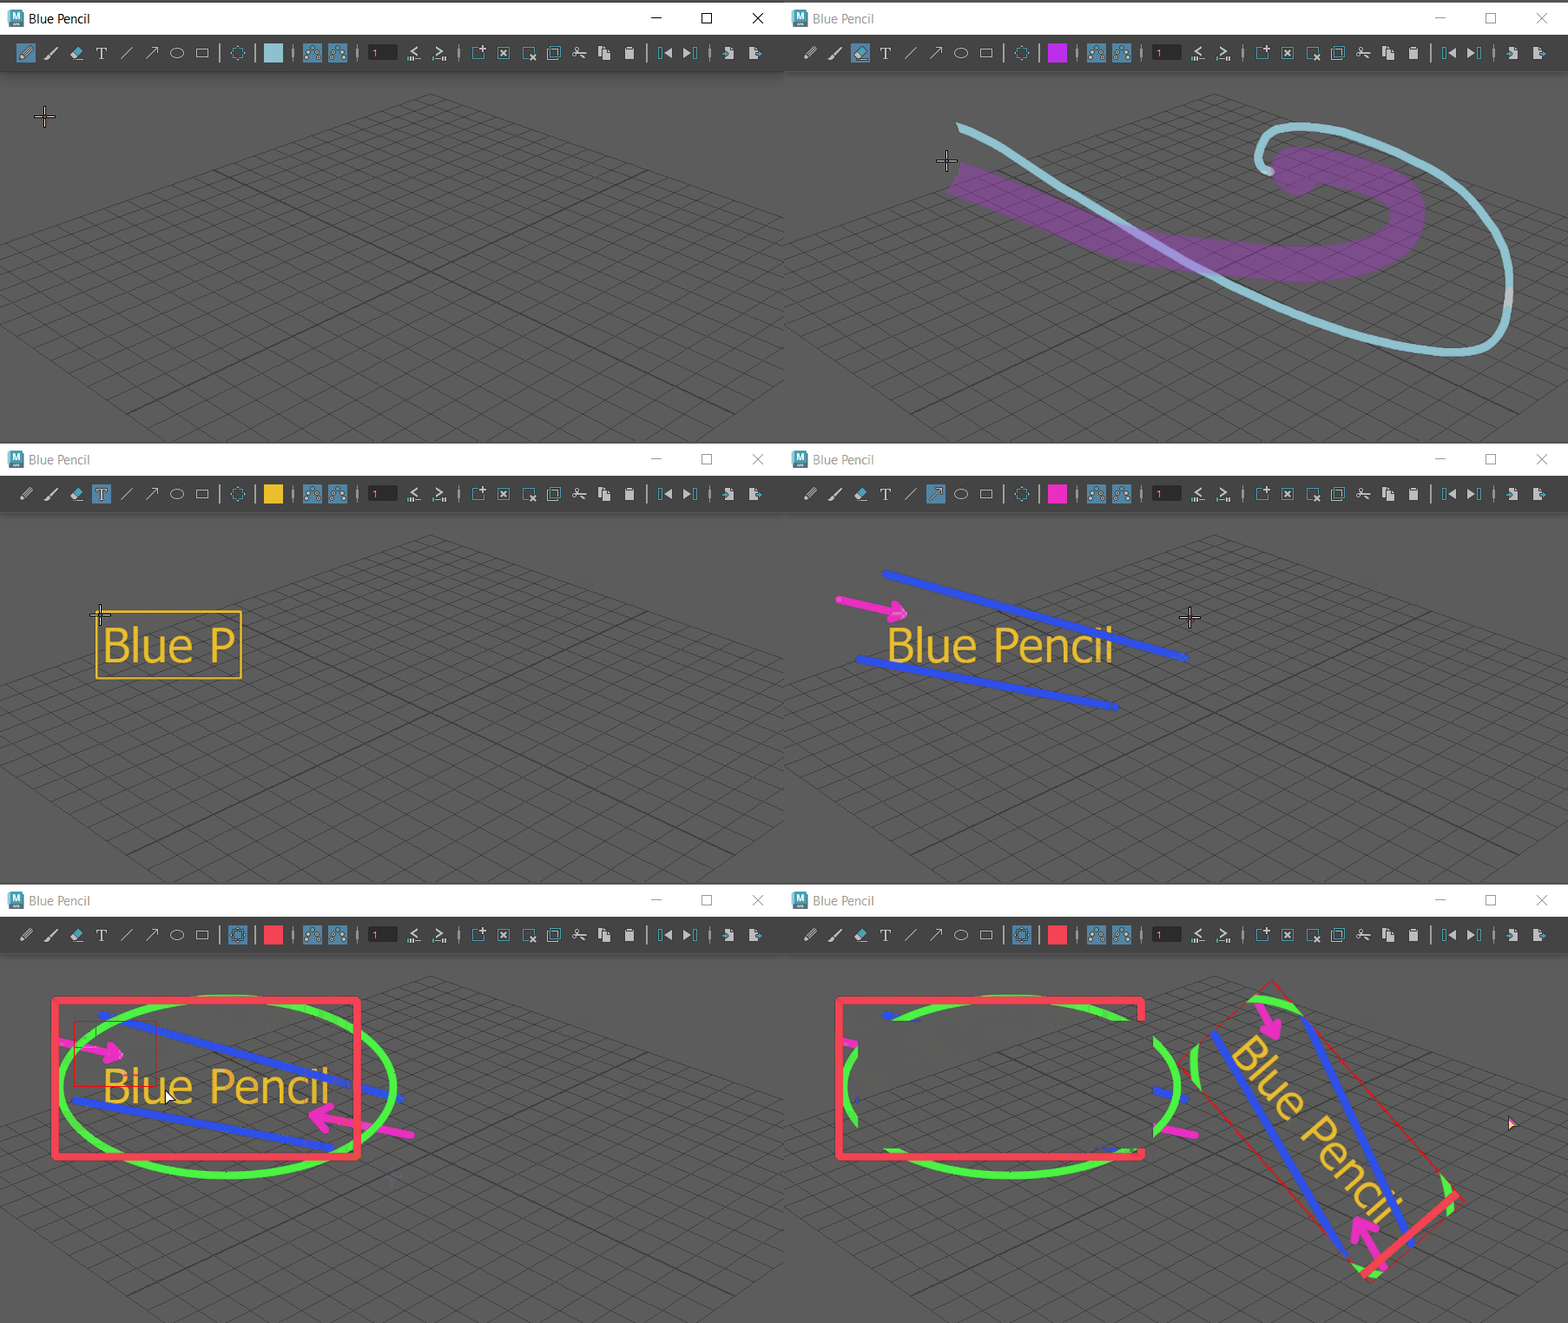
The Blue Pencil tool lets you draw 2D sketches on top of your scene. You can use it to sketch poses, movement arcs, comment, and annotate work in a clean and nondestructive way. Create a sketch to mark up a shot, or make a whole sequence of images and playblast to produce a short hand-drawn movie.
You can add one
Blue Pencil sketch per frame in any perspective or orthographic camera, but you can have multiple frames on
layers. You can
save and export your sketches in a .zip file using the Export Blue Pencil Frames button ( ) in the
Blue Pencil Toolbar.
Draw in the Viewport with Blue Pencil:
- Open the
Blue Pencil tool by doing one of the following:
- Click the
Blue Pencil icon
 in the
Panel toolbar.
- Select from the Animation menu set (F4).
- Click the
Blue Pencil icon
- Choose a tool from the
Blue Pencil Toolbar and start drawing in the Viewport.
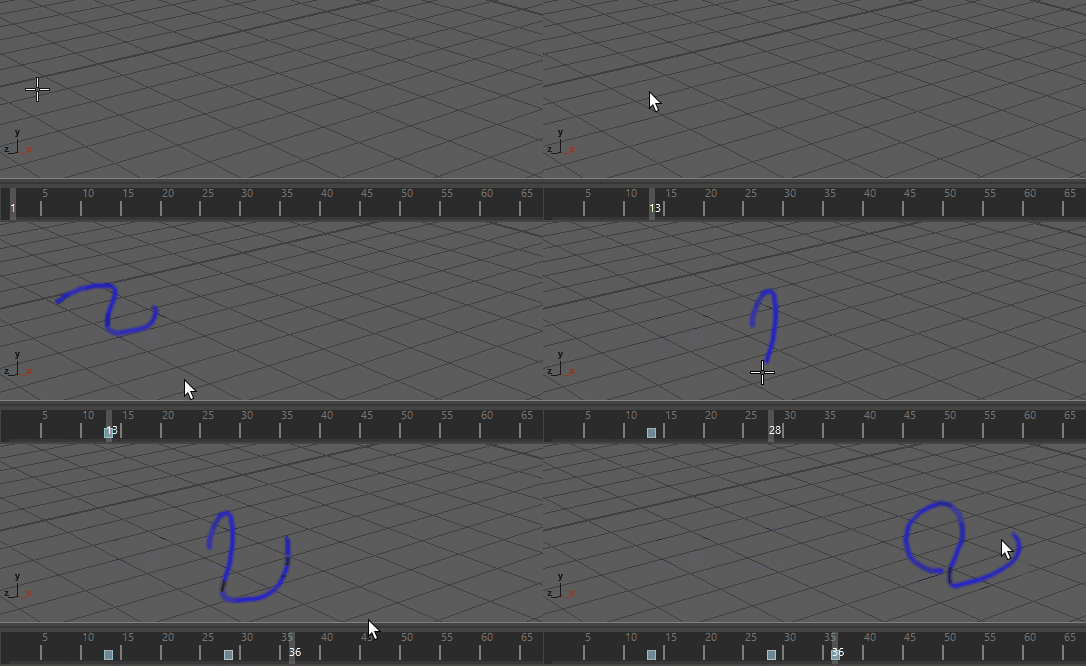
A Blue Pencil frame automatically appears at the position of the Time Slider Current Time Indicator. This frame is considered the Active Blue Pencil frame.
 Tip:
Tip:View Blue Pencil drawings of up to ten preceding or following frames with the Blue Pencil Ghost tool. See Preview Blue Pencil frames with Ghosting.
- To draw a frame at another
point in time, move the current Time Indicator on the
Time Slider to a new position and click the Add Frame icon
 on the
Blue Pencil Toolbar. (If you start drawing at a time where no
Blue Pencil frame exists, a frame is created.)
You can Shift + drag to reorganize the order of Blue Pencil frames on the Time Slider. See Work with Blue Pencil frames for more.
Adjust Blue Pencil Tool attributes:

You can also access Blue Pencil Tool attributes in the Blue Pencil Tool Settings.
Modify Blue Pencil drawings:
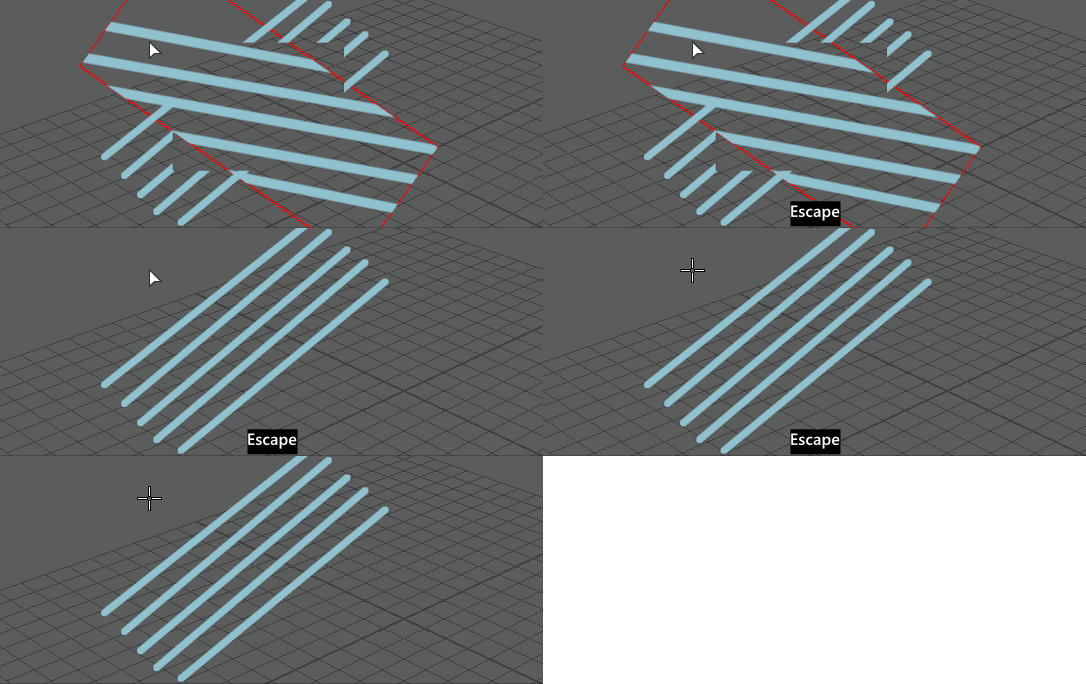
- Right-click your drawing and select Transform from the contextual menu
- Drag in the Viewport to select the region you want to change.
Note: If you enter Transform mode and do not select an area, Blue Pencil considers the entire image to be selected.
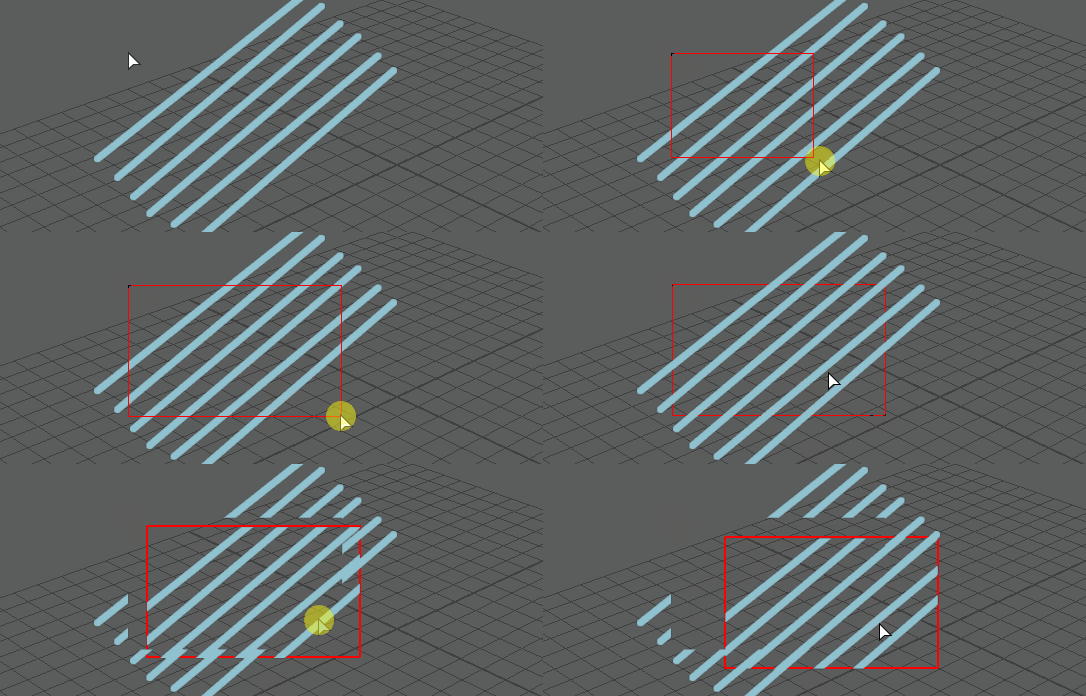
- Once you select an area of the drawing, press Enter to confirm it. You can also right-click the selection to bring up the context menu and select Transform.
- Drag, Shift-drag, or middle-drag to translate, rotate, or scale the selected area. See Modify the selection, below for how to transform the selected area.
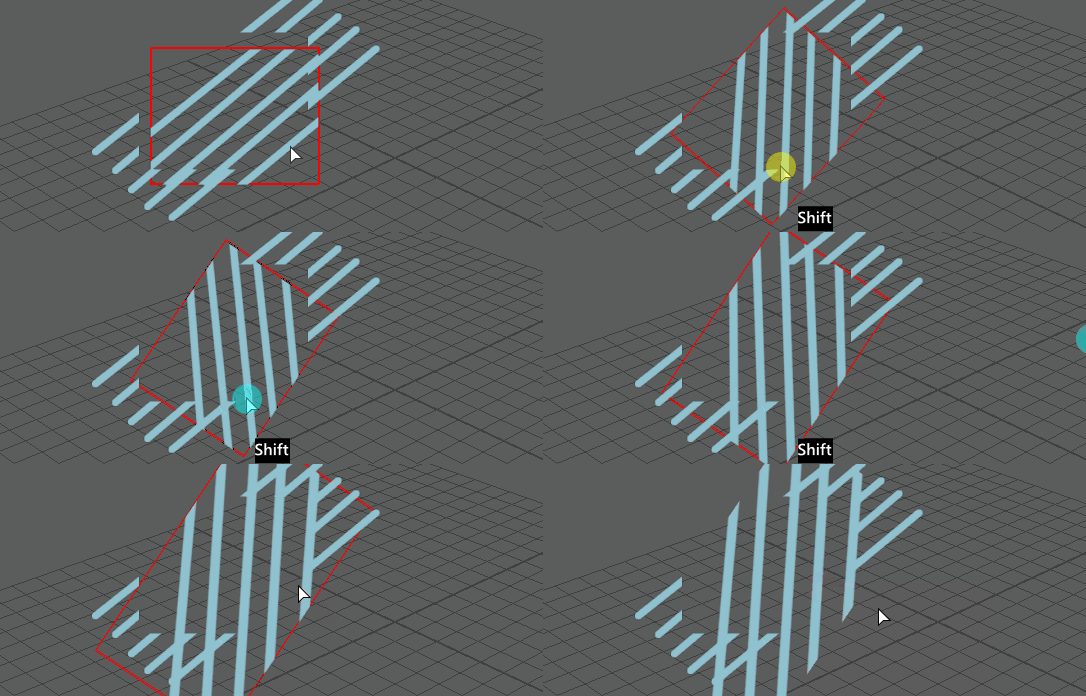
- Press Enter to apply the transformation (or right-click the drawing and select Apply Transformation).
- Press
Escape to cancel or
Backspace to restore the transformation.
- You can save and export your Blue Pencil sketches using
Export Blue Pencil Frames
 on the
Blue Pencil Toolbar. See
Import or Export Blue Pencil Frames.
Note: If you reference Blue Pencil drawings into another scene using File Referencing, they do not appear. They are meant to be added to the final scene.
You can edit Blue Pencil drawing in Blue Pencil Transform mode
See Modify drawings with Blue Pencil Transform mode for more information on how to edit Blue Pencil drawings.
- Add a Blue Pencil frame
- Open the Blue Pencil tool and start drawing in the Viewport: a Blue Pencil frame automatically appears at the position of the Time Slider Current Time Indicator. This frame is considered the Active Blue Pencil frame.
-

- You can also click
Add Frame
 in the
Blue Pencil Toolbar, or right-click the Time Slider and select
from the Animation Controls menu.
-
Tip: To add more than one frame at a time, Shift-select a range on the Time Slider, right-click and select . A Blue Pencil frame is created for each frame in the selected range.
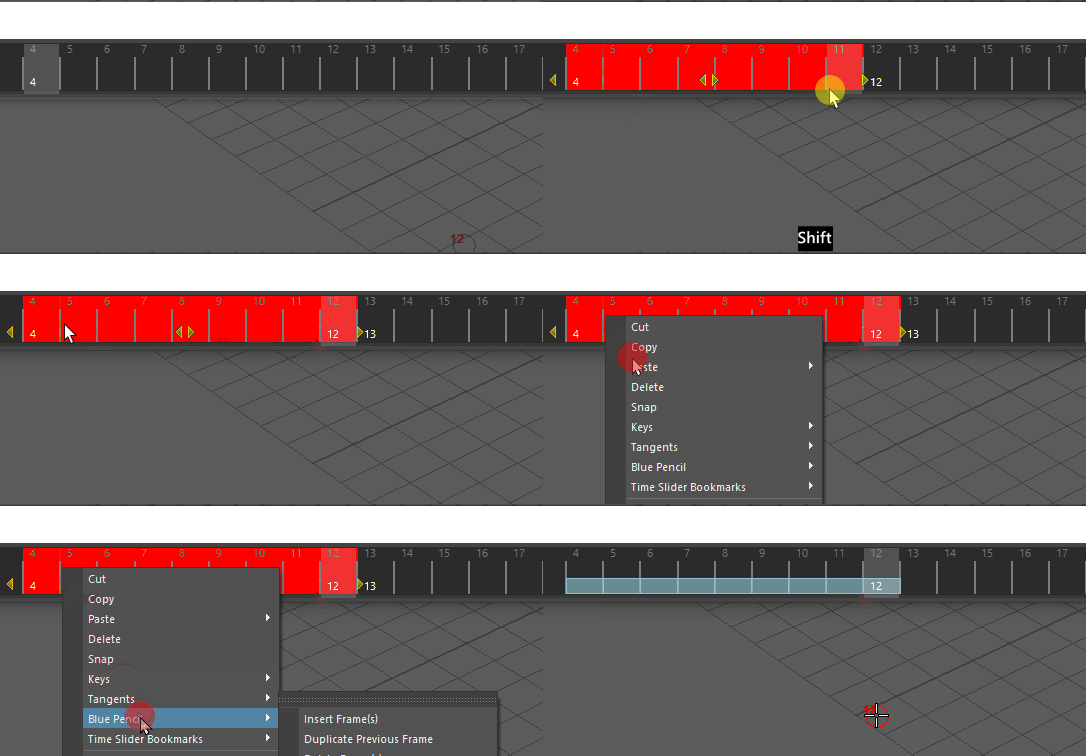
See Work with Blue Pencil Frames for more.
Save and export Blue Pencil sketches
Using
Export Blue Pencil Frames option
 on the
Blue Pencil Toolbar. See
Import or Export Blue Pencil Frames.
Erase Blue Pencil drawings:
- To erase
parts of your drawing, click the Eraser tool
 on the
Blue Pencil Toolbar. You can specify a size for the eraser in the Tool options. See
To adjust Blue Pencil Tool attributes, above.
Note: You can only erase one frame at a time.
 - To remove all drawings from the Active frame
without deleting it, click Clear Frame
 .
.
- To remove the frame and drawings from the Time Slider, click
Delete Frame
 .
.
See Clean up Blue Pencil sketches for more.
