Fasteners
Learn about the Fasteners you can insert into your design in Parametric Modeling mode in Fusion.
There is a difference in how fasteners are stored and handled based on when any hub member inserted a fastener to any design in the hub using the Insert Fastener tool for the first time.
Before May 14, 2024
If you are a part of a hub where fasteners were inserted to any design in the hub before May 14, 2024, they are stored in the Fasteners project. Only the project owner or a Fusion hub Administrator can grant you access to it. Contact them if you need access. See the How to use the fastener library with multi-user Fusion hub help topic for more information. If you are using a legacy single-user storage account, transfer it to a Fusion hub to access this feature.
After May 14, 2024
If you are a part of a hub where fasteners were inserted to any design in the hub for the first time after May 14, 2024, they are stored in the Fasteners folder in the Standard Components project in the Libraries section of the Data Panel. There is only one Standard Components project in a hub and it is automatically created when any user inserts a fastener to any design in the hub using the Insert Fastener tool. The Standard Components project is accessible to anyone in the hub.
Browser and Timeline
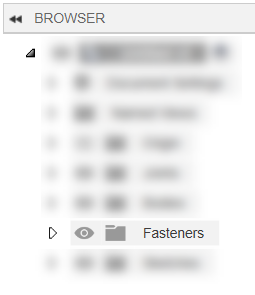
When you insert a fastener, it is stored in the newly created Fasteners folder in the Browser.
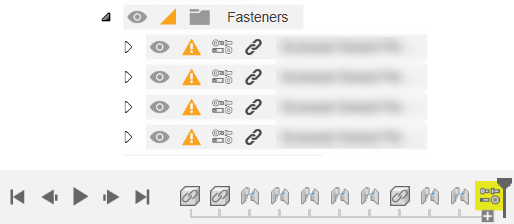
Fasteners and their joints are displayed in the Timeline.

When you insert multiple fasteners at once, only one fastener group is added to the Timeline.

You can expand the group to see and manage individual fasteners.

Target geometry
To position a fastener, you can select a circular edge, a cylindrical face or a sketch point. For countersunk fasteners, select the circular edge of the conical face, or an existing fastener. You can select multiple geometries to insert multiple copies of the selected fastener at once. When you place a fastener on a sketch point, use Flip to reverse the joint direction if needed. If you select a cylindrical face, the Secondary Geometry option lets you select a planar face.
Example of selecting multiple geometry when placing a fastener:
Auto settings
The drop-down lists of Nominal Size and Nominal Length offer Auto option.
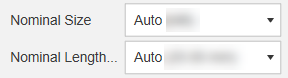
When Nominal Size or Nominal Length is set to Auto, you get notified in the Browser and the Timeline whenever a fastener no longer fits due to changes to the target geometry.
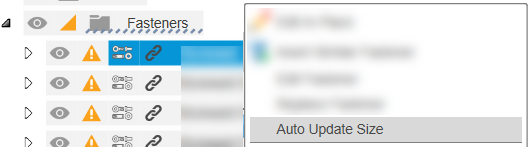
Auto Update Size
After you get notified that a fastener no longer fits, you can right-click the fastener in the Browser and select Auto Update Size. This will automatically update the size of the selected fastener.
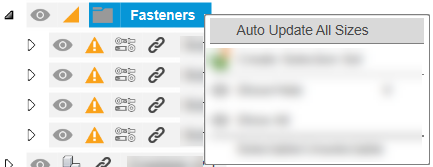
Auto Update All Sizes
You can also right-click the Fasteners folder in the Browser and select Auto Update All Sizes to automatically update all the fasteners that no longer fit.
Pre-filled settings
Part Number and Description are mandatory for all fasteners. Fusion fills them in for you. To change the part number or description, double-click the field and start typing; you can modify it, but you cannot leave the field empty.
Non-standard sizes
You can add new sizes to existing standards in Fusion to create non-standard fasteners, such as M10x33 or M9x50.
You can also add new lengths to existing standards in Fusion to create non-standard fasteners.
These custom sizes are marked with the custom size icon so that you can identify them in the list. ![]()

You can change and delete these sizes at any time to meet your needs.
Tips
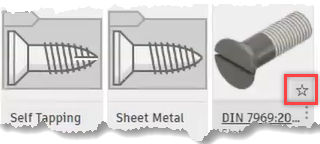
To favorite a fastener, hover over the library item's name in the List, Details or Tile view and click the star icon. You can also click the three dots next to the library item's name and select Favorite.
Click the out-of-date icon next to any outdated fastener in the Browser to update an entire stack of out-of-date fasteners after changes to your design were made.
When editing or removing fastener, you can also select it in the canvas, or in the Timeline.
Use the Break Link tool to remove the associative link between the fastener and the original design.
Place a washer on the nut or bolt that you already inserted, it will bump out the fastener and insert the washer in place with no extra work. Make sure you select the bolt or the washer in the canvas to position the fastener:
When working with configurations, you are able to create various configurations and insert fasteners of different sizes and hide/suppress the sizes you don’t want in each configuration. This lets you configure a design that needs fasteners of different sizes in each configuration and make sure you get an accurate Bill of Materials.
When creating drawings, you can see the Bill of Materials (BOM) populated with the description, part number, and quantities represented correctly. This lets you get an idea of the type and quantity of fasteners in your design.
Nominal Sizes and Nominal Lengths marked with an asterisk (*) should be avoided, if possible.
Nominal Sizes and Nominal Lengths marked with a double-asterisk (**) are obsolete.