
Set Motion Path
Creates an animation of an object traveling along an existing NURBS curve. Select Start and End Frame numbers to define the length and timing of the animation.
Create the path curve before invoking Set Motion. Make sure the start point of the curve is where you want your motion to start. Use Reverse Curve tool if needed. Curves-on-Surface and surface isoparms or edges cannot be used. Use the Duplicate Curve tool if needed.
Use Pick > Object to select the object to be animated. Group objects at the origin to position the attach point position – see Attach Point.
Choose the Set Motion tool. Open the option window to set the start and end keyframes.
You will be prompted to select the path curve. Once selected the curve will change color to indicate that it is now a motion path and not a modeling curve.
Related video:
Attach Point
The attach point for the geometry is not necessarily the object pivot point. (The exceptions are Primitives where the attach point is at the initial pivot point position regardless of where it is placed in teh scene.)
For geometry that has been built, the Attach Point is determined by the position of the grid origin (0,0,0) when the item is created, grouped, or when Transform > Zero Transforms is applied.
To prepare the Attach Point for Motion Path, move the objects to be animated so that your desired attach point is on the origin (0,0,0). Optionally, rotate the objects in relation to the start of the path curve. It may help to make a temporary copy of the path curve and move it to the origin as reference for rotating the object to the desired starting orientation.
Use Edit > Group to create a new node with the attach point at the origin. The Set Motion animation then starts with the object placed at the start of the path curve by this point.
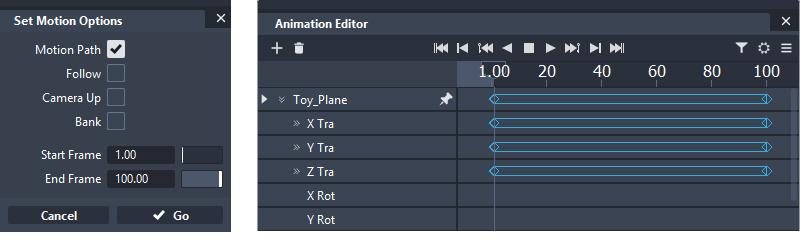
Set Motion Path Options
Motion Path, Start and End Frame
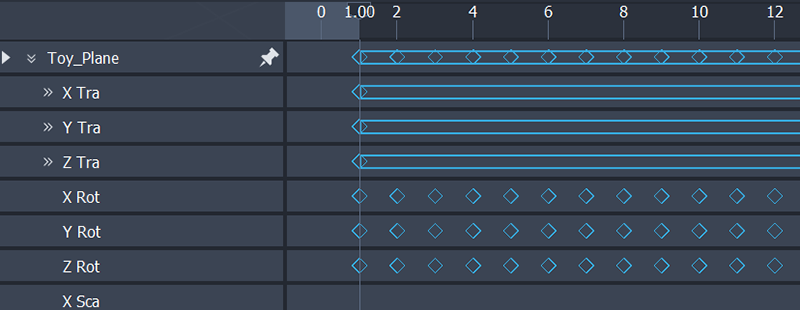
Creates the XYZ Translation animation channels that move the object along the path curve.
The curve you want to use as the motion path must exist before you invoke the function. Curves-on-surface, edges and isoparms are not valid motion paths and must be converted to world space curves using the Duplicate Curve tool.
The CVs on the path curve can be moved, or the whole curve translated, scaled or rotated and the animation will update.
After a curve is used for a motion path, it is no longer available for modelling or for snapping to, but it can be selected again as a motion path. When the animation channels are deleted, the path curve returns to a normal modeling curve.
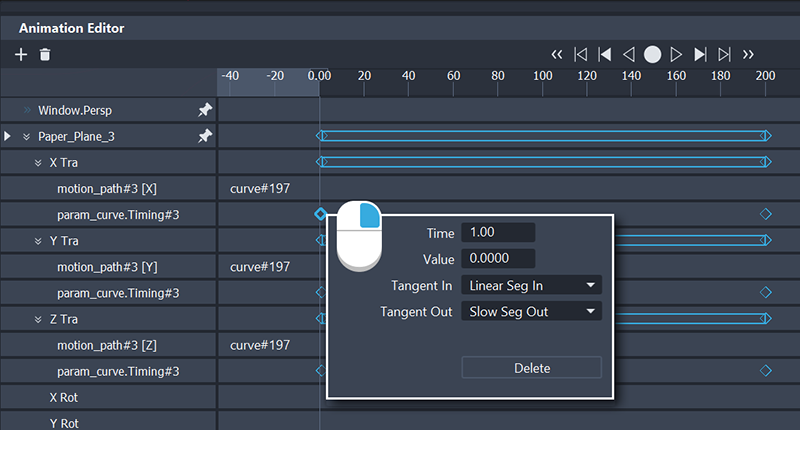
Actions
The Set Motion tool creates a two actions below each Translation channel:
- motion_path [X], [Y], [Z] connects the three XYZ Translation channels to a single path curve. This is a dynamic connection. So, if the curve is modified, the motion animation updates.
- param_curve.Timing provides the keyframes at the start and end that can be accessed for changing the tangent types. Any changes on these settings applies to all three XYZ channels.
Follow & Bank
Creates Animation channels for the XYZ Rotational parameters of the object that respond to the curvature of the path curve. The pivot point of the object is used as the center of rotation. This can be different from the attach point, but typically it is in the same position for predictable results.
Before invoking Set Motion, the object should be oriented as required to the start direction of the curve for the first frame of the animation.
Bank can only be selected if Follow is selected.
Bank In, Out & Maximum Bank
Banking In means the object leans in towards the center of the curve that it travels along similar to a motorcycle going around a corner.
Banking Out means the object leans away from the center of the curve.
Banking only occurs if Degree is set greater than 0.00. Try 45 degrees as a typical start value. The object banks the amount specified by the Maximum Bank option when it is at the point on the curve with the highest curvature. It banks a proportional number of degrees as the curvature changes. It does not bank at all where the curvature is a straight line.
Camera Up
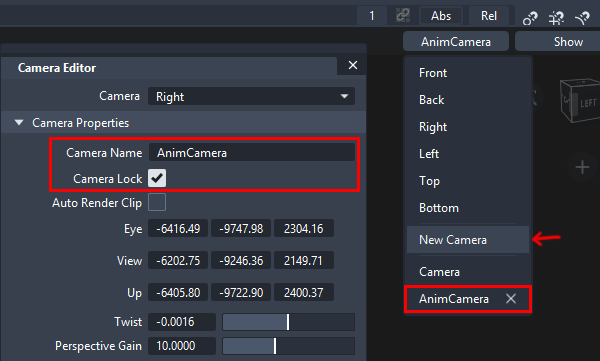
Applies a motion path curve to animate the Up DAG node of an animated camera. It is recommended that a new camera is always created for animation and set to locked in the Camera Editor. The original camera can be used for general viewing.
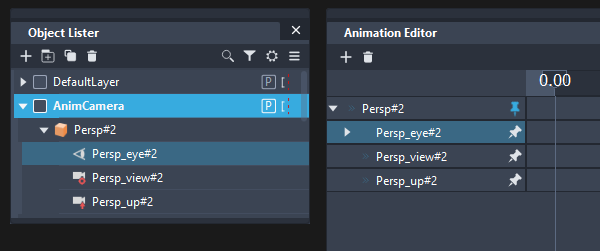
Select the Eye DAG node of the camera as the object to be applied to the motion path.
Choosing Camera Up helps to keep the camera stable as it follows the curve shape. There are two options for determining the Up vector direction:
- World Z - This aligns the camera up vector with the world Z axis and provide a stable camera animation, keeping the horizon level.
- Motion Based (Legacy Setting) - This takes the starting point of the up vector in relation to the eye node and maintains that relationship. This typically gives some swinging movement to the camera motion but much less than if Camera Up is not selected.
Sample By
(Only applies when Follow, Bank or Camera Up are selected.)
The Sample By value is used by the Follow and Bank options to determine how often to sample the positional animation when computing rotational animation. A keyframe is created for every Sample By frame.
Be careful to choose Start, End, and Sample By values that have a sufficient number of sample points along the length of the motion path to avoid sampling errors. You will encounter sampling errors if the change in tangency between any two adjacent sample points is greater than or equal to 90 degrees.
Sampling error can be remedied by increasing the number of samples taken, either by increasing the frame range, or by decreasing the Sample By value.
If the motion path CVs are moved to change the shape, these values do not update to the new curvature. Delete the animation channels for Rotation and apply Set Motion again to create the correct rotation for the new curve shape.
Range (Legacy Setting)
Range only applies if a previous motion path animation has already been applied.
When a second Set Motion operation is applied to the same node, typically the motion path option would be de-selected and Follow and/or Bank selected.
Selecting Option Window for range means that the only a portion of the curve is used for the follow or bank motion. In practice, this is rarely used.