Automotive Exterior Rendering - Arnold for Cinema4d
 |
 |
| shadow_matte shader applied to floor plane | Backplate only |
This tutorial will cover how to light, shade, and render a car model using an exterior HDRI and backplate image. It will show you how to light the car model using an Arnold Skydome Light. It covers how to realistically shade the car model using the Car Paint and Standard Surface shaders. We will also use the Shadow Matte shader to composite the car model onto a photographic backplate.
A car model is available for download here.
The HDRI and backplate images can be downloaded here.
A scene file (minus the car model) can be downloaded here.
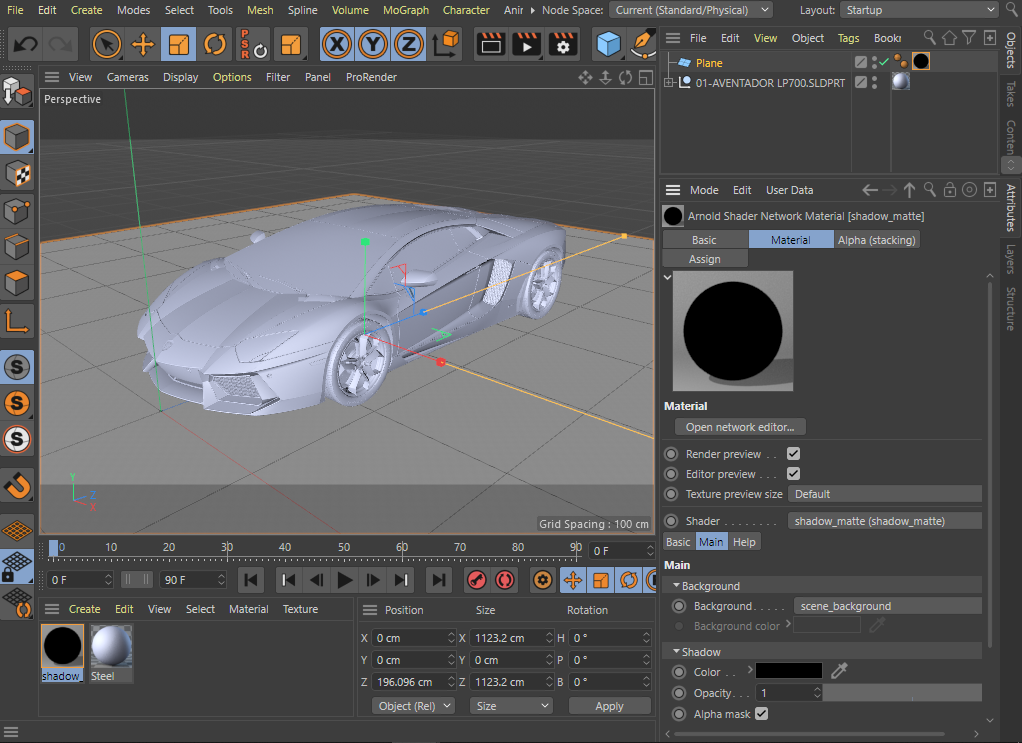
Importing the CAD Data
- Start off by downloading the CAD model (link above).
- Extract the contents and import this step file: 01-AVENTADOR LP700.SLDPRT (SolidWorks Part File).
- Position and rotate the car so that it sits flat on the grid as in the image below.
Floor Plane
- Create a floor plane large enough to capture the shadow from the car model.
- Assign the Shadow Matte shader to it. This will 'catch' shadows from lighting within the scene and will be used to integrate the car model onto the photographic background backplate.
Shadow Matte assigned to floor plane
Background (Backplate)
Now we want to bring the photographic backplate into C4DtoA.
- Create a C4D Background.
- Create an Image texture and open BACKPLATE-L-_NIK2854.TIF in Image name.
- Drag and drop the image shader onto the Background in the Object Manager. The backplate image should now be visible in the IPR window.
BACKPLATE-L-_NIK2854.TIF -> image -> Background
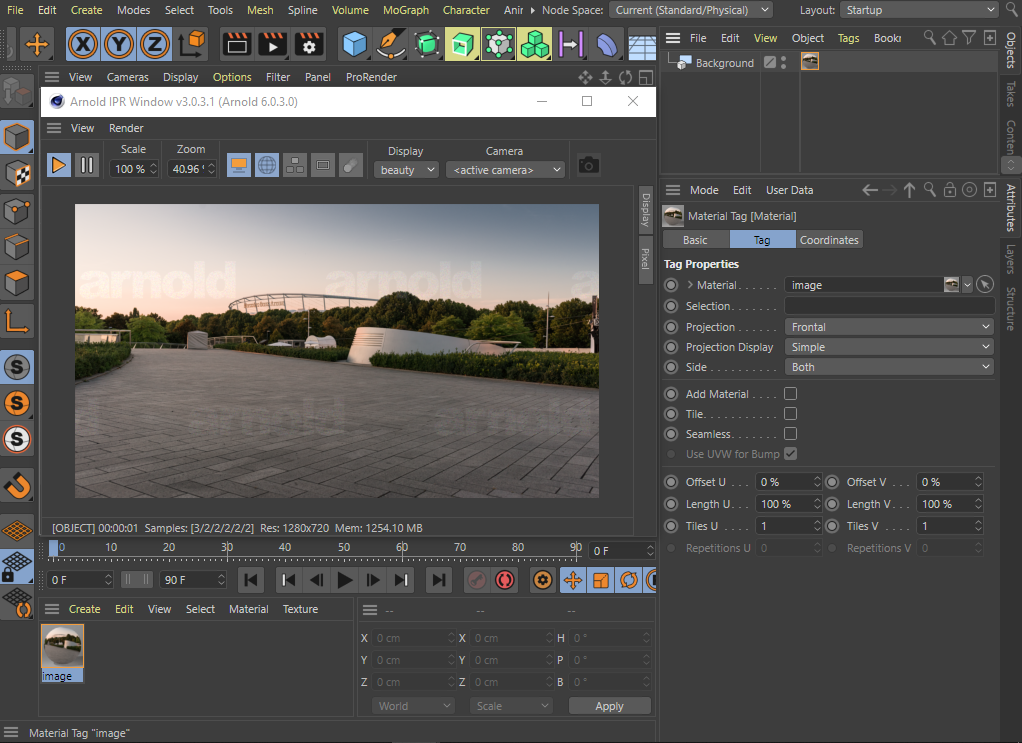
Skydome Lighting
To light the scene we will connect the HDRI to the Skydome Light -> Color.
- Go to Extensions -> C4DtoA -> Arnold Light -> Skydome Light.
- Connect DA-STR-MB1-HDR-B-4K-SPEED+96.exr to the Skydome Light (click the small arrow button next to the Color and select Texture).
- Rotate the Skydome Light so that it matches the direction of the lighting in the backplate (around 90 degrees).
- You may have to increase the Exposure of the Skydome Light 1 or 2 stops (depending on the HDRI).
- Increase the number of light samples to 3 (Rendering tab of Skydome Light).
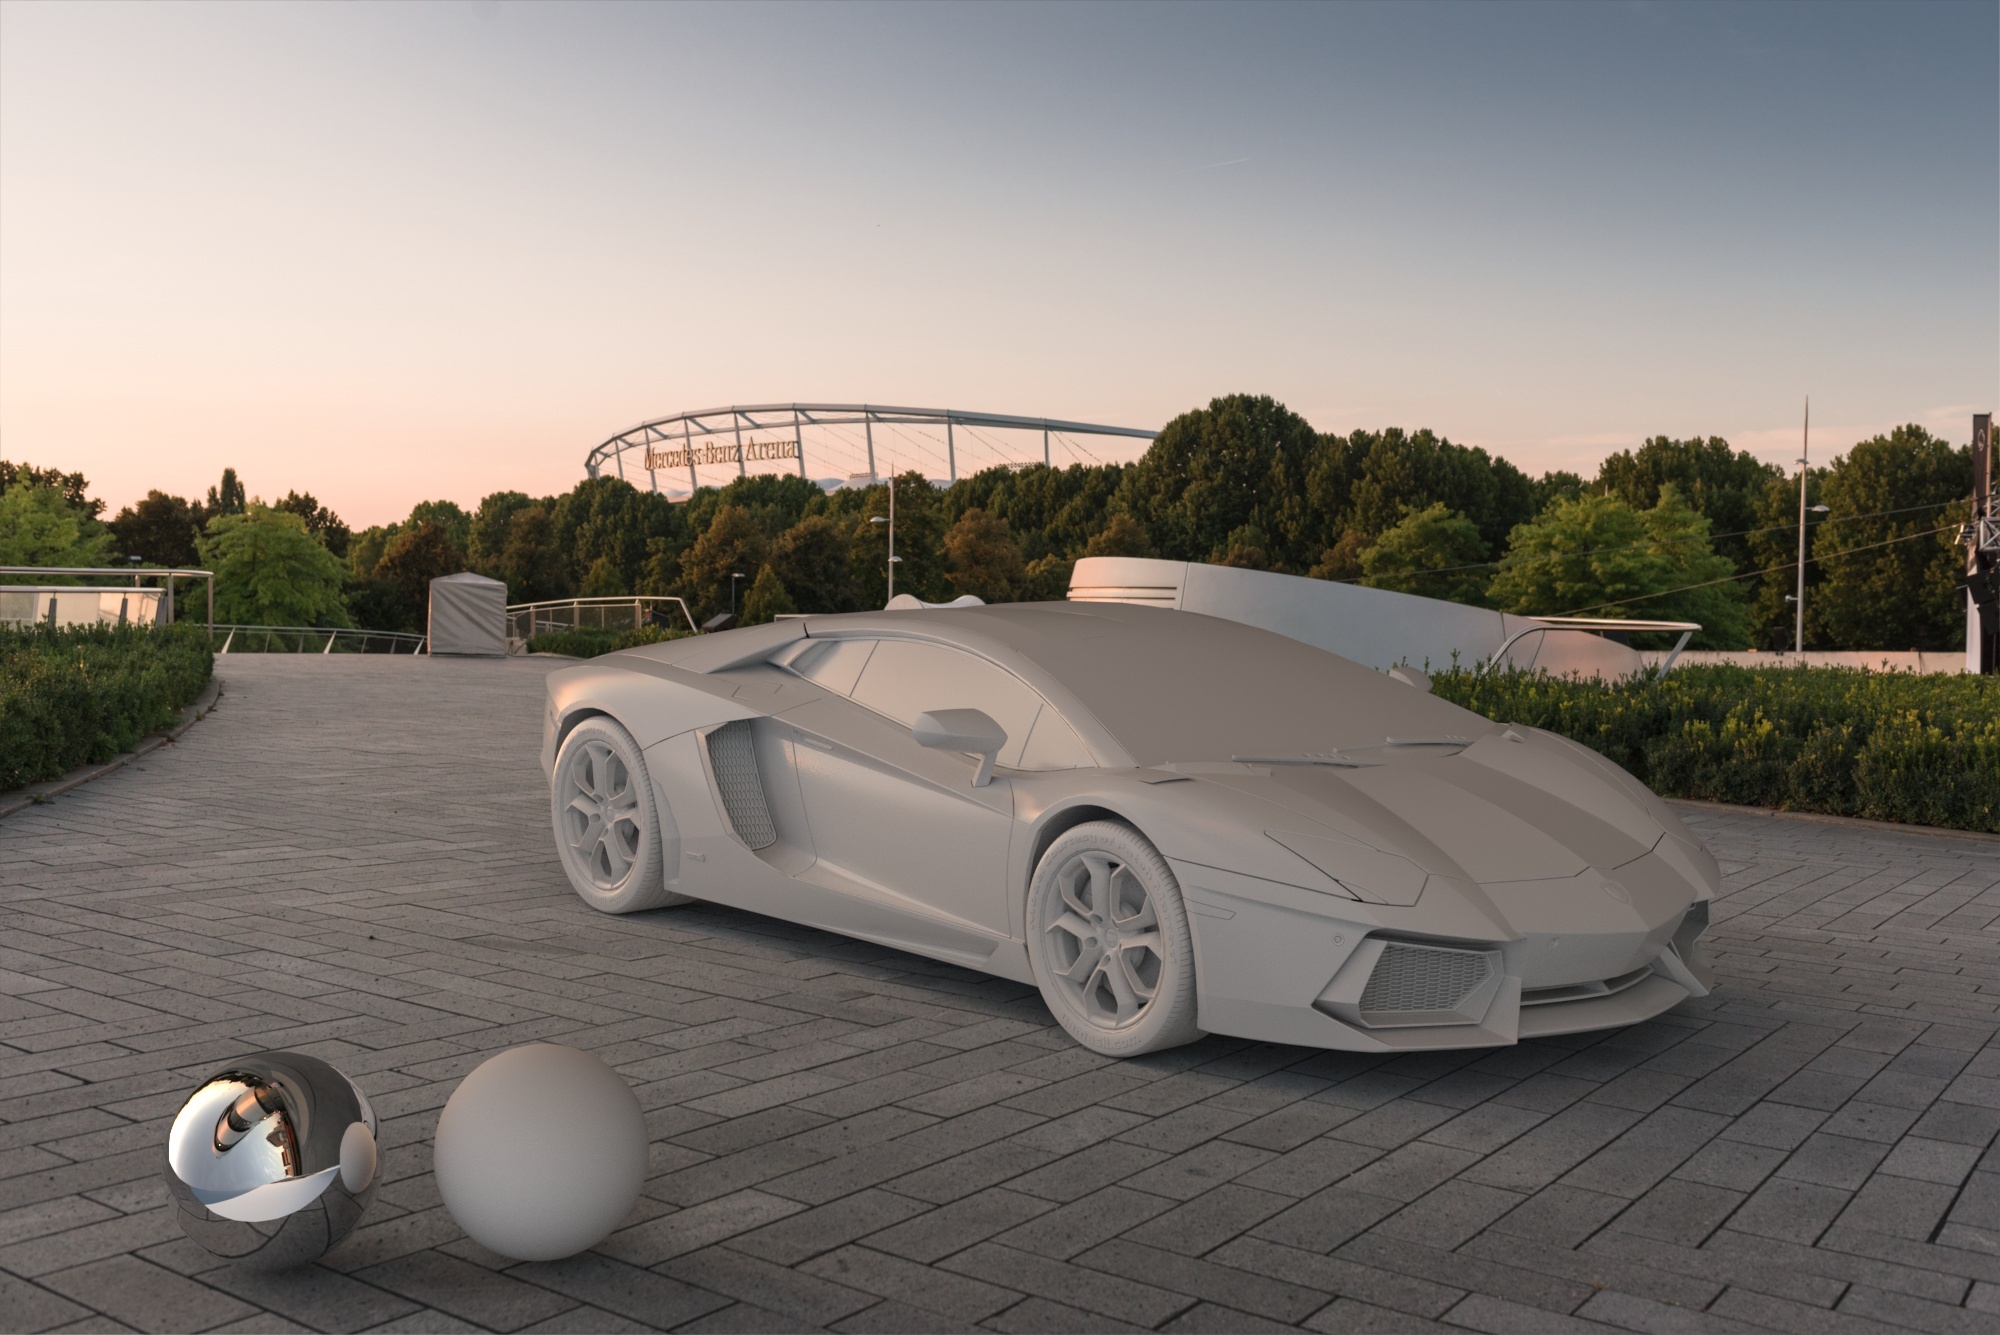
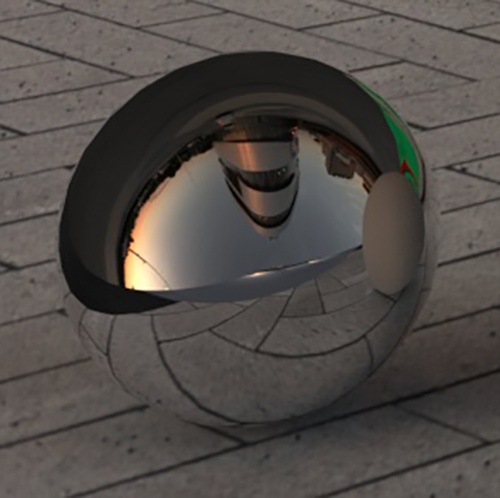
If you are not sure how the lighting should look, add a sphere to the scene, assign a Standard Surface shader to it, and increase the Metalness to 1. This will give you a chrome sphere with which to match the reflections to the backplate. You could also create another sphere with a dull gray shader to also match the lighting.
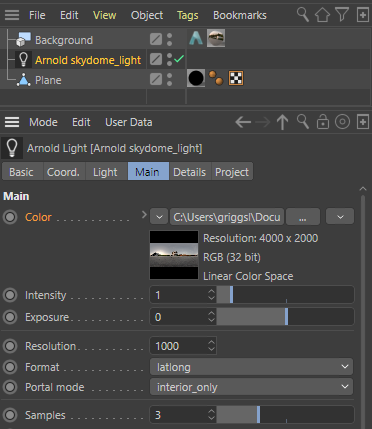
DA-STR-MB1-HDR-B-4K-SPEED+96.exr -> skydome_light -> Texture
- Apply a Standard Surface shader to the car model. This 'chalk preview' style render will give us a better indicator of how the lighting is affecting the scene.
- Render the scene. You should get something like the image below.
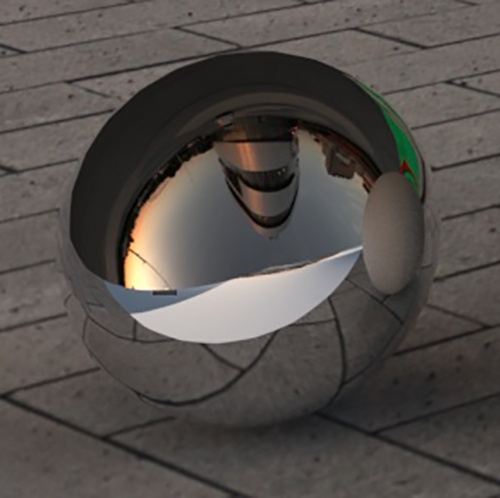
Offscreen Color (shadow_matte)
If we look closer we can see that something is not quite right with the reflection of the floor plane in the reflective sphere. There may be areas visible in the specular reflections which are outside of the background plate; so-called offscreen areas. The Shadow Matte Offscreen Color parameter defines the color used for these offscreen areas; you can link a texture for instance.
 |
 |
| without Offscreen Color | with Offscreen Color (default) |
To define the color used for these offscreen areas, you must add an Arnold Tag to the Background object and set the Offscreen Color parameter. To link a texture you must set the Offscreen color link parameter instead.
- Create an Image shader and open DA-STR-MB1-HDR-B-4K-SPEED+96.exr
- Drag and drop the Image shader onto Offscreen color link.
Shading
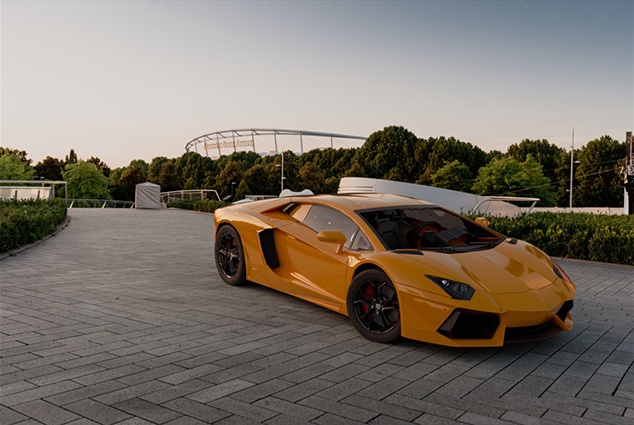
Once you are happy with the lighting and environment it is time to move onto shading the car. For the purpose of this tutorial, we will focus on car paint. The other car materials (windscreen glass, rims, plastic, etc) can be downloaded in the link at the top of the page.
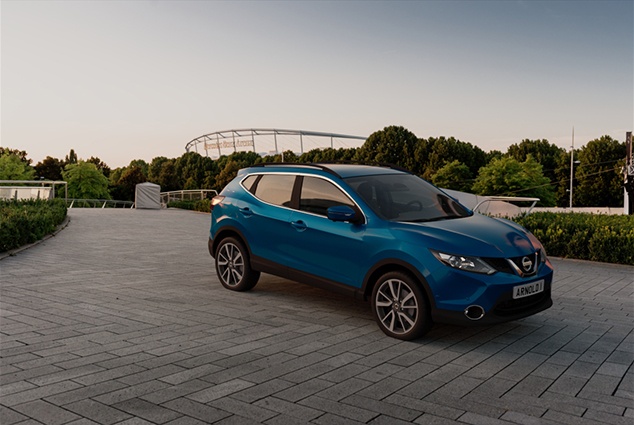
Two-Tone Metallic Car Paint
Now let's create a two-tone Car Paint shader and apply it to the car body geometry.
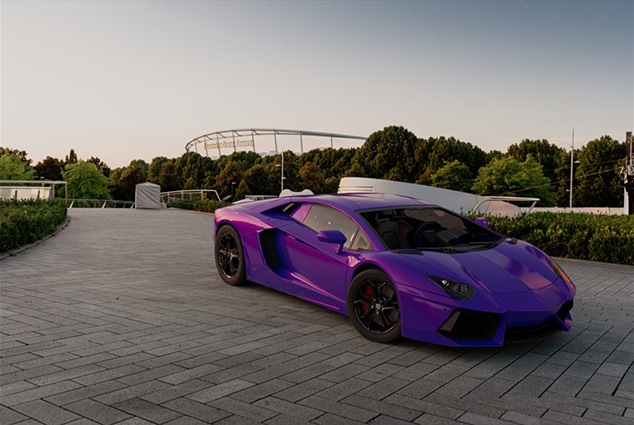 |
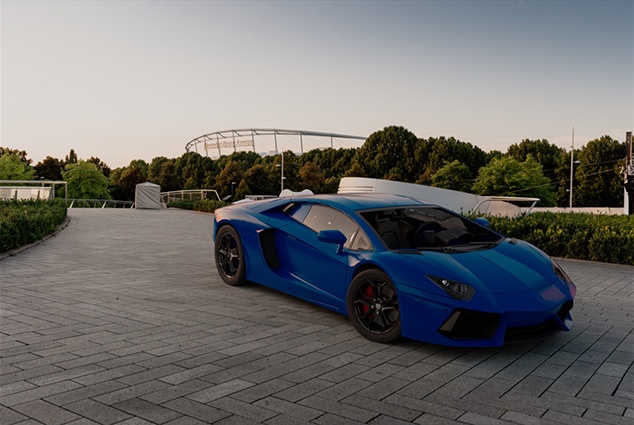 |
| Two-tone Car Paint. Base Color: blue, Specular Color: purple. | Only Base Color: blue (with default settings) |
- Create a Car Paint shader.
- Select the car body and apply the Car Paint to it.
Change the following parameters:
- Change the Base Color to a dark blue color.
- Change the Specular Color to a purple color. This is the color the specular reflection will be modulated with. This color will 'tint' the specular highlight from the base coat layer.
- Increase the Specular Roughness to around 0.5. This controls the glossiness of the specular reflections from the base coat layer. The lower the value, the sharper the reflection.
- Increasing the Specular IOR value will give the paint a more reflective quality. In this example, a value of 10 was used.
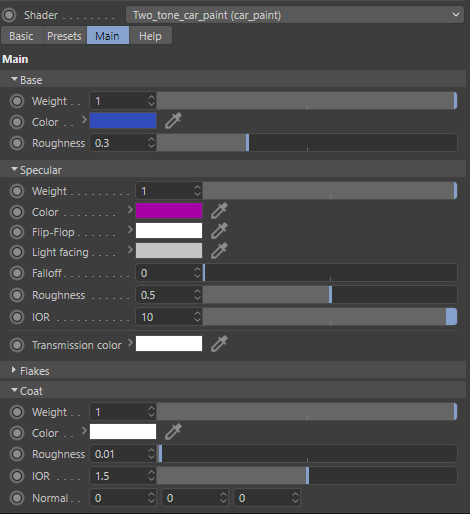
Two-tone Car Paint attribute settings
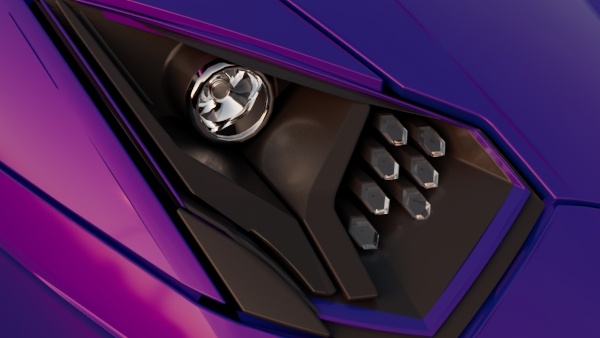
Headlights
Now let's move onto shading the headlights.
When rendering glass and metals (and diffuse surfaces), it is very important that the normals of the geometry face in the right direction, otherwise you may get incorrect results when rendered. This can be an issue when importing models from other CAD applications where the normal direction of surfaces can become inverted.
Scenes with many specular surfaces (such as headlights) require a higher Specular Ray Depth value to look correct. Specular Ray Depth defines the maximum number of times a ray can be specularly reflected.
 |
 |
| Specular Ray Depth: 6 | Specular Ray Depth: 2 (default) |
Glass
- Select the headlight glass geometry (01-HEADLIGHTS-1-surface14) and assign a Standard Surface shader to it. Rename it 'headlight_glass'.
- Increase the Transmission Weight to 1.
Black Plastic Surround
- Select the black plastic surround geometry (01-HEADLIGHTS-1-solid43) and assign a Standard Surface shader to it. Rename it 'headlight_plastic'.
- Change the Base Color to black. Increase the Coat Weight to around 0.1.
Metallic Light Fitting
The piece of glass in front of the light bulb ( 01-HEADLIGHTS-1-surface12 ) is single-sided geometry. Thin Walled is ideal for thin (single-sided) objects, like bubbles for example.
- Create another Standard Surface shader and rename it to 'light_glass'.
- Increase the Transmission Weight to 1 and enable Thin Walled (under Geometry).
It is recommended that Thin Walled only be used with thin objects (single-sided geometry) as objects with thickness may render incorrectly.
- Assign a Standard Surface shader to the reflective metallic object (01-HEADLIGHTS-1-solid42) behind the glass.
- Increase Metalness to 1.
That's it. You have reached the end of the tutorial. Well done! We encourage you to spend some more time with the C4DtoA user guide where you can find other tutorials such as this.