
Assigning Color to Sphere Primitives - Arnold for Maya
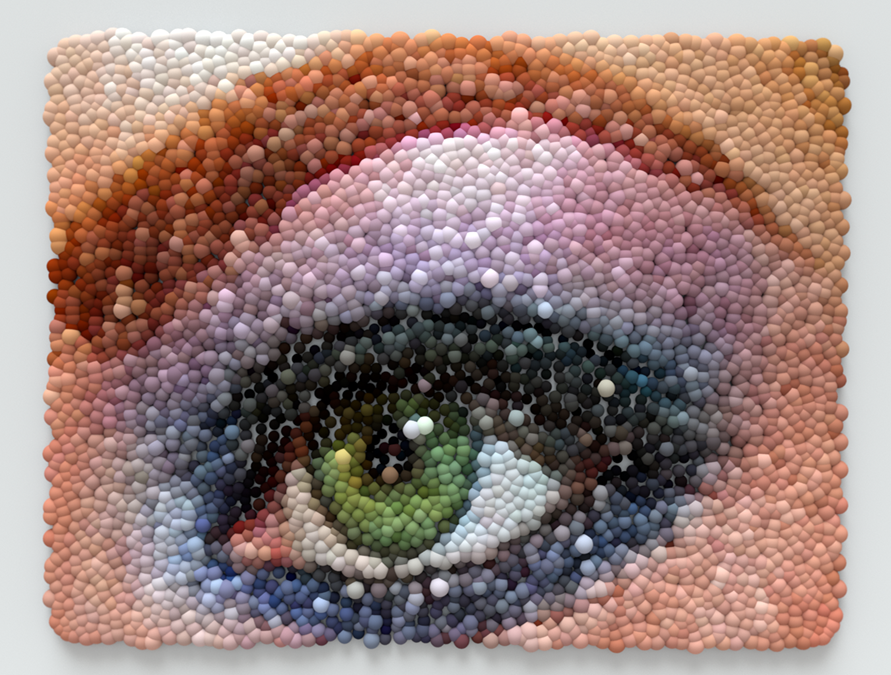
This tutorial covers how to apply color to XGen primitives using the user data shader in combination with a texture map. The effect is similar to a technique called Pointillism, where small dots of color are applied in patterns to form an image.
Before you start this tutorial, it is advised that you also read the tutorial Controlling Primitives with a Texture Map which shows you how to define the scale of your XGen primitives.
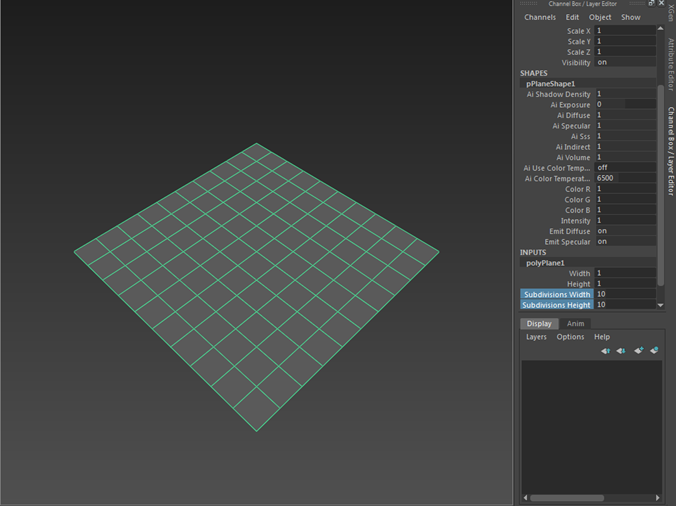
- Start off by creating a polygon plane. Increase its Subdivisions Width and Subdivisions Height to 10. We will use this plane to assign the XGen description.
- Select the polygon plane and go to Generate>Create Description. This will open up the Create XGen Description below.
- Choose the Spheres primitive. Leave the other default settings alone and click on Create.

- It is good practice to lower the Percent value in the Preview/Output tab before continuing. If the Percent value is too high, you may find that your computer will stall due to a large number of primitives generated.

- Increase the Density to around 100 and lower the Length, Width, and Depth of the Sphere primitives to around 0.1.
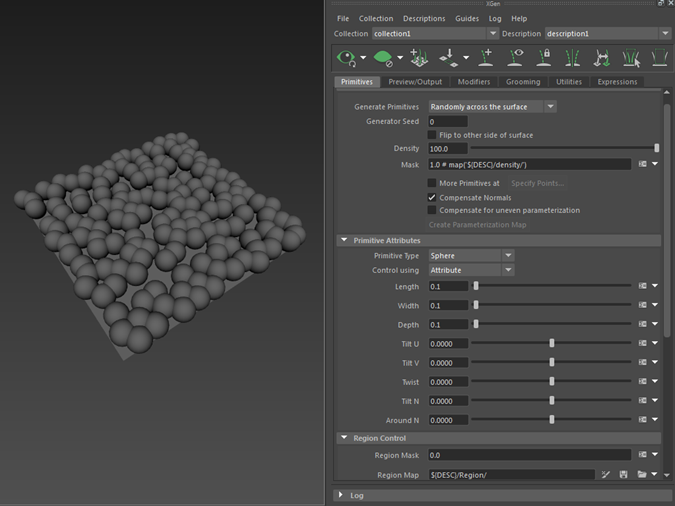
Sphere primitive Density set to 100. Length, Width and Depth 0.1
- Assign a standard_surface shader to the new XGen collection.
- Create an user data color node and connect it to the color attribute of the standard surface shader.
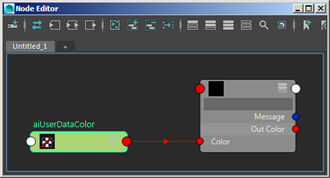
user data color -> standard surface color shader
- Type color in the Color Attr Name of the Ai UserData Color node. We will use the same 'Color' name in the XGen description.
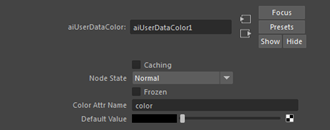
Add the name 'color' to the Color Attr Name in the user data color
- MtoA will not gamma correct the user data color. Therefore you will need to add a Maya Gamma Correct node in-between the user data color shader and the color attribute of the standard surface shader as shown below. Change the Gamma RGB values to 0.454.

- Render the scene. The spheres are black because the user data color default value is black. We need to connect it to the XGen description using the Custom Shader Parameters in XGen.

Sphere primitives are using the black Default Color of the Ai UserData Color node
Custom Shader Parameters
- Click on the Preview/Output tab in Xgen and open up Output Settings. Underneath you should see the Custom Shader Parameters. This is where we will add our expression.

Custom Shader Parameters
- In the Name text field, type the same name that was used for the Color Attr Name with the user data color shader. In this case, we used the word 'Color'. Click on float and change it to color because this is the attribute that we want to change.

Custom Shader Parameters set to Color
- Click on the downward pointing arrow
 to the right of the color text field. Select Create Map... (it is important to note that this will only work if the plane has a Maya shader assigned to it). Increase the Map Resolution to around 200.

- You should see in the Hypershade and Node Editor windows that a file texture has been connected to the plane. Select the file texture and open the texture map that you want to use to drive the color of the sphere primitives.

Remember to select the disk icon  after updating the file texture used to define the primitive attributes. Otherwise, XGen will not bake the ptex map to disk and the render will not change.
Render the scene. Your Sphere primitives should now have the same color as your file texture map. Now you just need to adjust the scale and Density of the Sphere primitives and you are done!

Thanks to Pedro Fernando Gómez for his assistance with XGen.