Revit Parts in Assemble
Revit Parts
Part elements in Revit support the construction modeling process by letting you divide certain elements from the design intent model into discrete parts. Parts can be generated from elements with layered structures, such as Walls, Floors, Roofs, and ceilings.
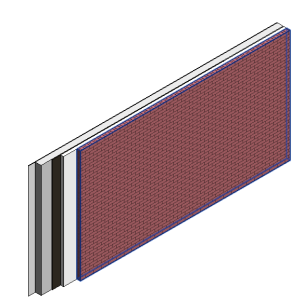
You can create a part from an element that you select in the drawing area, either in the current project or in a linked model.
In the case of elements with layers or subcomponents, such as walls, individual parts will be created for those layers. For other elements, a single part element is created. In either case, the resultant part or parts can then be divided into smaller parts.
For more information about Revit Part elements, click here.
How to create Parts in Revit
- Select Elements First
- In the drawing area, select the elements from which you want to create parts.
- Go Modify |
tab  Create panel
 (Create Parts).
- Select The Tool First
Go Modify tab
 Create panel
 (Create Parts).
In the drawing area, select the elements from which you want to create parts.
Only elements that are eligible for part creation will be selectable when the tool is active; ineligible elements display in half-tone.
Press Enter or Spacebar to complete the action.
PCL PartsLab for Revit
PCL PartsLab is a free Revit model browser that automates the creation, visualization, and change management of Revit Parts. It reduces time and clicks by instantly creating thousands of Parts from targeted categories/families/types. Context sensitive tools assist in quick hiding & isolation. The managed history view helps you keep track of when design updates happened, and what changed. Click here for more information about PCL PartsLab for Revit.
Revit Parts in Assemble
Assemble supports Revit Parts. You have the ability to divide elements into smaller pieces in Revit to simulate the construction process. Also, you can break down each element to its discrete layers which helps you in your material take-offs in Assemble.
By default, Assemble ignores Parts category which means it does not display in the Model Tree, Inventory, or Visibility Rules. However, they are visible in the viewer in "ghosted" mode. To access Parts, use the Visibility Settings to turn them back on in your project.
From the Model Tree, click Visibility Settings at the bottom of the panel.
From the dropdown next to Ignore, select the category you would like to turn on at the bottom of the panel.
Click Update at the bottom of the panel.
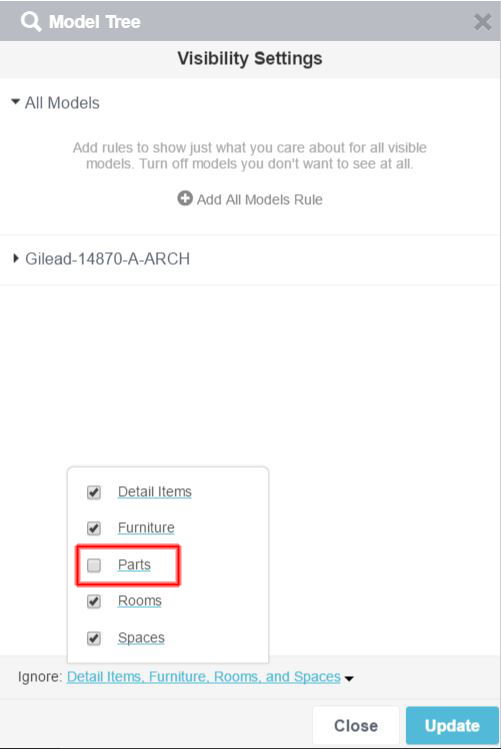
Close the panel.
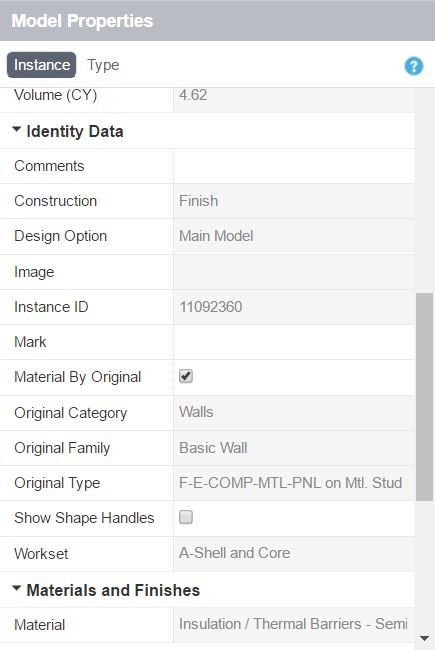
To cross-reference the Parts objects to their Parent objects, you can use the properties "Original Category", "Original Family" and "Original Type". In the example below, the Inventory is grouped by Original Category > Original Family > Original Types.
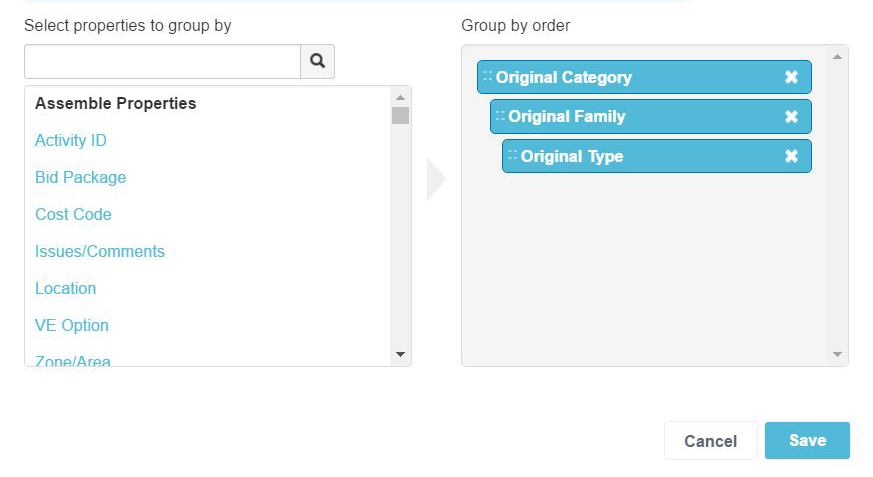
Assemble shows you all of the Parts Objects based on their Category > Family > Type.
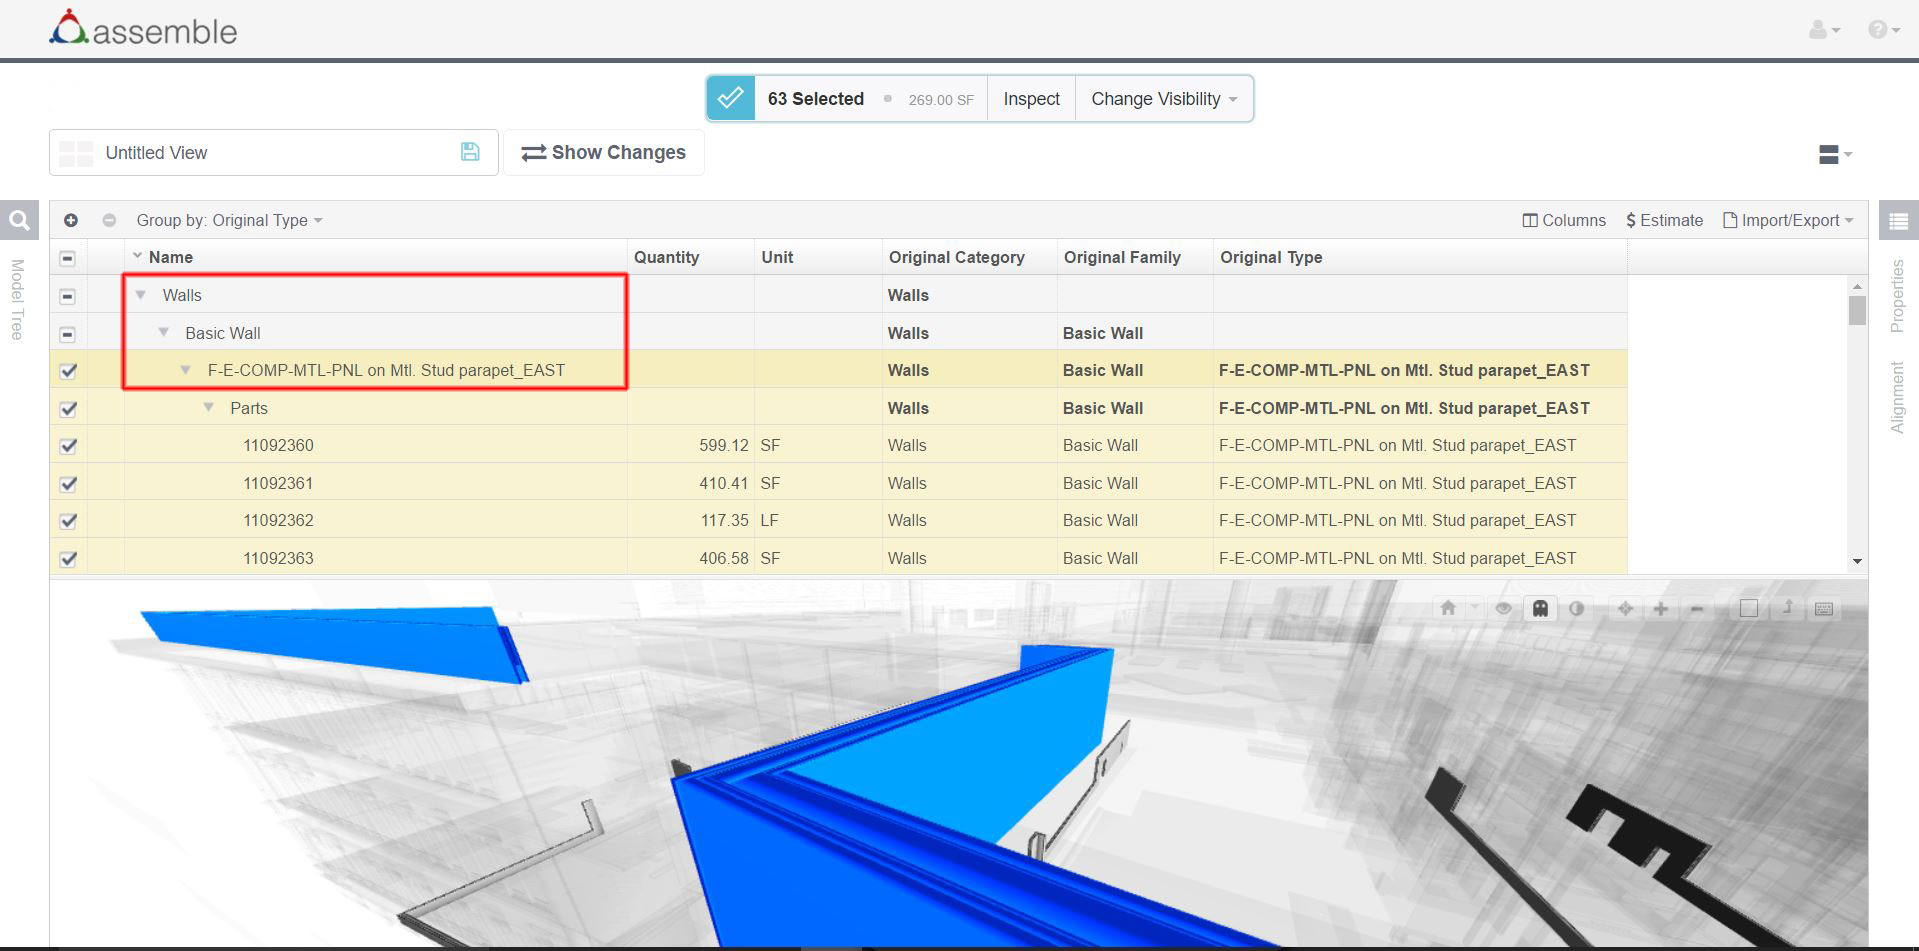
Parts in Assemble usually contain different properties than regular instances. These properties help you in making changes to the visibility of Parts in Visibility Settings.
Material Take-Off in Assemble Using Parts
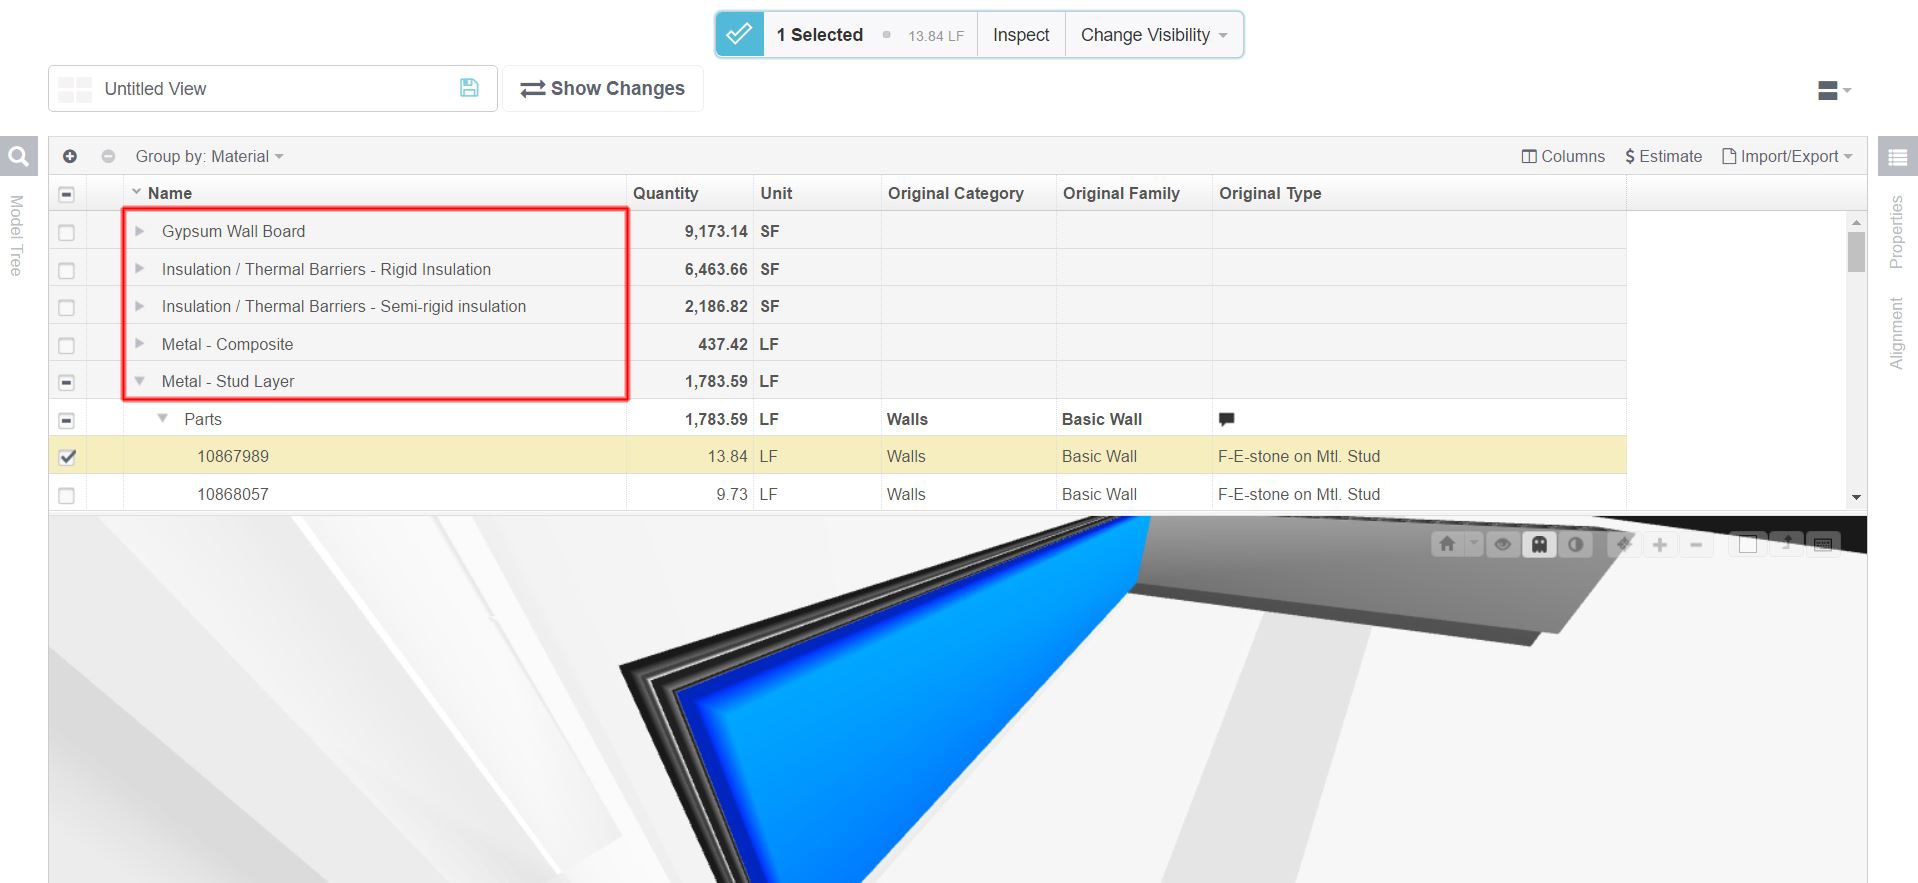
Using Parts, you can break break down each element to its discrete layers which helps you in your material take-offs. Grouping the inventory by "Material" helps you in identifying different materials. You can also cross-reference the Parts Objects to their Parent Objects by adding the properties "Original Category", "Original Family" and "Original Type" to the Inventory.
Notes:
Using the quantities of both System Family and its children gives you duplicate quantities. Please be careful in quantifying System Families to prevent having duplicate quantities.
- Tip: When working with parts, to avoid duplicate quantity values, we recommend creating a model-specific rule to Hide All of the objects that their "Has Children" property equals "Yes".
When both the System Families and the Children are visible in Assemble, clicking on the objects in the viewer only selects the Children objects.
