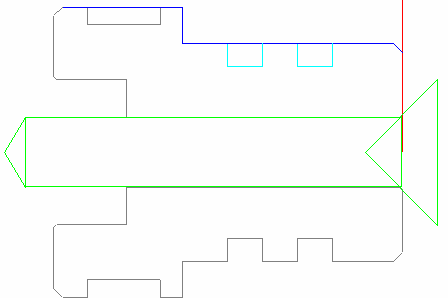
This section describes how to program the hole through the center of the part:
- Select a colour for the toolpath from the Color Palette, then click the
New Hole Group
button to display the
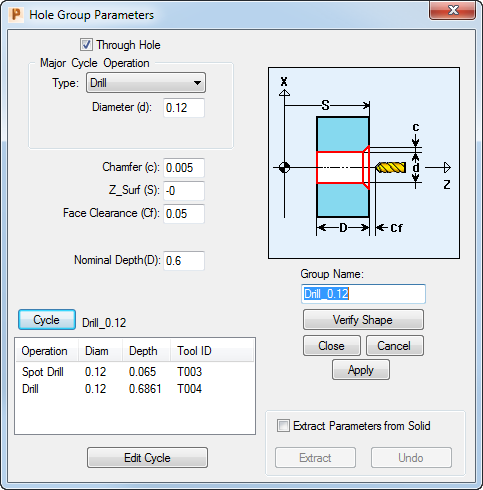
Hole Group Parameters dialog.

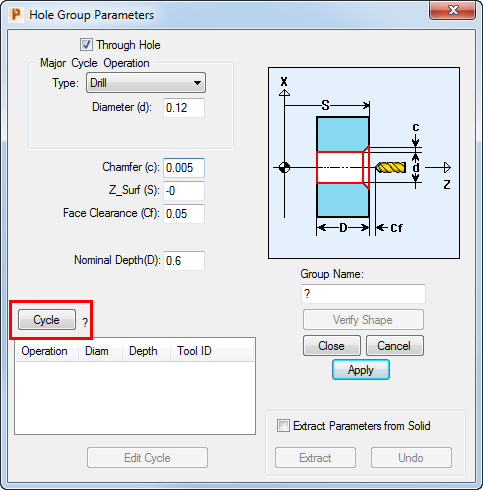
- Complete the
Hole Group Parameters dialog as shown, then click
Cycle to display the
Select Cycle dialog.
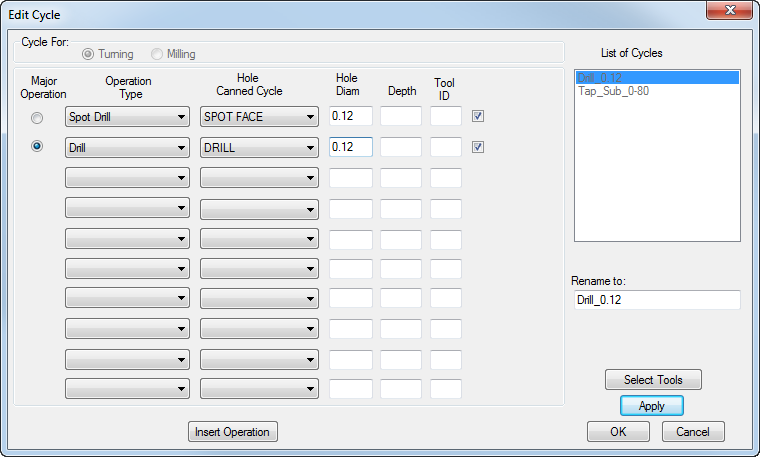
- On the Select Cycle dialog, click Add New Cycle to display the Edit Cycle dialog.
- Click
Insert operation, then complete the
Edit Cycle dialog as shown:
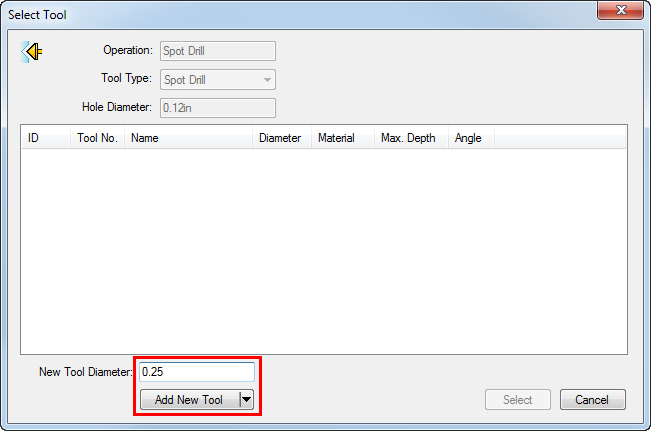
- Click
Select Tools,
change the
New Tool Diameter to
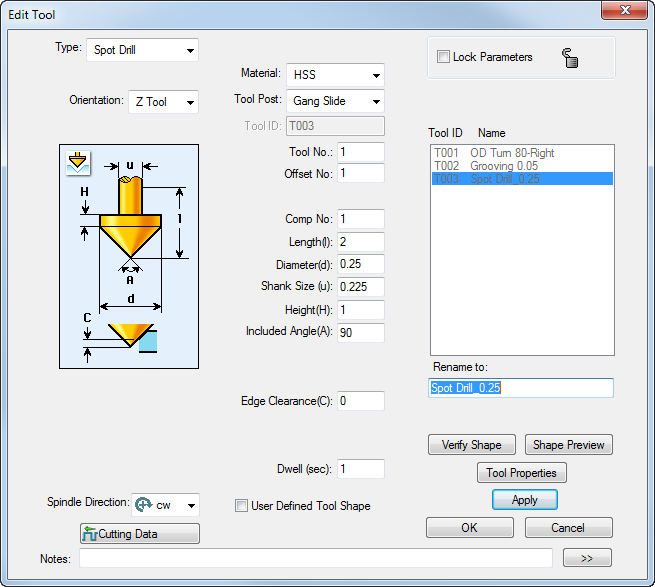
0.25 and then clickAdd New Tool.
- Complete the
Edit Tool dialog, as shown, noticing that the
Orientation and
Tool Post values have changed. Click
OK when you have finished.
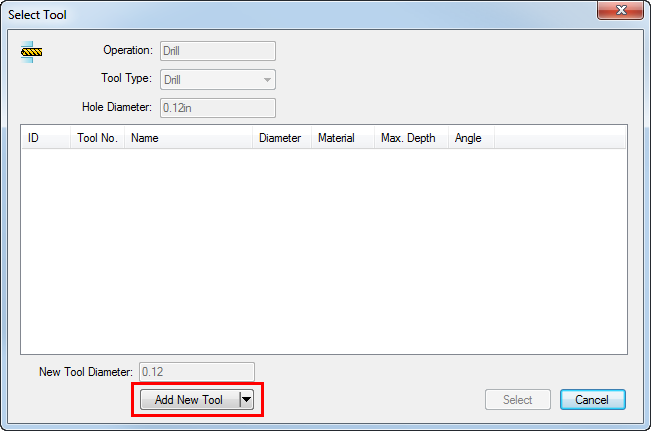
- You now need to create a new drill tool suitable for the diameter of this hole. To do this, click
Add New Tool on the
Select Tool dialog, then complete the
Edit Tool dialog as shown:
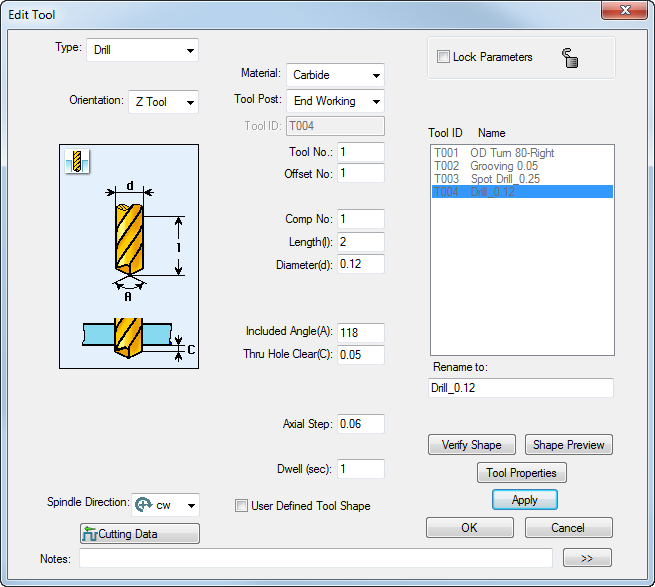
- When you have completed the
Edit Tool dialog, click
OK to confirm your changes.
PartMaker returns to the
Edit Cycle dialog:
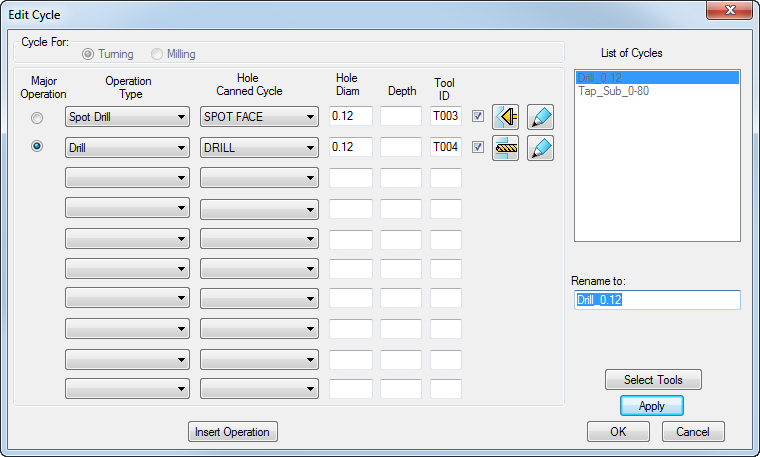
- Click
OK on the
Edit Cycle dialog to return to the
Hole Group Parameters dialog:
- On the
Hole Group Parameters dialog, click
Apply,
then
Close.
You can now visualize the toolpath: