
Creating or Modifying Mattes
Create or modify a matte by painting directly on the matte using any brush, Special Effects media, or graphic tool. For information on using graphic and cutout tools to create mattes, see Using the Cutout Commands.
Load the matte into Paint. You must load a matte clip in order to process a matte in Paint. If you want to create a matte from scratch, load a black source as the matte clip.
Click Matte. The Matte menu appears.
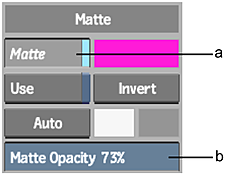
(a) Matte button (b) Matte Opacity field
Set the paint transparency in the Matte Opacity field. The value in the Matte Opacity field determines the transparency of the paint applied to the matte. Use a value of 100 to apply fully opaque paint or objects to the matte. Reduce the Matte Opacity value to increase the transparency of the paint.
Paint or place graphics or cutouts on the matte. The paint and graphics are applied to the matte. If you use graphic tools, use Tack to tack the graphic to the matte. See Tacking Down Selected Objects.
To save the matte in the matte library. See Saving, Loading, and Deleting Setups.
To process the matte clip, click Exit. The new matte clip is saved to the rendered destination.
Creating a Gradient Matte
Use graphics that contain gradients to create a matte that blends from one level of the matte colour to another level. A gradient matte is useful for blending paint strokes or creating soft edges. To create a gradient matte, draw a graphic with a gradient on the matte, and then use the Channel Editor to change the “a” channel of the start or end colour of the gradient. See Creating Graphics, and Changing the Object Gradient.
Reset or erase the Matte
If you do not load a matte, Paint displays the last matte that was loaded.
- Click Matte.
- Set the Matte Opacity to 0%.
- Click Wipe. The matte is erased.
Painting on the Matte and Image
When applying paint strokes or graphics to the image, enable Both to paint the image and the matte simultaneously.