In order to run a simulation of the network, you need to add some demand diagram data. The demand diagram contains one or more demand categories, each of which defines the demand pattern for an individual type of consumer.
A demand diagram must be created within a demand diagram group, so you may need to create a group first. Demand diagrams are viewed and edited using the demand diagram editor.
You can create demand data either by importing data from an external source or by entering data from scratch.
Importing demand data
You can import the sample demand data as follows:
- Open the Newtown Network by dragging the network object onto the window background.
- Import the demand diagram:
- Right-click the Demand Diagram group and select
Import
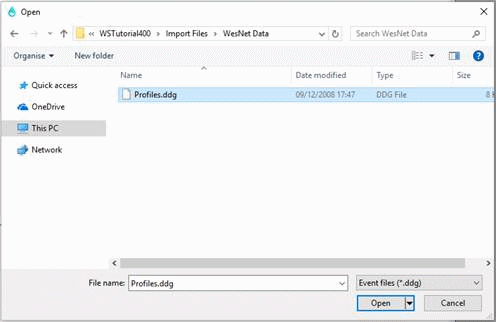
 Item from I/O file. The Windows Open dialog is displayed. From the
Example Data Directory, select Tutorial Files/Import Files/WesNet Data/Profiles.ddg.
A demand diagram contains one set of data, such as the demand for a particular scenario. Each demand diagram must be part of a demand diagram group.
Item from I/O file. The Windows Open dialog is displayed. From the
Example Data Directory, select Tutorial Files/Import Files/WesNet Data/Profiles.ddg.
A demand diagram contains one set of data, such as the demand for a particular scenario. Each demand diagram must be part of a demand diagram group.
- Click
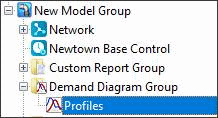
Open. The demand diagram is added to the project. Click the
 button to the left of the Demand Diagram group in the Model Group window to see the new item (which the system has named Profiles).
- You can inspect the new demand diagram by opening it. Either right-click the diagram name in the Model Group window and select
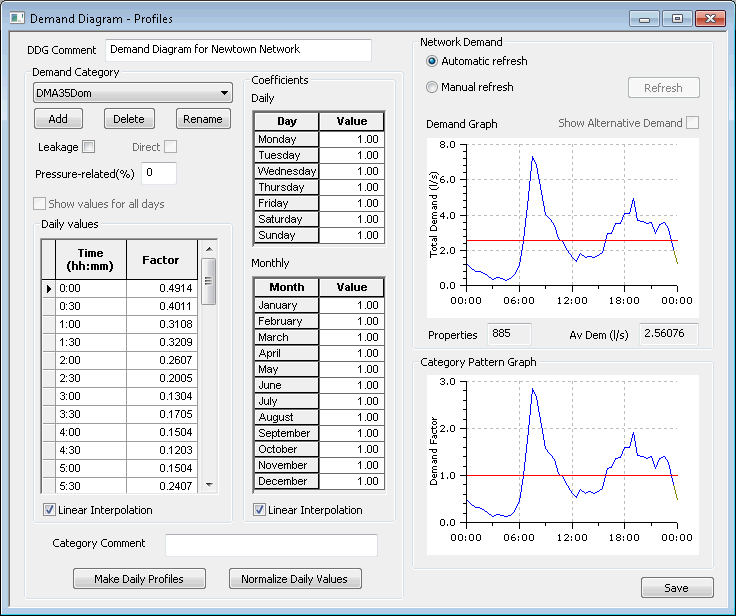
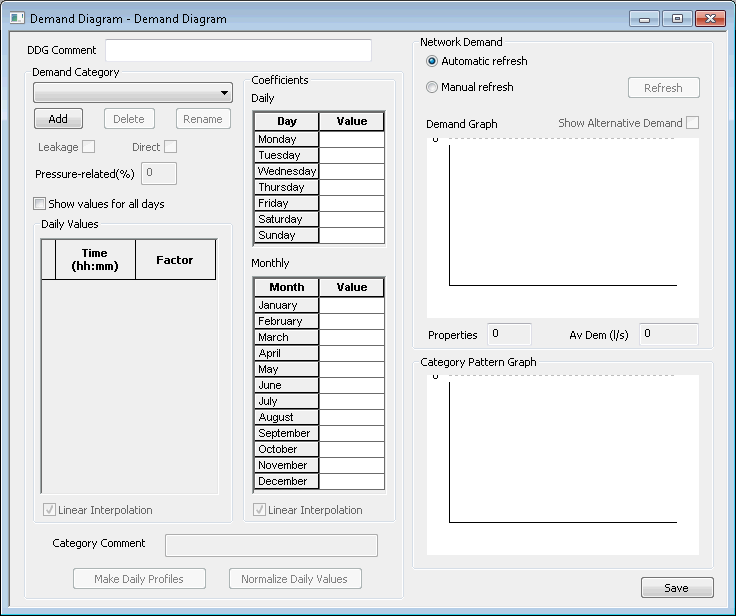
Open or, more simply, drag the demand diagram onto the main window. The display shows the proportion of demand for each half-hour period in the day. Use the scroll bar to view data from later in the day. You can change the demand for particular days in the week or specific months; the demand is scaled according to the values you enter in the Coefficients section (Daily and Monthly). The pattern graph gives a graphical representation of the event.
- When you have finished viewing the data, close the Demand Diagram dialog by clicking the
 button in the top right corner of the window.
- Right-click the Demand Diagram group and select
Import
- View the node demand data:
- Select
Window Grid windows New node demand window.
- As there are no nodes selected at present, you are asked if you want to work with all the nodes. Click Yes. If you want to view or edit only the demand data for a particular set of nodes, select the nodes before you open the Node Demand grid.
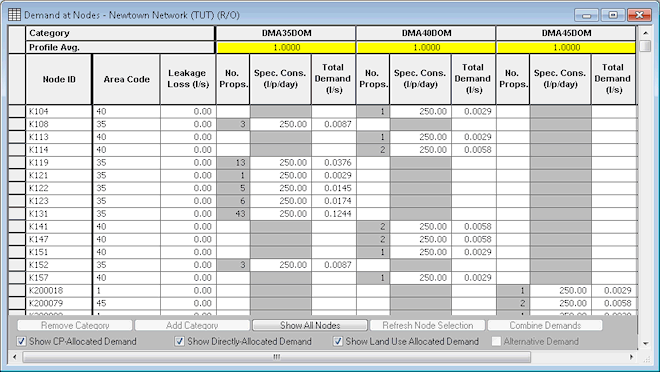
- The Demand At Nodes dialog is displayed. The grid brings together all the demand information for the nodes.
You can also use this grid to edit the demand data, providing the network has been checked out.
- Close the grid view.
- Select
Window
- View the node adjustment grid:
- Select
Window Grid windows New demand adjustment window.
- Confirm that you want to work with all the nodes in the network by clicking
Yes. The Demand Adjustment grid is displayed. This grid allows you to adjust the demand for individual demand categories or for the whole model.
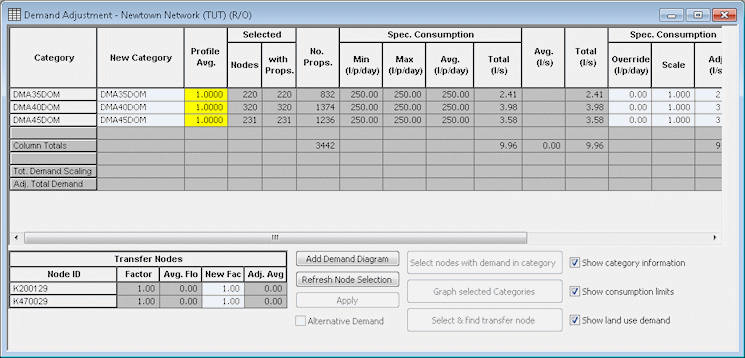
- For more information on the use of this grid, press F1 when the grid is displayed.
- Close the grid view.
- Select
Window
Creating demand data from scratch
It is possible to enter demand data from scratch. For the purpose of this tutorial, we will use the demand data imported as detailed above.
- Right-click the Demand Diagram group and select
New Demand diagram.
- Enter an appropriate name for the demand diagram in the Demand Diagram dialog and click OK.
- Open the newly created demand diagram by dragging it onto the main window background (not onto the GeoPlan) or by right-clicking it and selecting
Open.
- Enter a DDG comment applicable to the demand diagram.
- Use the Demand Category dropdown list (if populated) to select a category for viewing or editing or use the Add button to add a new demand category .
- If you click the Add button, the New Demand Category dialog is displayed.
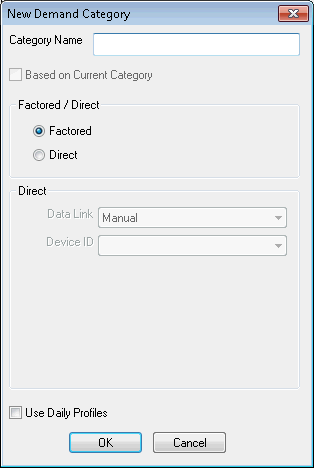
- Leave the Factored option button clicked and enter a category name. The Direct option is to be selected when using demand data which comes from a live data source.
- Check Use Daily Profiles if you want to use daily profiles.
- Click OK.
- You are back in the Demand Diagram dialog.
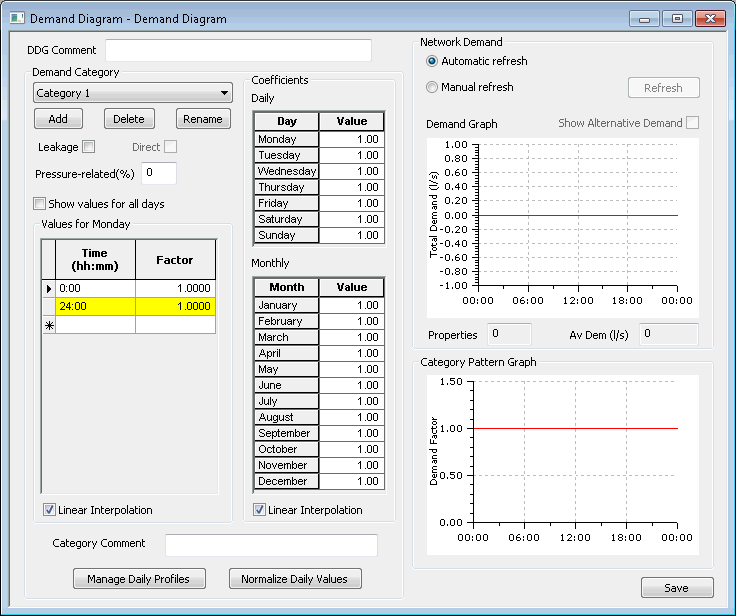
- Check the Leakage box if the category is to be treated as leakage rather than user demand.
- If required, check the Show values for all days box if daily profiles have been set up for the current demand category.
- Enter some daily and monthly coefficients in the appropriate tables:
- The sum of the daily factors should equal 7 (i.e. the average weighting factor must be 1). The numeric value represents the factor at noon on each day.
- The sum of the monthly factors should equal 12 (i.e. the average weighting factor must be 1). The numeric value represents the factor at the middle of the month.
- Ensure that the values are set to 1.0 if you do not want any scaling to take place.
- Click Save to save the demand diagram. For more details on how to set up a demand diagram from scratch, refer to the Editing Demand Diagrams topic.
Once demand diagrams have been imported or created, we can run some simulations.
 Back to main flowchart