
Use these settings to work with the Blue Pencil tool.
- Double-click the
Blue Pencil icon
 in the Last Used tool area of the
Tool Box, or
in the Last Used tool area of the
Tool Box, or
- When
Blue Pencil is the active tool, click the Tool settings icon in the upper right corner of Maya

The Tool settings icon (circled)
Drawing
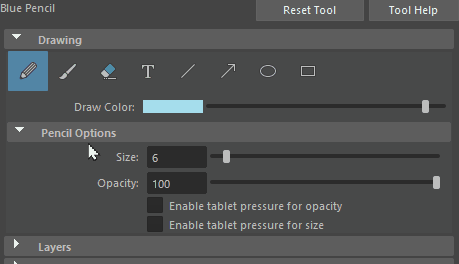
Blue Pencil Tool settings: the options for each tool display beneath once you select the tool
For information on how to use Blue Pencil drawing tools, see Draw in the Viewport with Blue Pencil.
- Pencil

-
Lets you draw freehand at the current time in the Time Slider.
- The Pencil has options for working with a pressure-sensitive stylus on a drawing tablet: Enable Tablet Pressure for both Size and Opacity. Enable Tablet Pressure for Size is on by default, while Enable Tablet Pressure for Opacity is off by default.
-
Tip: You can also create custom presets for the Blue Pencil Pencil Size and Opacity using a falloff curve. See Customize Blue Pencil brushes with falloff curves.
- See Use a Tablet with Blue Pencil and Tablet setup for more information on using Maya Creative with a tablet.
- Brush

-
Lets you draw freehand with a configurable edge hardness at the current time in the Time Slider.
- The Brush has options for working with a pressure-sensitive stylus on a drawing tablet: Enable Tablet Pressure for both Size and Opacity. The Enable Tablet Pressure settings are on by default.
- The
Brush also has a
Hardness slider that lets you adjust the density of the stroke edge.

Brush strokes of same size and opacity with Hardness set to 100, 70, and 6
-
Tip: You can also create custom presets for the Blue Pencil Brush Size and Opacity using a falloff curve. See Customize Blue Pencil brushes with falloff curves.Note: If you're sketching on a Wacom tablet and you have the latest drivers installed, you can also erase using the stylus eraser. See Use a Tablet with Blue Pencil and Tablet setup for more information on using Maya Creative with a tablet.
- Eraser

-
Erases Blue Pencil strokes on the sketch at the current frame.
- The
Blue Pencil
Eraser has two settings:
- Size, which is a slider that lets you set the size of the eraser stroke
- Enable Tablet Pressure for Size option to turn on if you want to use a pressure-sensitive tablet to configure the eraser size: the harder you press with the stylus, the larger the eraser size expands.
-
Note: If you're sketching on a Wacom tablet and you have the latest drivers installed, you can also erase using the stylus eraser. See Use a Tablet with Blue Pencil and Tablet setup for more information on using Maya Creative with a tablet.
-
Tip: You can also create custom presets for the Blue Pencil Eraser Size and Opacity using a falloff curve. See Customize Blue Pencil brushes with falloff curves.
- Text

-
Adds a text box to the scene where you can type.Note: Currently, Blue Pencil text does not support Chinese or Japanese character sets. To use Chinese or Japanese character sets, copy and paste them into Blue Pencil from a text editor.
- The
Blue Pencil
Text tool has three settings:
- Font: Choose the typeface for your text.
- Size: Choose how large the text will be.
- Opacity: Set an opacity level for your text.
-
Blue Pencil uses the system default font on operating systems other than Windows:
- Windows: Arial
- Macintosh: San Francisco
- Line

-
Drag across the screen to create a straight line. Set a thickness for the stroke with the Size setting, and an opacity level with the Opacity setting.
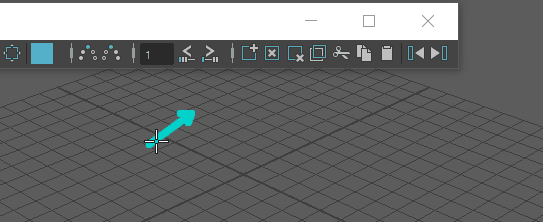
- Arrow

-
Drag across the screen to create a line capped with an arrowhead. Set a thickness for the stroke with the Size setting, and a transparency level with the Opacity setting.
- Ellipse

-
Drag across the screen to create an oval shape. Set a thickness for the stroke with the Size setting, and an opacity level with the Opacity setting.
- Rectangle

-
Drag across the screen to create a square shape. Set a thickness for the stroke with the Size setting, and an opacity level with the Opacity setting.
Layers
The Blue Pencil Layer manager table lets you organize Blue Pencil layers. See Manage Blue Pencil Layers for information on how to create and manage your layers.
Layers are grouped with their camera. The order of layers is set by the Viewport draw order: for example, a layer at the top of the Layer manager is the top layer in the Viewport.
| Icon | Function |
|---|---|
 |
Clears and rebuilds the camera list and layers. |
 |
Moves up the selected layer in the Blue Pencil Layer manager. See Manage Blue Pencil layers. |
 |
Moves the selected layers down in the Blue Pencil Layer manager. See Manage Blue Pencil layers. |
 |
Creates a layer. |
 |
Removes the layer from the table. |
 |
Click to prevent editing on the layer. |
 |
Click to allow editing on a layer. |
 |
Click to set the selected layer as
Static.
Static layers are unchanged throughout the animation, and are good to use as background panels that persist throughout regardless of the current time. The static state uses a single frame for all strokes
If a layer is not set to Static, it is considered Animated. The Animated state is useful for animation-related tasks like blocking and review. |
 |
Click to show or hide drawings in the selected layer in the Viewport. |
Ghosting
This area contains settings for the Blue Pencil ghosts. Select Ghost Previous or Ghost Next to configure the settings for the Blue Pencil frames before or after the current frame. See Preview Blue Pencil frames with ghosting.
- Pre Frames
- Use the slider to set how many Blue Pencil frames to show before the current frame.
- Post Frames
- Use the slider to set how many Blue Pencil frames to show after the current frame.
- Enable Color Override
- Double-click the
Pre and
Post Frames Color color tile to open the Color Settings window where you can set a color for the Blue Pencil ghosts. Use the slider to set the number of ghosts that will appear.
Note: The Enable Color Override option appears in both Ghost Previous (
 ) and
Ghost Next (
) and
Ghost Next ( ) right-click window. If you turn on the option for one setting, it becomes active for both. For example, setting the
Ghost Previous
Enable Color Override option also turns it on it for the
Ghost Next frames.
) right-click window. If you turn on the option for one setting, it becomes active for both. For example, setting the
Ghost Previous
Enable Color Override option also turns it on it for the
Ghost Next frames.
Retiming

Using Retiming to move Blue Pencil frames on the Time SLider
- Frame Range
-

- Enter the number of frames that you want to offset the Blue Pencil frames.
-
Retime backward

- Moves the Blue Pencil frames after the current frame, backward on the Time Slider by the amount set in the Offset frames by field.
- Retime Forward

- Moves the Blue Pencil frames after the current frame ahead on the Time Slider by the amount set in the Offset frames by field.
- Move to next frame
-

- When enabled, the current frame is set to the next Blue Pencil frame after you retime.
Frame
This area contains the same settings for selected Blue Pencil frames as the Blue Pencil Toolbar.
See Work with Blue Pencil frames for more information on how to manage frames.
| Icon | Name | Behavior |
|---|---|---|
|
|
Add Frame |
Inserts a blank frame at the current time. Empties the current frame. |
|
|
Duplicate Frame |
Creates an identical version of the
previous frame at the current time, provided there is no frame there already.
See the section Difference Between Copy and Duplicate frame in the Work with Blue Pencil frames topic. |
|
|
Delete Frame |
Removes the frame at the current time. |
|
|
Cut Frame |
Removes the frame at the current time and copies it to the clipboard. |
|
|
Copy Frame |
Lets you copy a frame to the clipboard and paste it anywhere on the Time Slider.
See the section Difference Between Copy and Duplicate frame in the Work with Blue Pencil frames topic. |
|
|
Paste Frames |
Pastes the contents of the clipboard at the current time. |
|
|
Clear Frame |
Empties the current frame. |
|
|
Jump to Previous Frame |
Moves the selection to the frame before. |
|
|
Jump to Next Frame |
Moves the selection to the following frame. |


