This example shows you how to create a stock model rest boundary. It uses the Cowling.dgk model in the Examples folder.

- Create a
Block
and define a 10 mm ball nosed
Tool.
Ensure the block extends above the top of the model.
- Create a Raster Finishing toolpath.
- From the Stock Models context menu, select Create Stock Model. This creates a stock model called 1.
- In the
Stock Model dialog which is displayed:
- Change the Stepover value to 0.1.
- Click Accept.
- From the individual Stock Model context menu:
- Select Apply > Active Toolpath First. This adds the Block and the currently active toolpath to the Stock Model.
- Select Calculate.
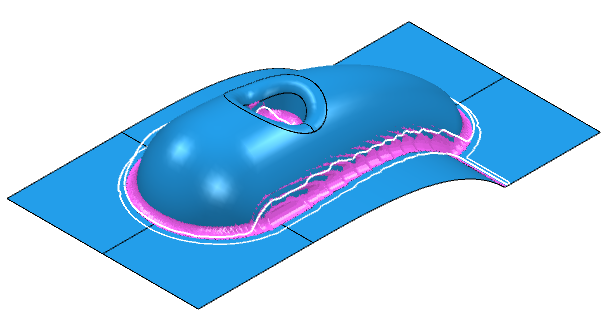
- Select Drawing Options > Show Rest Material.
- Create a boundary based on this stock model. From the
Boundaries
context menu, select
Create Boundary > Stock Model Rest. This displays the
Stock Model Rest Boundary dialog.
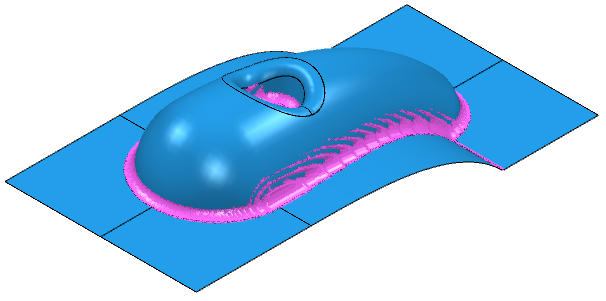
- Select Stock Model 1.
- Select the tool you want to use for the boundary, in this case BN10.
- Click Apply to create the boundary.