This example shows how to create a helix using the Curve Editor tab.
- Click Curve Editor tab > Create panel > Curves > Helix, which attaches a helix to the cursor.
- Click to locate the helix at the centre of its base, or enter the coordinates in
 on the
Status bar to display the
Helix dialog.
on the
Status bar to display the
Helix dialog.
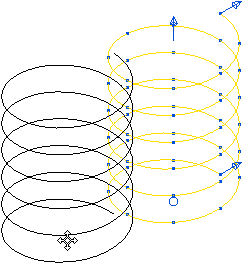
PowerMill also draws a helix.
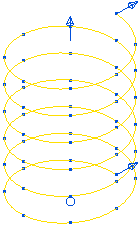
The helix is yellow and has:
- blue handles that enable you to edit the Top radius, Bottom radius and Height graphically.
- blue points showing the number and location of the points in each turn.
- a blue circle at the centre of its base that enables you to edit the location of the helix graphically.
- Enter suitable values, for example:
- Height of 60.
- Pitch of 10.
- Number of turns of 6.
- Points in each turn of 8.
- Top radius of 20.
- Base radius of 20.
- Click OK.

Clicking OK creates a spline curve that you cannot edit.
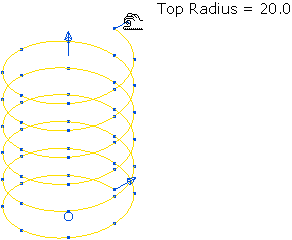
Alternatively, you can create the helix graphically. For example, if you select the top-radius handle (the cursor changes to
 ) and drag it to a new position, the top radius changes.
You can move the helix by selecting the centre handle (the cursor changes to
 ) and dragging it to a new position.