
There are two ways to select the hatch boundary:
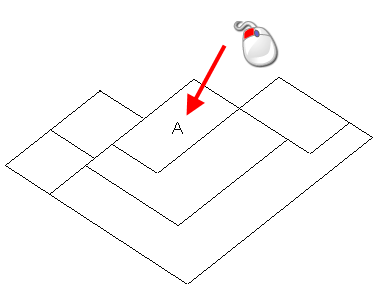
- Select an area enclosed by wireframe:
- Click in free space within an area enclosed by wireframe objects.
Clicking as shown below hatches region A:
- Click in free space within an area enclosed by wireframe objects.
- Use wireframe to define the boundary:
- Click a wireframe object as the start object of the hatch boundary.
When an object is selected, the Create Hatch toolbar is displayed and a boundary is selected.
- When you have decided where you want the hatch boundary to lie, select an object near to an intersection such that you want the boundary to turn left at that intersection. For example, to hatch region A, click the objects as shown below:
To hatch region B, click objects as shown below: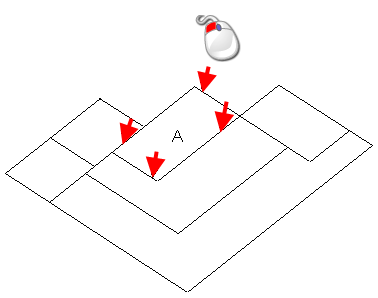
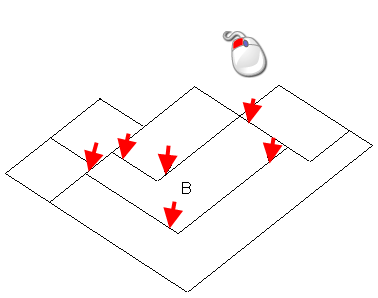
When Turn left at branch mode is selected on the Create Hatch toolbar (default), you can select the complete hatch boundary with one mouse click.
- When the required boundary is selected, click the
Save
 button on the toolbar. The selected hatch pattern is added to the selected region.
- Click a wireframe object as the start object of the hatch boundary.
To edit the hatch boundary, use the Create Hatch toolbar. This toolbar is used in the same way as the Composite curve toolbar.
When you have created the hatch, you can edit the hatch.
Tip: You can edit the default settings of each hatch pattern using the
Hatching page of the
Drafting Options dialog.