
Chapter 8: Assigning Materials and Devices
Previous: Chapter 7 | Next: Exercise 2
The first required step in any Autodesk® CFD design study is to define the materials of the components in the design. This chapter describes the following:
- How to assign materials.
- How to define material properties and create new materials.
- How to specify how and when material properties vary.
- How and when to use material devices.
- How to use the installed material database and manage custom material databases.
Materials are physical substances, and are the foundation of the Autodesk® CFD analysis. There are two distinct material types available in an analysis: fluids and solids.
Devices are models of physical devices, and include internal fans, centrifugal fans, resistances, check valves, rotating regions, Printed Circuit Boards, LEDs, Compact Thermal Models, Thermoelectric Coolers, Heat Exchangers, and Heat Sinks.
Materials and devices are assigned and created using the same processes and dialogs.
Using Materials
Default material setting: "Unassigned"
The default Material setting for every part in a new Scenario is "Unassigned". This is not a valid material setting for an analysis, so all parts must be assigned a material prior to running.
The purpose of this is to make it obvious if a material assignment is lost after updating the geometry of a Design. Additionally, assigning materials with Rules on Parts is simplified because it is clear which parts have materials, and which do not.
Before a Scenario can be run, a material must be assigned to all parts. An error is given if one or more parts are unassigned when the analysis is started.
To assign a material with the quick edit dialog
Open the Material quick edit dialog (four methods):
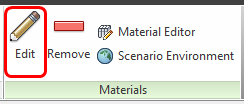
Left click on the part, and click the Edit icon on the context toolbar.

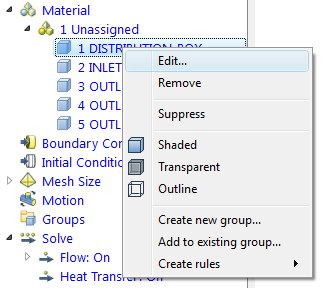
Right click on the part, and click Edit.
Right click on the part name under the Materials branch of the Design Study bar, and click Edit.
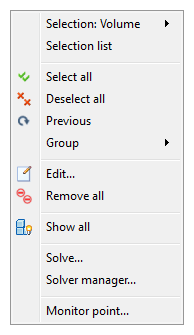
Click Edit in the Materials context panel.
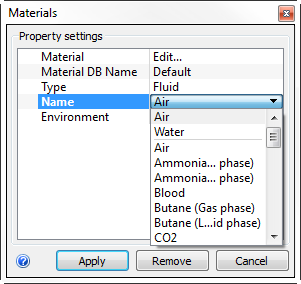
Select one or more parts.
Select the database from the Material DB Name menu.
Select the type from the Type menu.
Select the material from the Name menu.
Click Apply.
 Note: Optionally, indicate if properties vary, and specify the Environment conditions.Note: Alternatively, select a material from the Favorites list.
Frequently used materials (Favorites)
Favorites are materials that are used in most (or all) scenarios. They are easily accessed from the right click context menu, and do not require the Material quick edit dialog.
To make a Favorite
If the material is assigned to a part, simply right click on the part, and click Make favorite.
To designate an unassigned material as a Favorite:
Open the Material Editor. (Click Material Editor from the Materials context panel.)
Click the List button.
Right click on the material, and select Add to favorites.
This symbol,
 ,appears on Favorites in the material list.
To assign Favorites
Right click on a part.
Click Favorites, and select the material.
Note: For materials that require additional inputs, such as internal fans, the Material quick edit dialog opens.
To create a material from an existing material
The Default material database contains at least one instance of every material type. A convenient way to create a new material is to use a Default material as an example. Because these materials are read-only, use the Material Editor to copy the original into a custom database, and modify the copy.
To open the Material Editor, click Edit... on the Material line of the quick edit dialog. (Alternatively, click Material Editor from the Materials context panel.)
Click the List button.
Find the material in the list, and left click on it.
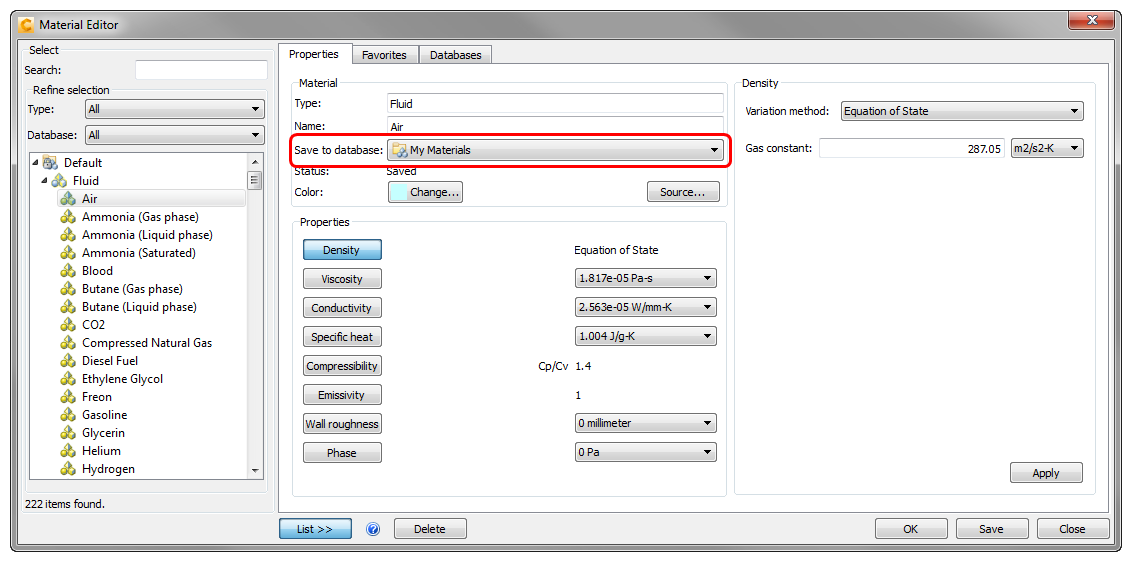
On the Properties tab, select a database from the Save to database menu.
Modify the properties as needed, and optionally, specify a new name.
Optionally, click Save.
Click OK. The quick edit dialog displays the material.
To set the material environment conditions or to vary property values (natural convection, compressible, etc.)
The Default material database contains a single version of each material. Most are defined with variable properties.
When applying a material, specify if it is Fixed or Variable, and define the operating conditions of the scenario. The material properties at these conditions are computed, and either held constant or used initially and varied.
To specify Fixed or Variable
Many materials in the Default material database are defined with varying properties. To specify if they are constant or vary in a scenario:
Click Set... on the Environment line of the quick edit dialog.
(Alternatively, right click on the material in the Design Study bar, and select Edit material environment reference...)
Select either Fixed or Variable.
- Select Fixed to compute properties at the specified Environment, and keep them constant.
- To specify a specific value for a property that is defined as varying, copy the material to a custom database, change the property variation to constant, and specify the value.
- Select Variable to vary properties as defined in the material. Do this for natural convection and compressible analyses.
- Only properties defined with a variable method vary.
- This dialog is not available for materials defined only with constant properties.
The material condition (Fixed or Variable) is shown adjacent to the material name on the Design Study bar. This makes it easy to know if the correct variability is selected for the analysis type. Note that Fixed is the default setting.
For an example of setting varying properties...
Optionally, to learn more about Environment-Driven properties...
More about Devices
Devices are a powerful way to use geometrically simple objects to represent complex parts or assemblies. They affect the flow in the same manner as the physical component, but at a fraction of the mesh size and complexity. The result is a faster and more efficient analysis process.
In most applications, it is obvious when to use fluid and solid materials. Because material devices are approximations of physical objects, we thought it would be helpful to provide a "mapping" between Autodesk® CFD material devices and physical objects, based on application type.
Electronics and Lighting applications
Use this Device Type... | ...to represent these physical objects: |
sheet metal baffles, thermal layers, and contact resistances | |
perforated plates and filter media | |
axial fans in a system | |
centrifugal fans or blowers in a system | |
integrated circuits | |
custom printed circuit boards | |
Peltier modules, electronic “heat pumps” | |
| LED | LED’s in lighting applications |
air handler or CRAC unit for electronic cabinet, cold plate for electronic module | |
various heat sink device types including pin fin and straight fin |
Turbomachinery applications
Use this Device Type... | ...to represent these physical objects: |
rotating devices such as pumps, compressors, and turbines |
Internal Flow applications
For more about these devices, follow the links at the end of this chapter.
About Material Databases
Material databases provide the ability to efficiently organize and search for material data. They are a valuable tool for organizing, sharing, preserving, and standardizing material data within projects and across multiple users.
Use the installed and custom databases to organize and share materials...
Installed Material database
- The installed material database is called "Default"
- It contains an extensive library of fluids, solids, fans, LED devices and at least one example of the others (including CTM, TEC, PCB, and resistances).
- Materials in this database cannot be changed, but they can be copied to a custom database and modified.
Custom Material databases
- Custom databases are efficient for organizing materials by project or for quick access.
- A custom database called My Materials is included in the installation.
- It is easy to create additional databases.
A quick look into using material databases...
To create and manage databases
To open the Material Editor, click Material Editor from the Materials context panel.
Click the Databases tab.
- To create a new database, click New...
- To import a database from another user, click Add...
- To copy a database, select it, and click Clone.
To select a database
It is often necessary to select the database when assigning and creating materials. There are several ways to do this from the Material Editor:
- Select from the Material DB Name menu.
- Open the List region, and select from the list. To create a new material in the database, right click and select New material.
- On the Properties tab, select from the Save to database list. This copies the material into the selected database.
When applying a material, select the database directly from the Material quick edit dialog on the Material DB Name line.
Optionally, click here to learn more about material databases...
Properties of Materials and Devices
The information in this chapter focuses primarily on using materials. Each material type is actually made up of several properties. This information is quite detailed, so to learn more please browse these topics within the Help System: