How To: Manually Configure Onelogin App
When setting up SSO using OneLogin as your identity provider, the recommended method is to use the Autodesk SSO app in OneLogin, which is pre-configured with essential settings (including SAML attribute mapping). For more information, seeOneLogin.
However, if you have any issues with the Autodesk template or need to update the SAML mapping source, you can use the following manual configuration procedure.
To enable single sign-on you must register Autodesk SSO as a SAML app on OneLogin.
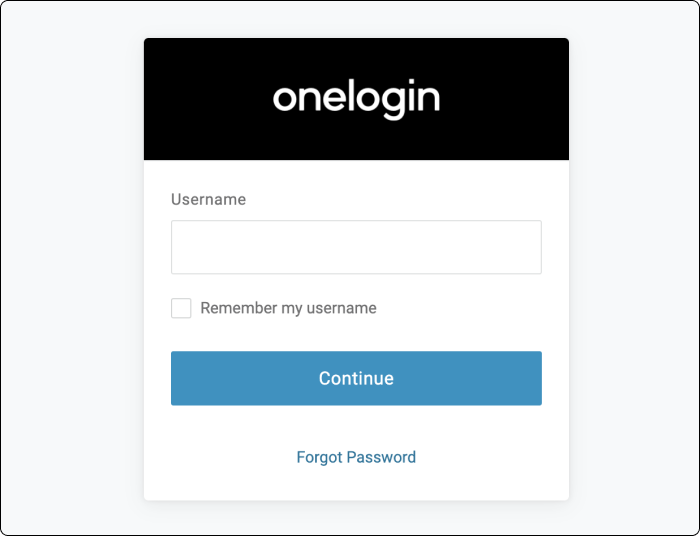
Log in to your OneLogin Admin portal using an account that has Admin privileges.
 Note:
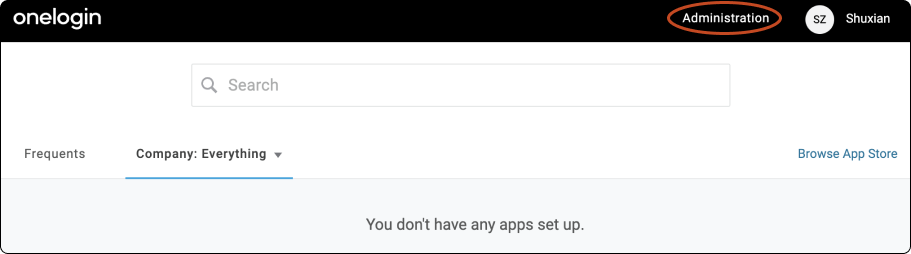
Note:The URL for OneLogin differs from company to company. It is of the form
https://<your_company_domain_name>.onelogin.com/loginIn the navigation pane, click Administration.
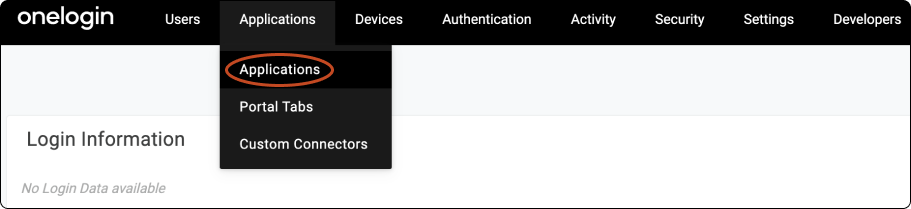
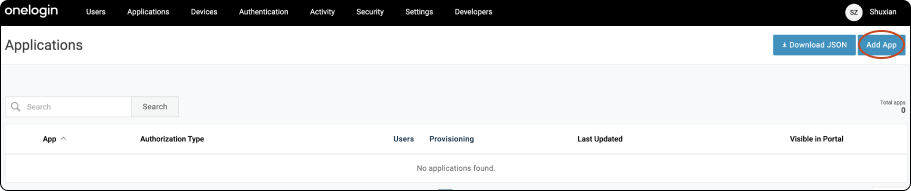
Open Applications from the Applications Menu.
Click Add App.
Note:When you have added an app or two, you can go to Users-->Roles to start adding and grouping your users.
Type
samlin the search box, then select the SAML Test Connector (SP).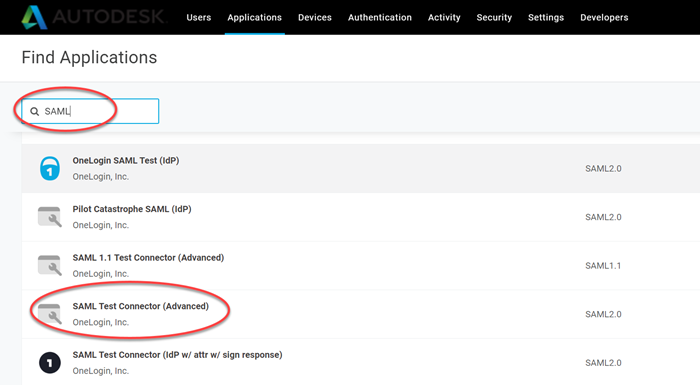
Specify a unique name in the Display Name box and click SAVE.
Note:You can specify any name for establishing the connection. Here we have used
Autodesk SSOfor the Display Name field.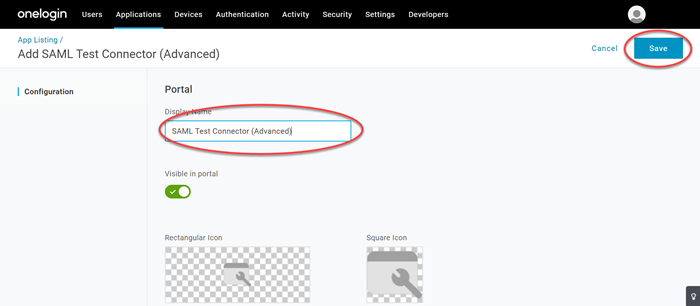
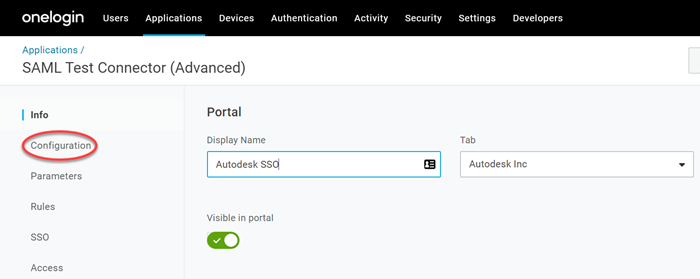
Click Configuration.
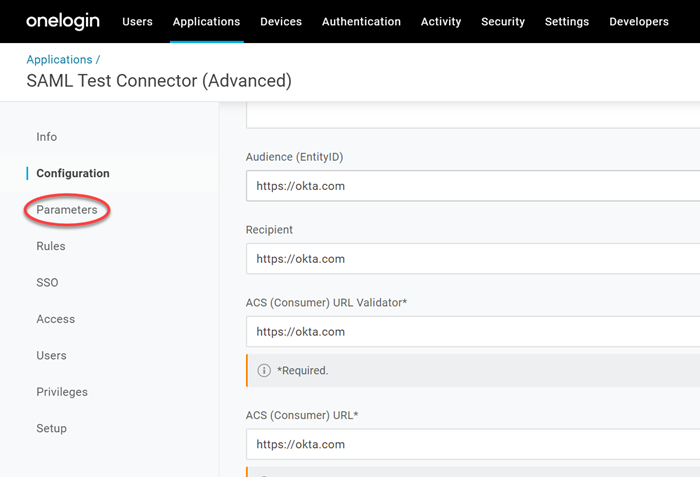
Take note of the following fields, do not specify any value as of now, but once you setup the connection in SSO Admin console (Refer Stage 3), you can come back to this screen and fill in these fields using metadata. (Refer Stage 4).
- Audience (Entity ID)
- Recipient
- ACS (Consumer) URL Validator
- ACS (Consumer) URL
Note:For the
ACS URL ValidatorandACS URLfields, though its specified as "Required", you can save the configuration page to move on with the instructions. Only when you provide those values, as specified in Stage 4, the integration will be completed.
Select SAML Initiator to be
Service Provider, SAML Issuer Type to beSpecificand SAML signature element to beAssertion.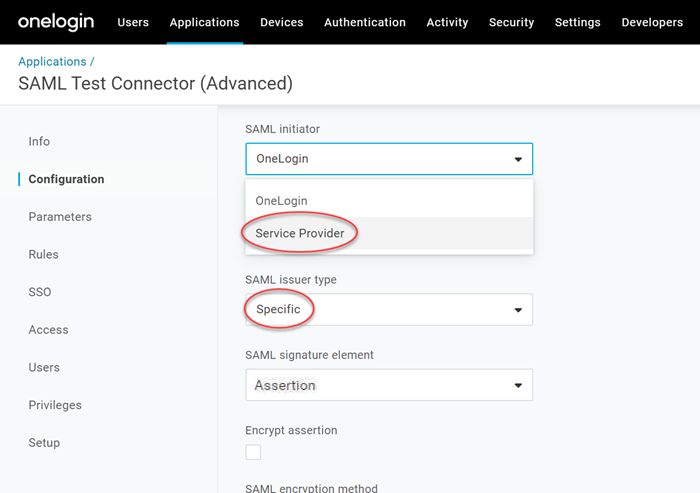
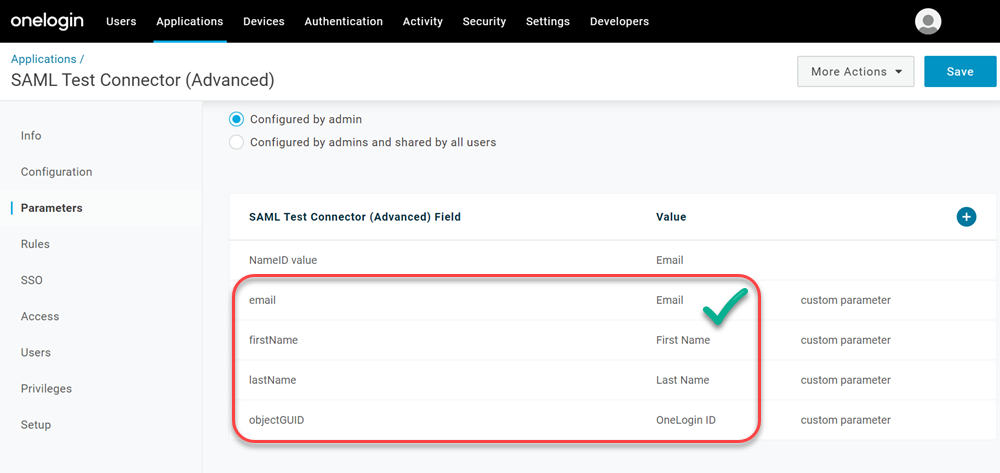
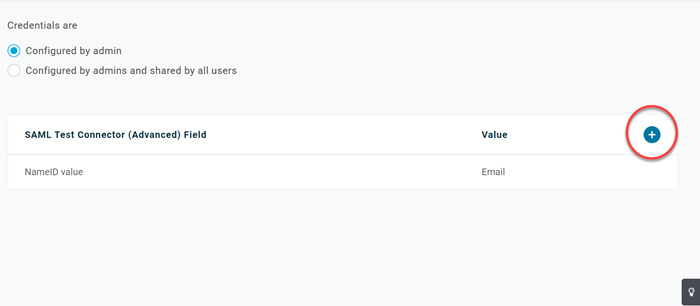
Click Parameters.
Click + symbol on the right of the SAML Test Connector Field. The New Field box displays.
In the New Field box, specify
firstName, select Include in SAML assertion, and click Save.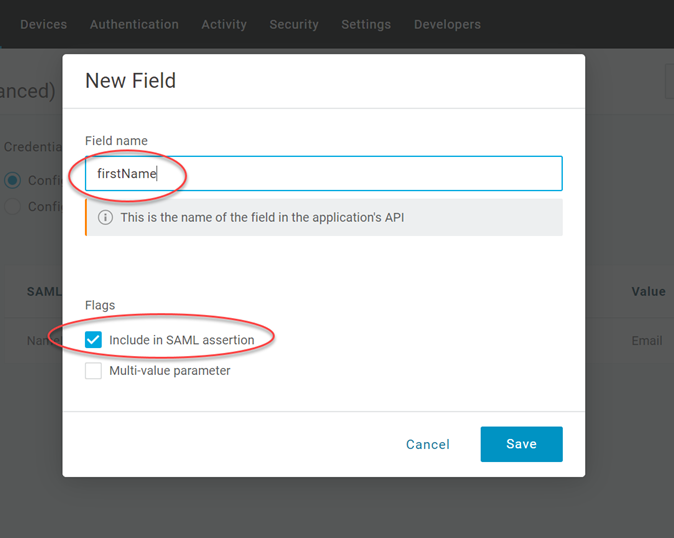
Click Save. The Edit Field 'name' box displays.
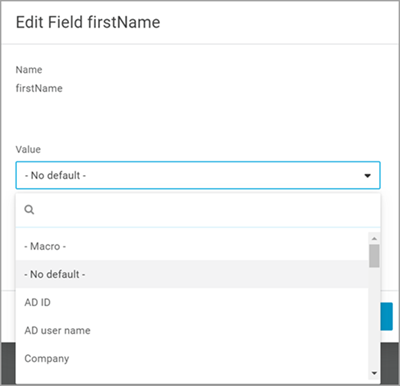
From the Value drop-down, select First Name, and click Save.
 Note:
Note:These attribute labels are strictly case-sensitive and if mapped differently or hold invalid characters, the authentication will fail. Hence, ensure that you have entered the correct syntax of labels as stated in the table below.
Repeat steps 10 to 12 to add the following attribute mappings:
Application Attributes Values firstName First Name lastName Last Name email Email objectGUID OneLogin ID The end result should resemble this: