
Activity 11: Pencil cut3
In this activity, we will use use the 3D Pencil strategy again, to reduce the amount of stock in the corners of the cavity, with a smaller tool.
Previously we used a 2 mm ball mill. Now we will use a 1 mm ball mill.
Prerequisites
- Activity 10 is complete.
Steps
Start a new 3D Pencil operation and, from the Tutorial Tools (Metric) library, select the #24 - Ø1 mm R0.5 mm ball tool.
- On the Manufacture toolbar, Milling tab, select 3D > Pencil
 .
. - On the Tool tab
 , click Select. This opens the tool library.
 - In the Tool Library dialog, select Fusion Library > Tutorial Tools (Metric).
- From the list, select #24 - Ø1 mm R0.5 mm (Ball end mill).
- Click Select.
- On the Manufacture toolbar, Milling tab, select 3D > Pencil
Stepover cut value, cut angle.
- Click the Passes tab
 .
. - Set Stepover to .05 mm.
- Set Number of Stepovers to 15.
- Click OK to begin calculating the toolpath.
- Click the Passes tab
Activity 11 summary
In this activity you selected a 3D Pencil finishing operation and used a smaller tool to clean out the fine corners.
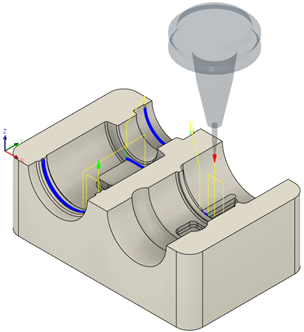
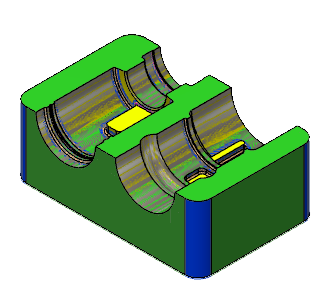
| The calculated toolpath is shown below. | The Simulated toolpath is shown below. |
 |
 |
The toolpath is shown with a red arrow start, yellow rapid move, green lead in/out move, blue cutting moves and a green arrow at the end.
The part is now finished within the tolerances specified in the various operations, and the only stock that is remaining is that between the stepovers of the various toolpaths. To obtain an even better finish, edit the operations and use a higher tolerance and smaller steps in the toolpath.