
Activity 3: Create features for the turbine model
In this activity, you open the sample file Turbine and save it to a personal folder. You use the pattern and mirror tools to create a 2-sided turbine from a base and blade. The order in which you create the features is important if you want to minimize the number of features.
First you finish the blade by patterning the cut along it. Next you pattern the blade around one side of the turbine, and finally, you mirror the pattern on the underside. Mirroring as the last step means you avoid having to pattern the blades on both the top and the bottom of the turbine separately, and thereby ensure that the blades are symmetrical on both sides.
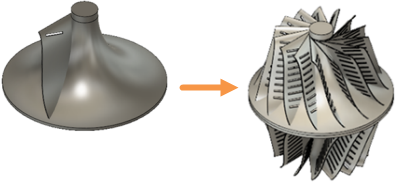
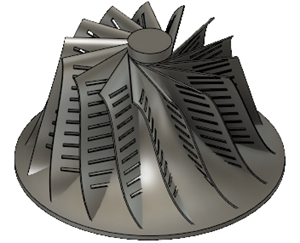
Turbine model starting shape (left), and with added features (right).
Prerequisites
- Fusion is started.
- Data file location: Samples > Basic Training > 04-Modeling > Turbine.f3d
Steps
Open the sample file, Turbine, and save it to a personal project.
Note: Refer to Activity 1 for detailed instructions.Finish the blade by patterning the cut along it, to create a total of 10 cuts that extend a Distance of 80 mm down the blade.
Click Design > Solid > Create > Pattern > Pattern on Path
 to activate the Pattern on Path tool.
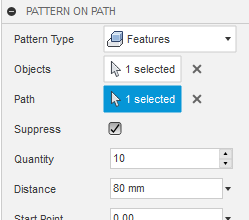
In the Pattern on Path dialog, set the Pattern Type to Pattern Features
 .Note: The object you are patterning is an extruded cut in the blade, so the pattern type is a feature. Roll back the timeline to before the last extrusion to see this.
In the Pattern on Path dialog, confirm that Select
 associated with Objects is activated, then select the extruded cut of the turbine blade on the timeline as the object.
In the Pattern on Path dialog, click on Select
associated with Path to activate it, then select the outside longitudinal edge of the blade as the Path.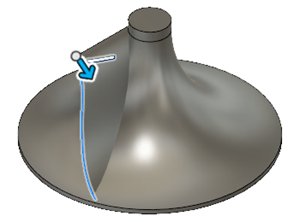
In the Pattern on Path dialog, enter a Distance of 80 mm with a Quantity of 10.
Click OK to complete the tool and close the Pattern on Path dialog.
Create 15 blades in total in a circular pattern around the turbine top.
Click Design > Solid > Create > Pattern > Circular Pattern
 to activate the Circular Pattern tool.
In the Circular Pattern dialog, set the Pattern Type to Bodies
 .Note: The object you are patterning is Body3 in the Browser, the blade, so the pattern type is a body.
In the Circular Pattern dialog, confirm that Select
associated with Objects is activated, then click on the blade to select it as the only object.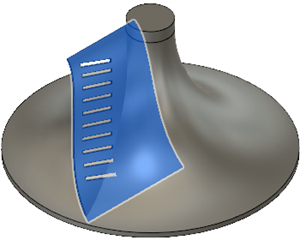
In the Circular Pattern dialog, click on Select
associated with Axis to activate it, then click on the circular edge at the base of the turbine as the axis.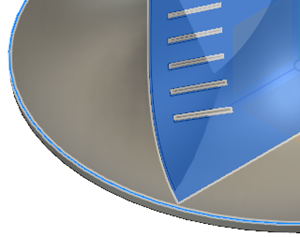
In the Circular Pattern dialog, set the Type to Full
 and the Quantity to 15.
Click OK to complete the tool and close the Circular Pattern dialog.
Mirror the blades from the top of the turbine to create a symmetrical set of 15 blades on the bottom of the turbine.
Click Design > Solid > Create > Mirror
 to activate the Mirror tool.
In the Mirror dialog, set the Pattern Type to Bodies
.Click the Top view on the ViewCube, and window select all the bodies, that is the base and 15 blades, as Objects.
 Note: Confirm that 16 objects are selected in the Mirror dialog.
In the Mirror dialog, click Select
associated with Mirror Plane to activate it, then click on the bottom of the turbine base to select it as the Mirror Plane.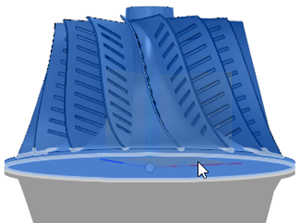
Click OK to complete the tool and close the Mirror dialog.
Go to Activity 5 to check your modifications.
Activity 3 summary
In this activity, you used the pattern and mirror tools to create a 2-sided turbine from a base and blade.
You accomplished this task using the following tools:
- Pattern on Path
- Circular Pattern
- Mirror