Using this option, you can define or modify the appearance of a printout of summary tables.
To begin defining the printouts, open the Table printout manager dialog from:
- Menu: Formwork Drawings > Tables > Table Printout/Export/Edit
- Ribbon: ASD - Drawings > Tables > Table Printout/Export/Edit
- Toolbar: Tables > Table Printout/Export/Edit

- Command line: RBCX_LIST_EXP.
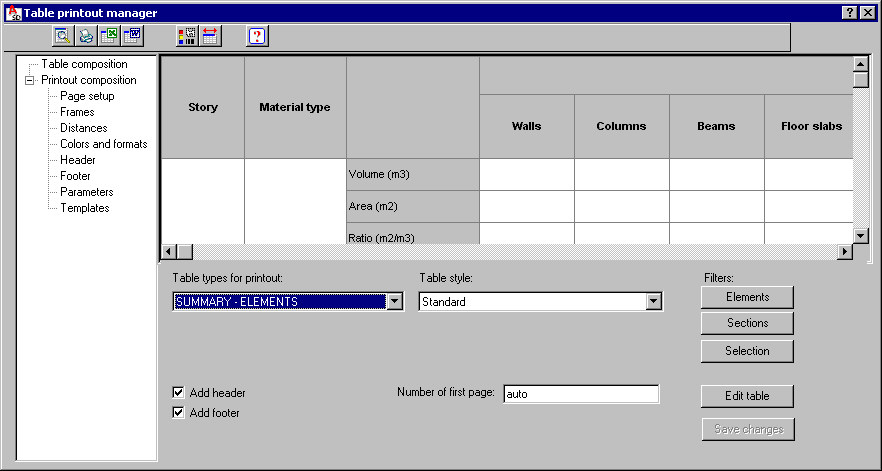
In the left panel of the dialog, select a component of the printout for which you will specify parameters:
- Table composition
- Printout composition
o Frames
o Header
o Footer
In the main part of the dialog, you specify parameters relevant for the component selected on the left. The upper part of the dialog displays the layout of a selected table type.
Use the icons at the top of the dialog to work with the table:
|
|
Printout preview - click this to open a preview of a table printout; return to the Table printout manager dialog by clicking Close. |
|
|
Print table - click this to start printing a table. |
|
|
Save table - click this to open the Save As dialog, where you can save a table in the MS Excel® format. A table may be saved to: *.CSV (Comma Separated Values) files - text files *.XLS files -table settings can be seen in a preview window |
|
|
Save table (MS Word®) - click this to open the Save As dialog, in which you can save a table in an MS Word file of the specified name. |
|
|
Save graphical settings - click this to save the current settings of the printout manager. |
|
|
Automatic adjust of column width to header text - click this to adjust the width of table columns to the length of names of table columns. |
|
|
Help - click this to open the Help file. |
Although a table shape (cell height, column width) depends directly on a defined table style, you can determine a cell height or a column width.
When you right-click in a table, use the context menu options to modify the table:
- table cells - group (merges several table cells into one cell) and ungroup
- text orientation - vertical, horizontal
- inserting or removing a column from the table
- inserting or removing a row from the table.