Review the camera symbol configuration options and learn to set up the camera symbol for detailing use cases.
Model camera setup and detailing results
The way the camera symbol is detailed depends on how the camera is configured in the model, and on the camera view direction in the model.
| Unlimited | Both the xy viewport and the depth are set to unlimited, with no fixed boundaries. Advance Steel will not be able to display a symbol for the camera, and it will show only the label for the camera, pinpointing the center of the model camera. |
| Limited depth and unlimited xy viewport |
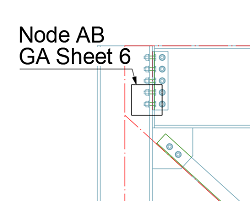
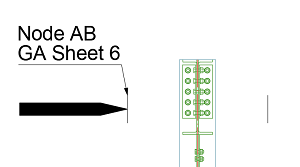
The view of the drawing is along the camera view direction, the symbol displayed on the drawing will be a small rectangle, with a fixed size (in this case, the rectangle would have to display the xy viewport, which is set to unlimited):  When the view is perpendicular on the camera view direction, the fixed depth is visible in the view, the camera symbol will be represented by two parallel lines, marking up the two boundary plans:  |
| Limited depth and xOy viewport | In this case, the symbol will appear as a rectangle or as a circle, highlighting the size of the box regardless of view direction. |
Configure a Drawing Style for Cameras
To detail cameras using the symbol presentation on general arrangement drawings, you need to define a new object presentation in the drawing style:
- In the Output tab
 Document Manager panel, click
 (Drawing Style Manager).
- In the Drawing Style Manager, browse to a drawing style (use an Elevation drawing style, for example).
- Expand the drawing style and click Object Presentation.
- Click
 (Add a new object presentation) to add a new line in the object presentation definition list on the right side of the Drawing Style Manager dialog.
- Configure the new object presentation:
- Model objects: Browse the list to the Cameras category and select one of the options from the list (e.g. Camera Node).
The model object definition contains:
- the model object (Camera) which is the internal association with the camera model object.
- the model role (Camera Node, Overview Camera, etc.) - preset roles that link the camera object to a camera type, set in the model.
- Presentation: to obtain the camera symbol on general arrangement drawings, select Symbol from drop-down list in the Presentation field.
- Labeling: The camera symbol can automatically receive a label through the drawing style configuration. This label shows relevant information about the camera properties (description, type, viewport settings), and a reference to the drawings generated using that camera.
To setup a labeling strategy for the camera:
- Expand the drawing style.
- Expand Objects presentation.
- Expand Cameras - All, and click Labeling strategy.
- On the Labeling strategy tab, set the following:
- Generic label properties (text direction, leader line).
- In the Label content section
 Used for object, select Cameras from the drop-down list. This will filter out the tokens available for cameras in the label editor section.
- Configure the label content with the tokens available for cameras. Set the text formatting as needed.
Note: The tokens available for camera symbol labels are:
- Camera Detail Number: The name of the drawing(s) created from the model camera using a camera process, for example.
- Camera Front: the value of the front depth distance (if the model camera has a bounded z-viewport).
- Camera Rear: the value of the rear depth distance (if the model camera has a bounded z-viewport).
- Camera Type: the type of the model camera.
- Camera Type Description: the model camera description text.
- Camera Viewport: the model xy-viewport setting - automatic or fixed.
- Camera X Delta: the value of X-delta viewport size, if the viewport is set on Fixed.
- Camera Y Delta: the value of Y-delta viewport size, if the viewport is set on Fixed.
- Model objects: Browse the list to the Cameras category and select one of the options from the list (e.g. Camera Node).