- For information about managing Time Editor Tracks, such as resizing, muting, or copying, see Working with Time Editor tracks
- For information on editing the clips's animation curve, see Modify Time Editor Clips in the Graph Editor.
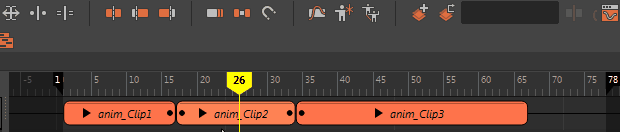
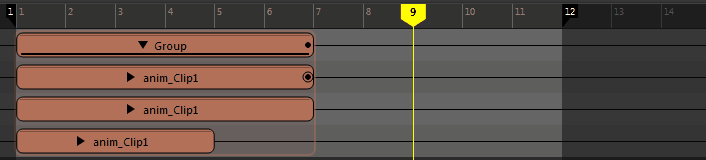
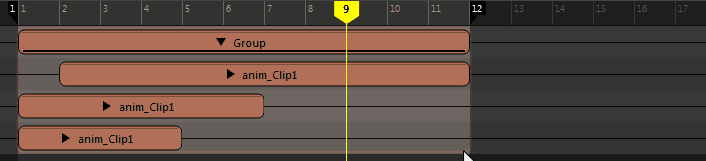
- Move clips
- Click on a clip, and drag it to the left or right. Using the marquee rectangular selection, you can select multiple clips in the time view to move all of them simultaneously.
- Split clips
- Select a clip, move the Current Time Marker to the desired split location, and press 1.
See Ripple edit clips (below) for information on Ripple editing clips so that neighboring clips compensate for the missing clip.
 Note: You cannot split a clip once a Hold or Looping has been applied to it. Make it into a Group clip and split it instead.
 - Copy clips
- Select a clip, press Ctrl-C, move the
Current Time Marker to the desired paste location, and press Ctrl-V.
Important: When an Animation Source is being reused elsewhere in the Time Editor, all instances of its title are italicized. This is to help you avoid modifying the clip if you modify an Animation Source clip in a composition. Be careful not to open the Graph Editor and move a key on the animation, or you will change the source animation.To create a version of an Animation Source so you can make edits to, right-click the clip and Make Animation Source Unique from the Time Editor clip contextual menu. This lets you make the selected Animation Source independent from its originating clip.
-
Scale

- Lets you speed up or slow down the clip's animation. Select
Scale from the
Edit Mode menu, and place your cursor to the left or right edge of a clip. Notice the change in cursor look. Drag the cursor to scale.

The scale percentage appears at the top of the clip.
Tip: You can also press R with a clip selected to activate Scale mode.Note: Special symbols appear at the trimmed or expanded edge of a clip to show the state of the animation contained inside. See Time Editor clip symbols for more -
Trim

- Lets you set the in and out points of a clip so that only part of the original source contributes to the clip. Select
Trim from the
Edit Mode menu, and place your cursor at the left or right edge of a clip. Notice the change in cursor look. Drag the cursor to trim.

A negative number on top of the clip indicates the number of frames trimmed.
A white dot on a child clip indicates that it is trimmed because of the parent clip. The white dot does not appear if a child clip is too small to display.

A black dot on the trimmed clip indicates that there is animation outside the clip.
See Time Editor Clip symbols for more.
-
Tip: Trim mode is the default Edit mode for the Time Editor. You can also press E with a clip selected to activate Trim mode.
- Ripple Edit clips
- Lets you resize a clip in the Timeline without affecting the neighboring clips. When this option is active, changes you make to one shot in a clip propagates to other shots, so that if you lengthen one shot, other shots move to maintain their distance from the modified shot.
- Activate Ripple Edit mode by clicking the Ripple icon
 on the
Time Editor toolbar.
on the
Time Editor toolbar.
 Note: Ripple Edit mode affects only clips to the right of the edit. Clips to the left of the edit are unaffected.
 -
Loop

- Lets you repeat a clip's animation multiple times sequentially. Select
Loop from the
Edit Mode menu, place your cursor at the left or right edge of a clip, and drag to loop.

To adjust the looping, click and drag the edges of the looped area of the clip. A Loop After value (0.3 in the above figure) appears to indicate the number of loops the clip contains. If you loop the left side of the clip, then it is the Loop Before value. When you scale, trim, or loop a clip, the virtual border of a clip becomes the real border to perform all edit operations.
Tip: You can also press T with a clip selected to activate Loop mode. - You can set looping at clip start and end separately, with the Clip Loop Before Mode/Clip Loop After Mode in the Attribute Editor. There you can find two types of Looping modes, Cyclical, which makes the animation repeat itself, and Progressive, which repeats animation with an offset so you can use it to create a walk cycle. For a description of these two looping methods, see Types of Loops in the Time Editor.
-
Note: You cannot split a clip once a Hold or Looping has been applied to it. Make it into a Group clip and split it instead.
-
Note: To use Animation layers with a looped clip, create a Group clip from it, and then add layers to the Group.
- See also:
-
Hold

- Lets you extend the last pose frame of a clip for a specified period of time. Select Hold from the Edit Mode menu, and place your cursor to the left or right edge of a clip. Notice the change in cursor look. Drag the cursor to the desired Hold length.
-
 Tip: You can also press Y with a clip selected to activate Hold mode.
 -
Note: You cannot split a clip once a Hold or Looping has been applied to it. Make it into a Group clip and split it instead.
- Extend parent clips
- Resizes a Group clip to include the full length of a clip contained within it. When you edit a clip (moving, trimming, or scaling) inside a Group clip, you cannot extend it beyond the border of the Group, its parent. This is because the child clip is always constrained by the parent.
Note: The Extend Parent option expands the Group clip to accommodate the selected clip's complete animation only.
To extend a parent clip
- Right-click a clip inside a Group clip and select Extend Parent from the Time Editor Clip contextual menu
- Drag the edge of the Group clip to manually extend its duration
-
Note: Extension of Group clips occur only if the border of a child clip is inside the range of the parent clip. If a child clip is already outside the range, then the group clip does not extend. See Edit clips inside a Group clip. - Crossfade clips
- Overlap any two adjacent clips. Crossfading occurs in the overlapped regions.
-
- You set options about the type of crossfade to use, or create a custom crossfade effect in the Crossfade options in the Clip contextual menu.
- Key on clips
- You can keyframe on top of an animation clip with Clip Layers, similar to how you can add animation layers to animation in Maya.
Note: You cannot drive animation with both Animation Layers and Clip Layers in the Time Editor as this will create conflicts.
- See Add Clip Layers to the Time Editor.
- Weight clips
-
When you adjust the weight of a clip, you control how much influence it has compared to the other clips in the resulting animation. The higher the mix weight, the more strongly the clip contributes to the animation.
- See Key Time Editor clip weights.
- Rename clips
- Right-click a clip and select Rename from the Clip contextual menu.