Use the Create Composite Curve toolbar to merge adjacent arcs, lines, curves, and surface edges into one composite curve. It has similar functionality to PowerSHAPE's composite curve creator.
Click Curve Editor tab > Create panel > Curves > Composite to display the Create Composite Curve toolbar.

You build a composite curve from existing geometry, starting by selecting a curve or surface. Where you select the curve or surface determines the default direction. Then the options enable you to guide the path of the curve to create a composite curve.
The Create Composite Curve toolbar works on curves (not surfaces). If a surface is in an area of interest, it selects the surface edge curve and operates on that. This edge curve is always a complete closed loop that goes all the way around the perimeter of the surface.
This toolbar contains the following:
-
 Surface marker — Click to display the surface markers. The surface markers use the same colour scheme as the curve selection:
- Pink indicates the surface edge automatic sketching follows.
- Yellow indicates alternate surface edges.
- Blue indicates the current surface for the current curve.
- Grey indicates an alternative surface for the current curve. This is an option you are unlikely to use because it returns to the start point, but along the other surface. For more information, see Selecting curves to create a composite curve.
-
 Reset — Click to go back to the start and deselect all curves. It still displays the Create Composite Curve toolbar.
 -
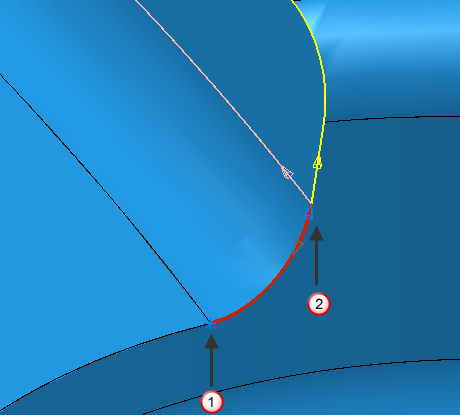
 Marker point 1 — When sketching a composite curve, click
  and then click on a curve to specify the marker point. The marker points prevent the composite curve progressing beyond this point. If the composite curve does not meet this marker point, the marker point has no effect on the composite curve.
 -
 Rewind — Click to go back to either the previous branch point, or the beginning (if no branch points exist).
Starting with:
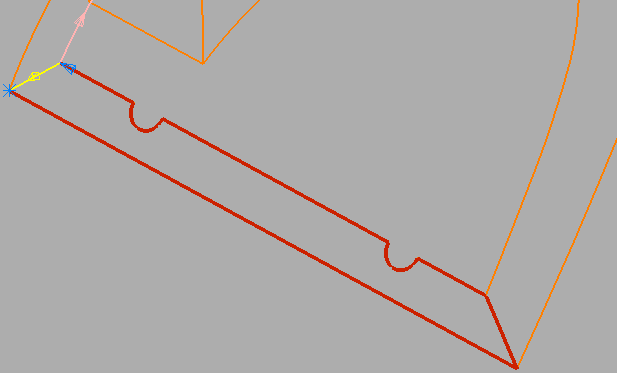
Click
 to give:
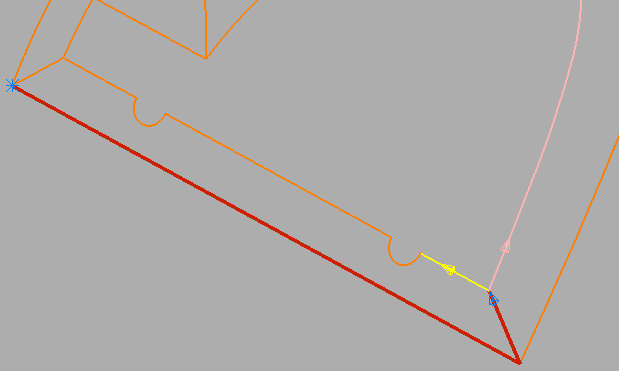
-
 Backward — Click to go back to the previous curve. This takes you back to where two or more curves meet, so it may not take you back as far as the previous branch point.
Starting with:

Click
 to give:
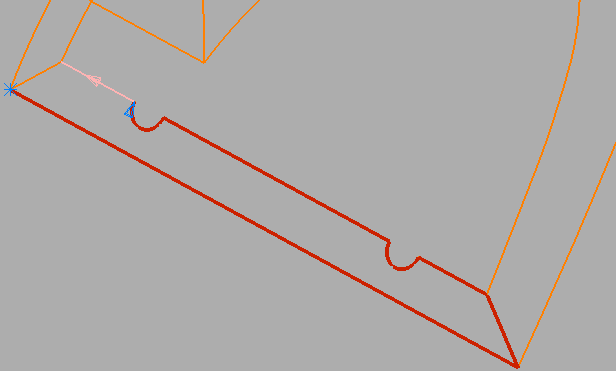
-
 Forward — Click to proceed to either the next branch point, or the end (if no branch points exist).
 -
 Fast Forward — Click to proceed along the automatic path as far as possible.
 -
 Marker point 2 — When sketching a composite curve, click
  and then click on a curve to specify the marker point. The marker points prevent the composite curve progressing beyond this point. If the composite curve does not meet this marker point, the marker point has no effect on the composite curve.
 -
 Reverse — Click to change the direction of the curve.
Starting with:
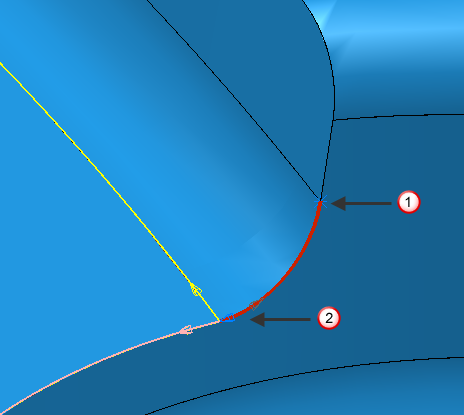
Clicking
 gives:
 Start point
 Curve direction
 -
 Save and Restart — Click to save the current selection as a composite curve. This still displays the Create Composite Curve toolbar, so you can create another composite curve in this pattern or boundary.
 -
 Direction — Hover over the button to display the Direction toolbar. The option you select determines the default direction at a branch point. When PowerMill encounters a branch point, the composite curve creator displays the choices using an arrow and colour.
 -
 Curve fitting — Hover over the button to display the Curve fitting toolbar. The toolbar contains options which enable you to select the type of curve fitting you want, or to keep the curve embedded.
-
 No curve fitting — Click to keep curves embedded.
 -
 Spline selected — Click to convert the selected segments into a spline.
 -
 Arc Fit selected — Click to arc fit selected segments. This smooths curves.
 -
 Polygonise selected — Click to convert the selected segments to a series of straight lines.
-
-
 Composite curve creator options — Click to display the Options dialog with the Composite curve creator page displayed.
 -
 Accept changes — Click to accept the current composite curve and closes the Create Composite Curve toolbar.
 -
 Cancel changes — Click to delete the current composite curve and closes the Create Composite Curve toolbar.