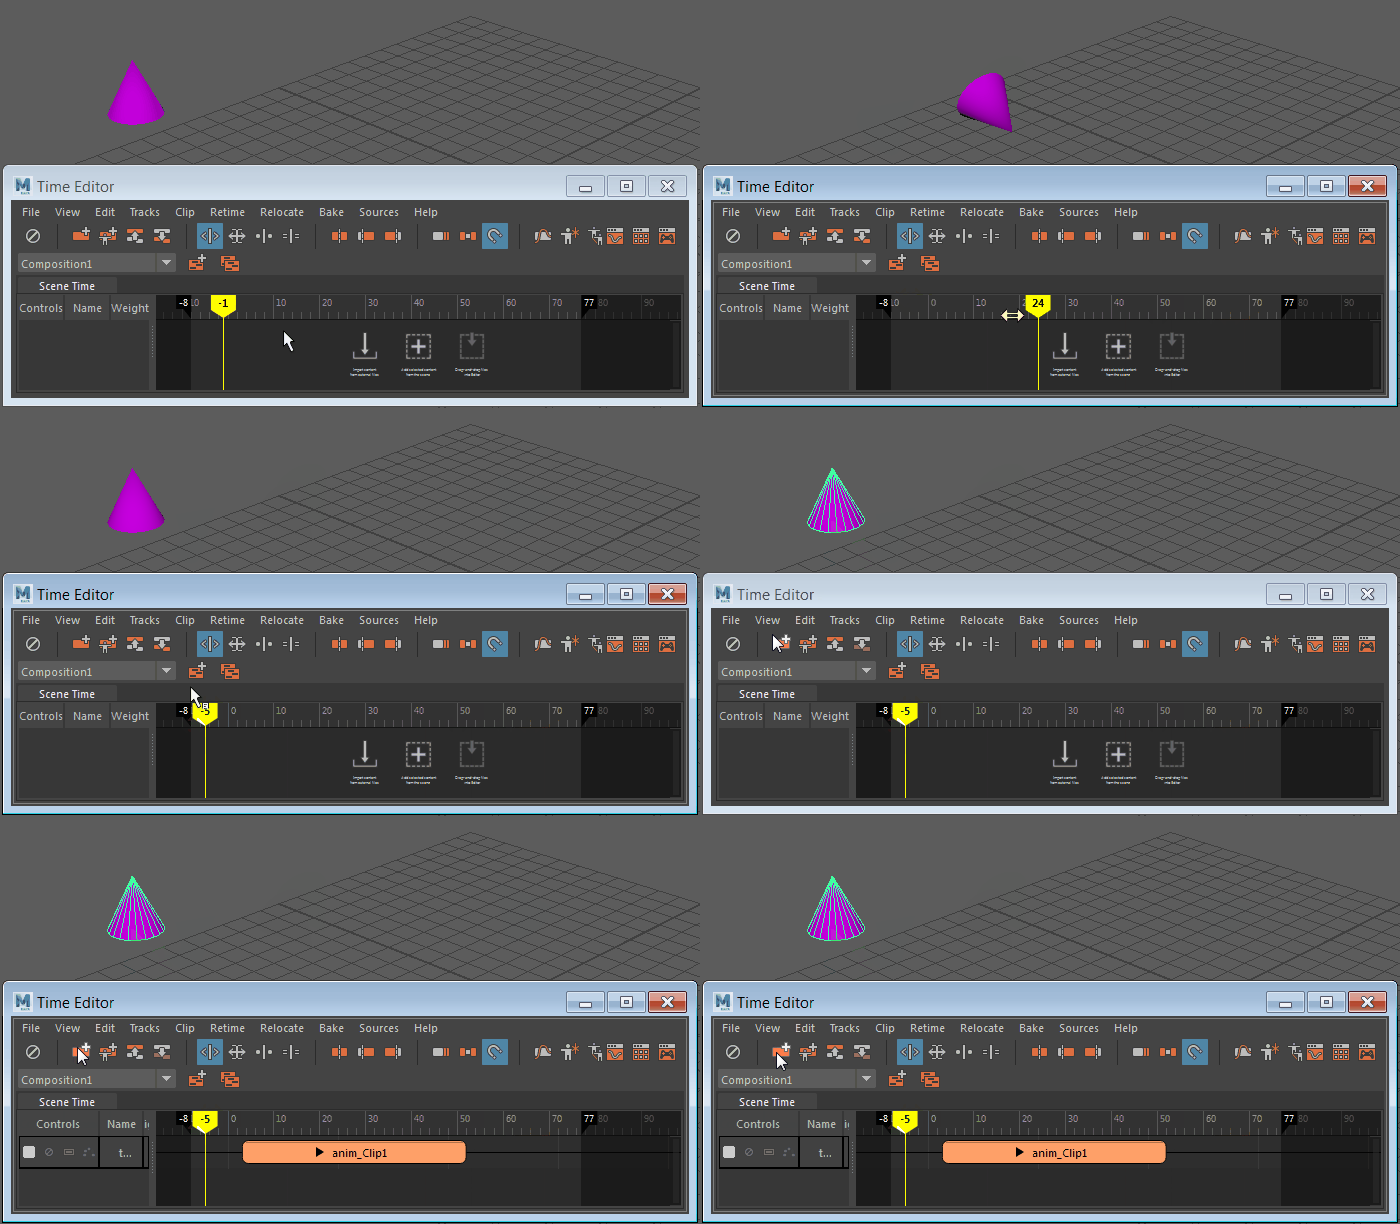
Clips are the building blocks of the Time Editor. Any keyable object, (such as a character, camera, object, material and so on,) can become a clip in the Time Editor. If you can keyframe it, it can become an animation clip in the Time Editor.
Create Time Editor Animation clips
To create an animation clip from a simple object or attribute in the Viewport
- Select the object/attribute in the Viewport.
Note: When you create an Animation clip in the Time Editor, ensure that you select the object's complete hierarchy to ensure that it is incorporated in the new clip. Otherwise, your clip will not have all the animation incorporated with it and it won't play. (If you are animating a rig, select the rig and use to include all associated attributes.)
- In the Time Editor, select
 Create Clip from Selection from the
Time Editor menu bar.
A clip appears that lasts the duration of the animation.

To create a clip from an object in the Outliner:
- With an object already in your scene that is animatable, such as a Character Rig or object, open the Outliner () and select the object(s).
- Expand timeEditor Sources to view all the animation sources in the scene.
- Middle-mouse-drag an animation source onto an animation track in the Time Editor.
The animation source drives the object.

Other kinds of Time Editor Clips
You can also create Time Editor clips out of audio files, which let you access some mixing capabilities. You can also import single-frame poses and create Pose clips from which you can create animation. Lastly, you can create Layer clips from Animation clips, which let you non-destructively layer new behavior on top of existing animation.
Create Audio clips in the Time Editor
Import audio files into the Time Editor to add a soundtrack to your animation.
To create an Audio clip
- In the Time Editor, select ClipAudio clip from the Time Editor menu bar.
- In the File browser that appears, navigate to the audio file you want to use as a Time Editor clip.
You can also drag an audio file into the Time Editor Track View area to create an Audio Track.
See Add audio to the Time Editor for more.
Create Pose clips in the Time Editor
To create a Pose clip from a simple object or attribute
- Select the object/attribute.
- In the Time Editor, click
 Pose Clip from Selection from the
Time Editor menu bar
You can also create a one-frame-long Pose clip that you can blend with transitions to create animation. See Create animation from Pose clips.
Create Clip Layers in the Time Editor
To create a Clip Layer
- Right-click an animation clip, and select Create Override or Create Additive from the
Clip contextual menu. (You cannot create Clip Layers for audio clips or pose clips).
Tip: You can group-select multiple Clips/Group clips and/or the appropriate scene objects and create a Layer clip.
A grey Clip Layer appears above the animation clip on the track. See Time Editor Layer clip contextual menu.
Drag a Layer clip in the track view to rearrange them. Remember that reordering clips affects clip evaluation, which is also dependent on the blend mode and weighting. See Layer Clip contextual menu for Layer clip options.