
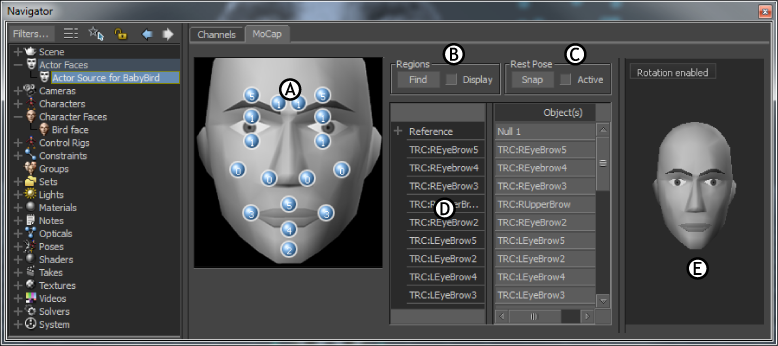
MoCap pane
The MoCap pane lets you map markers to drive the Actor Face. The markers can be, for example, a set of optical markers imported from a Vicon .c3d file, or a set of sensors connected to a live device.
The mapping process involves defining nodes that control the movement of certain face regions. In the Actor Face settings, these nodes control areas such as the eyebrows, eyes, cheeks, nose, mouth, and so on.
The MoCap pane consists of the following:
- A. Mapping Model
- B. Regions area
- C. Rest Pose area
- D. Marker Set list
- E. Mocap Preview area
Mapping model
The Mapping model is a visual representation of the Actor Face that shows the number of markers affecting each facial part. The mapped markers are collectively called a Marker set. The following figure identifies the cells in the Mapping model that represent each facial part.
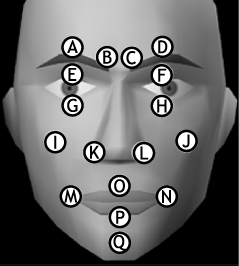
A. Right outer eyebrow B. Right inner eyebrow C. Left inner eyebrow D. Left outer eyebrow E. Right upper eye F. Left upper eye G. Right lower eye H.*Left lower eye *I. Right cheek J. Left cheek K. Right nostril L. Left nostril M. Right mouth N. Left mouth O. Upper mouth P. Lower mouth Q. Chin
Regions area
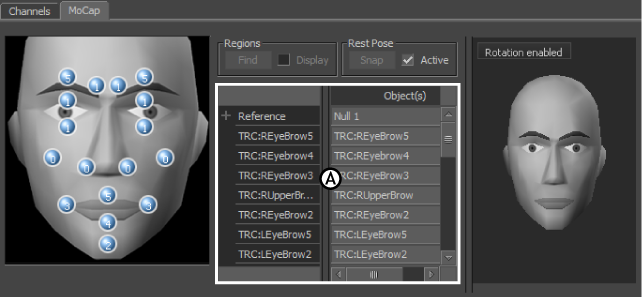
After setting up the Marker Set list, use the Regions area to define the zone of movement for the model’s main facial components. The Regions area is available only when the Active option in the Rest Pose area is disabled, and consists of the Find button and the Display option.
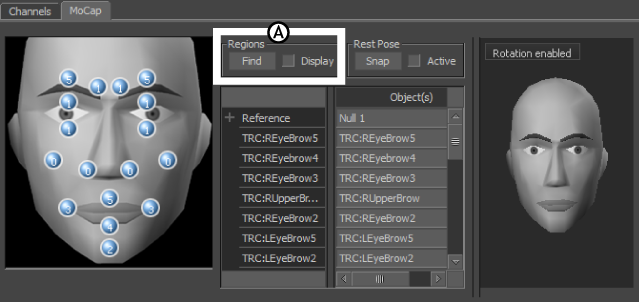
MoCap pane A. Regions area
Find
The Find button automatically defines the zone of movement for the facial markers using bounding boxes around the mouth, eyes, cheeks, nostrils, and eyebrows. The face must be in the rest pose and be pointed towards the Reference positive Z-axis.
Display
To display the bounding boxes in the Viewer window, activate Display after clicking Find. Bounding boxes appear as purple cubes around the eyes, eyebrows, cheeks, and mouth of your face model.
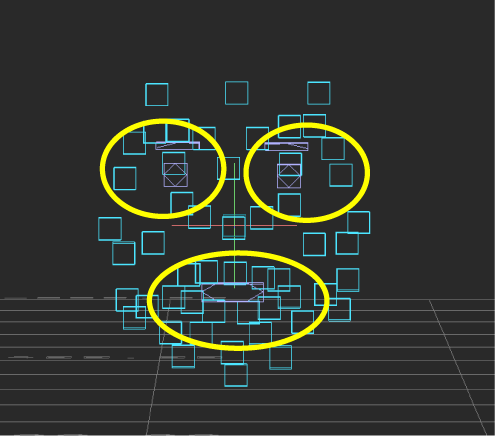
Bounding boxes display in purple around the eyes, eyebrows, and lips of the optical sensors. Cheeks and nostrils are not defined for this Marker set.
Bounding boxes are Rigid bodies that limit the area in which of your face model can move. If the shapes are set to move outside of a bounding box region, they do not reach to their full values.
You can scale the global movement using the bounding boxes. For example, if there are not enough face markers, you may want to define facial areas so that they fit the boxes more accurately.
When you scale bounding boxes, you affect the volume and shape that the box defines. For example, increasing the size of the bounding box for the mouth decreases the range of movement. Conversely, decreasing the size of the box increases the range.
The data for the bounding boxes comes from the optical sensors that you used to define your Marker set
| Right Eye | Upper and lower right eye sensors (2) |
| Left Eye | Upper and lower left eye sensors (2) |
| Right Eyebrow | Inner and outer right eyebrow sensors (2) |
| Left Eyebrow | Inner and outer left eyebrow sensors (2) |
| Mouth | Right, left, upper, and lower mouth sensors (4) |
| Right Cheek | Right cheek sensor |
| Left Cheek | Left cheek sensor |
| Right Nostril | Right nostril sensor |
| Left Nostril | Left nostril sensor |
Remember that both the size of your optical sensors and of the bounding boxes in the Viewer window are adjustable, so the bounding boxes might not match their corresponding optical sensors exactly.
Rest Pose area
The Rest Pose area consists of the Snap button and the Active option.
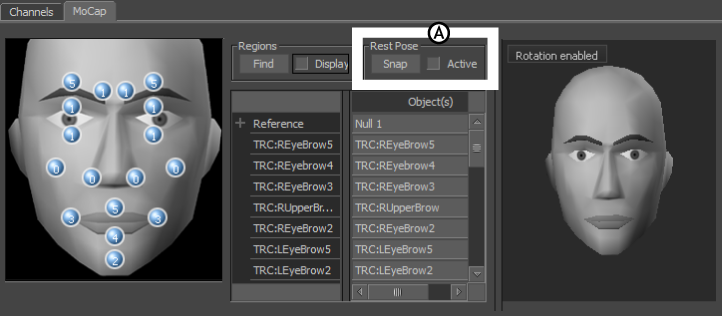
MoCap pane. A. Rest Pose area
| Option | Description |
|---|---|
| Snap | Use the Snap button after creating the Marker set and setting the regions. Click Snap to compute slight positioning differences between the Marker set and the sensors the Marker set uses, and to set the starting point of the face. The Actor Face settings use the rest pose of the face as the default starting point. |
| Active | Clicking Snap automatically enables the Active option and activates the mapping. When activated, the remaining options in the Rest Pose and Regions areas are disabled. To make any changes in the Mapping List, you must disable the Active option. |
Marker Set list
The Marker set list lets you define a Marker set for mapping motion data to the Actor Face. The mapped areas define the facial parts on your source model that relate to the motion sensors on a performer.
MoCap pane A. Marker set list
For example, you can see motion sensors on the performer’s face in the following image. The marker names in the list indicate where the sensors or markers drive the model, and where they eventually drives the Character’s facial shapes.
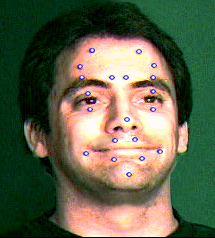
Performer with facial motion sensors
The first item in the Marker Set list is the Reference field. Setting a reference with Rigid body sources lets you stabilize the head movement. The reference represents the head bone from which the markers move.
To scroll through the Marker Set list, you can Shift-drag up or down. You can rename a marker in the Marker Set list by double-clicking the marker to select it, typing a new name, and pressing Enter.
To delete a marker, select the marker in the Marker Set list, then press Delete. To delete all models in the Marker Set list, click the Model heading at the top of the column. In the dialog box that appears, click Ok to delete all models in the list.