
Viewing a part in sections along the cardinal axes or a custom axis, and setting up plane cuts
Jump to:
- Controlling clip plane position
- Placing the custom clip plane
- Switching visibility
- Focusing on cross sections
- Proceeding to cutting with a plane
Controlling clip plane position
Several methods affect the positions of clip planes across occupied space within the buildroom
-
Sliders, slider buttons, and slider space
- Move the slider, click the slider buttons, or click in the space directly left and right of the slider
-
Numerical input
- Type the value
- Press Enter or click outside the input box
-
Context menu
- In the Clip planes view, right-click the section of the clip plane to set.
- Choose Set cut in <axis>.
- In the 3D display, click the part in the location where the respective plane should cut through.
-
Keyboard shortcuts
- Use Shift+WASDQE to move the planes along X, Y, and Z
- Adjust the shortcut stepping for all four planes together, or each one individually through the clip plane
Settings dialog

Configure the steppings and save them as an easily recalled setting
Placing the custom clip plane
The custom clip plane lets you view the cross section of parts at any angle, not just perpendicular to X, Y, or Z.
-
To angle the plane parallel to a triangle
- In the Clip planes view, right-click the Custom section.
- Choose Set custom plane by parallel point.
- In the 3D display, click the part in the location which should determine the clip plane's orientation.
To angle the plane through three points
- In the Clip planes view, right-click the Custom section.
- Choose Set custom plane by 3 points.
- In the 3D display, click the part in the three locations where the plane should cut through.
Note: The order in which you set the points determines the direction of the view axis.
Setting the points clockwise, "positive" is behind the points.
Switching visibility
To select which side of a clip plane to show or hide (or make transparent, if set), click on the box between the axis name and the slider.
 Toggle visibility of the section towards the negative of the view axis
 Toggle visibility of cross section highlighting
 Toggle visibility of the section towards the positive of the view axis
- By default, the clipping line only shows on when at least partially unobstructed. Toggle
 Settings > Settings > Display > Clip planes show inner sections to
yes to be always visible even if solid part surface would obstruct it.
Settings > Settings > Display > Clip planes show inner sections to
yes to be always visible even if solid part surface would obstruct it.
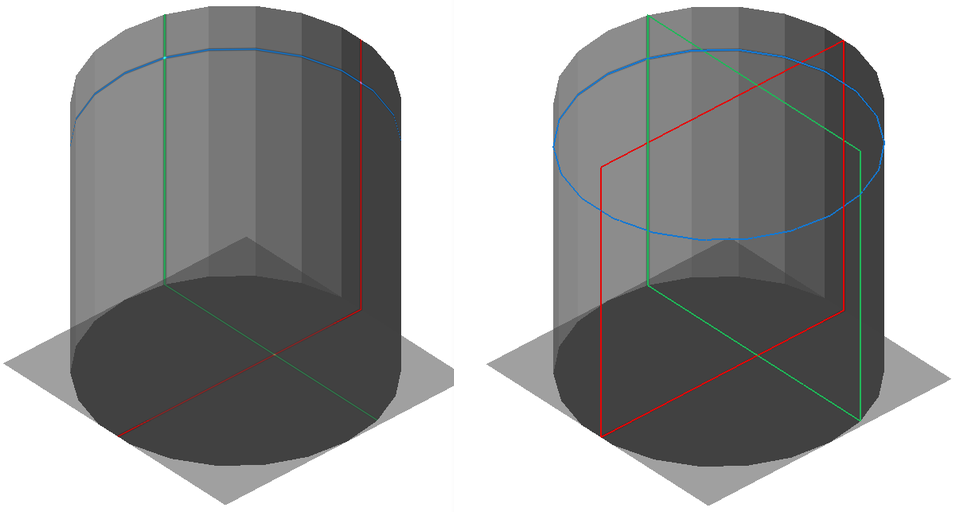
Visualize cross-sections by switching the clip planes to show on inner sections, too.
Focusing on cross sections
Focusing turns both sections from a clip plane invisible and only leaves the highlighting visible. It also changes the perspective so that you can see it straight on.
- In the Clip planes view, right-click the section of the clip plane to set.
- Choose Focus on cut in <axis> or Focus on custom cut, respectively.
Proceeding to cutting with a plane
- Bring the clip plane in the desired position and orientation.
- From the main menu, choose
Modify >
 Cut > Plane cut.