
Showing and hiding layers
Jump to Mobile or Windows 10
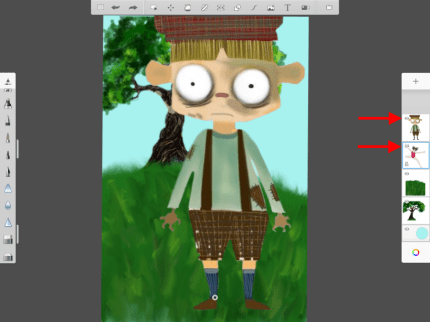
There are times when you will want to show/hide layers, such as for less visual distraction when working on a specific area of your composition, to see how one variation of a design looks compared to another, to add/remove a logo, place something else in the scene, or remove an element. As you work on larger or more complex compositions, the Hide feature will come in quite handy.
- To hide a layer, tap the layer's
 icon. It changes to
  , indicating the layer is hidden.
 - To show a layer, tap the layer's icon. It changes to , indicating the layer is now visible.
Showing and hiding layers in SketchBook Pro Desktop
From the toolbar, tap ![]() , if the Layer Editor is not visible. To hide a layer (not see them), there are two ways of doing this
, if the Layer Editor is not visible. To hide a layer (not see them), there are two ways of doing this
In the Layer Editor, within the layer, tap
 . This will turn the content on that layer off.
In the Layer Editor, if you tap the icon in the center of the layer
 , this will open a marking menu containing layer tools. Select
  .
.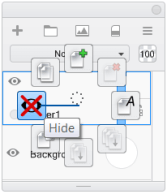
If you want to make a layer visible again (see it), either tap
 to display the content or select Show in the layer marking menu.
Showing and hiding layers in SketchBook Pro Mobile
If the Layer Editor is visible by default, do the following:
- On a tablet, the Layer Editor is along the right of your screen.
- On a handheld device, tap
 to access the Layer Editor.
In the Layer Editor, tap a layer to select it.
Within the layer, tap
to hide the layer. This will turn the content on that layer off.To make a layer visible again, tap
to display its content.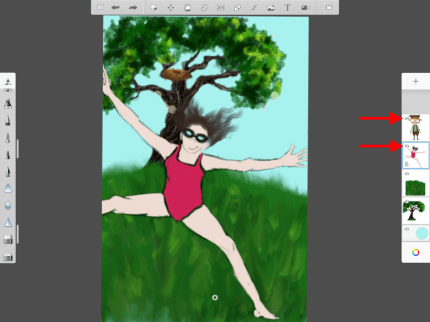
Showing and hiding layers in SketchBook Pro Windows 10
If the editor isn’t open, in the toolbar along the top, tap  and select Layer Editor.


In the Layer Editor, tap a layer to select it.
Tap-hold
 and swipe and select
  .
.Tap it again to show a layer.
INFORMATION: You can also hide a layer by tapping
in the layer.