
Set up SSO with CyberArk
This section explains how to set up your SSO connection using CyberArk as the identity provider, so that users can sign in to Autodesk with their organization’s email address. This connection uses SAML (Security Assertion Markup Language) to allow Autodesk to communicate with CyberArk to authenticate users. To enable this communication, you will need to add metadata from CyberArk to Autodesk and vice versa.
Page Contents:
Register Autodesk SSO as an app on CyberArk
Add CyberArk metadata to Autodesk
Register Autodesk SSO as an app on CyberArk
To set up SSO, register Autodesk as an SAML app on CyberArk.
Sign in to CyberArk portal using an account that has admin privileges.

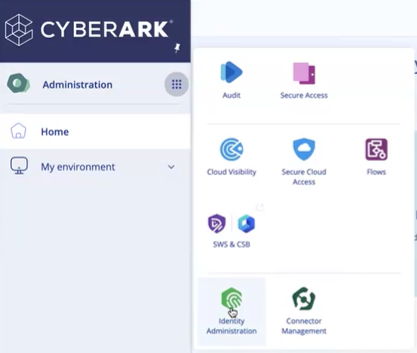
Navigate to the Administration tab and select Identity Administration.
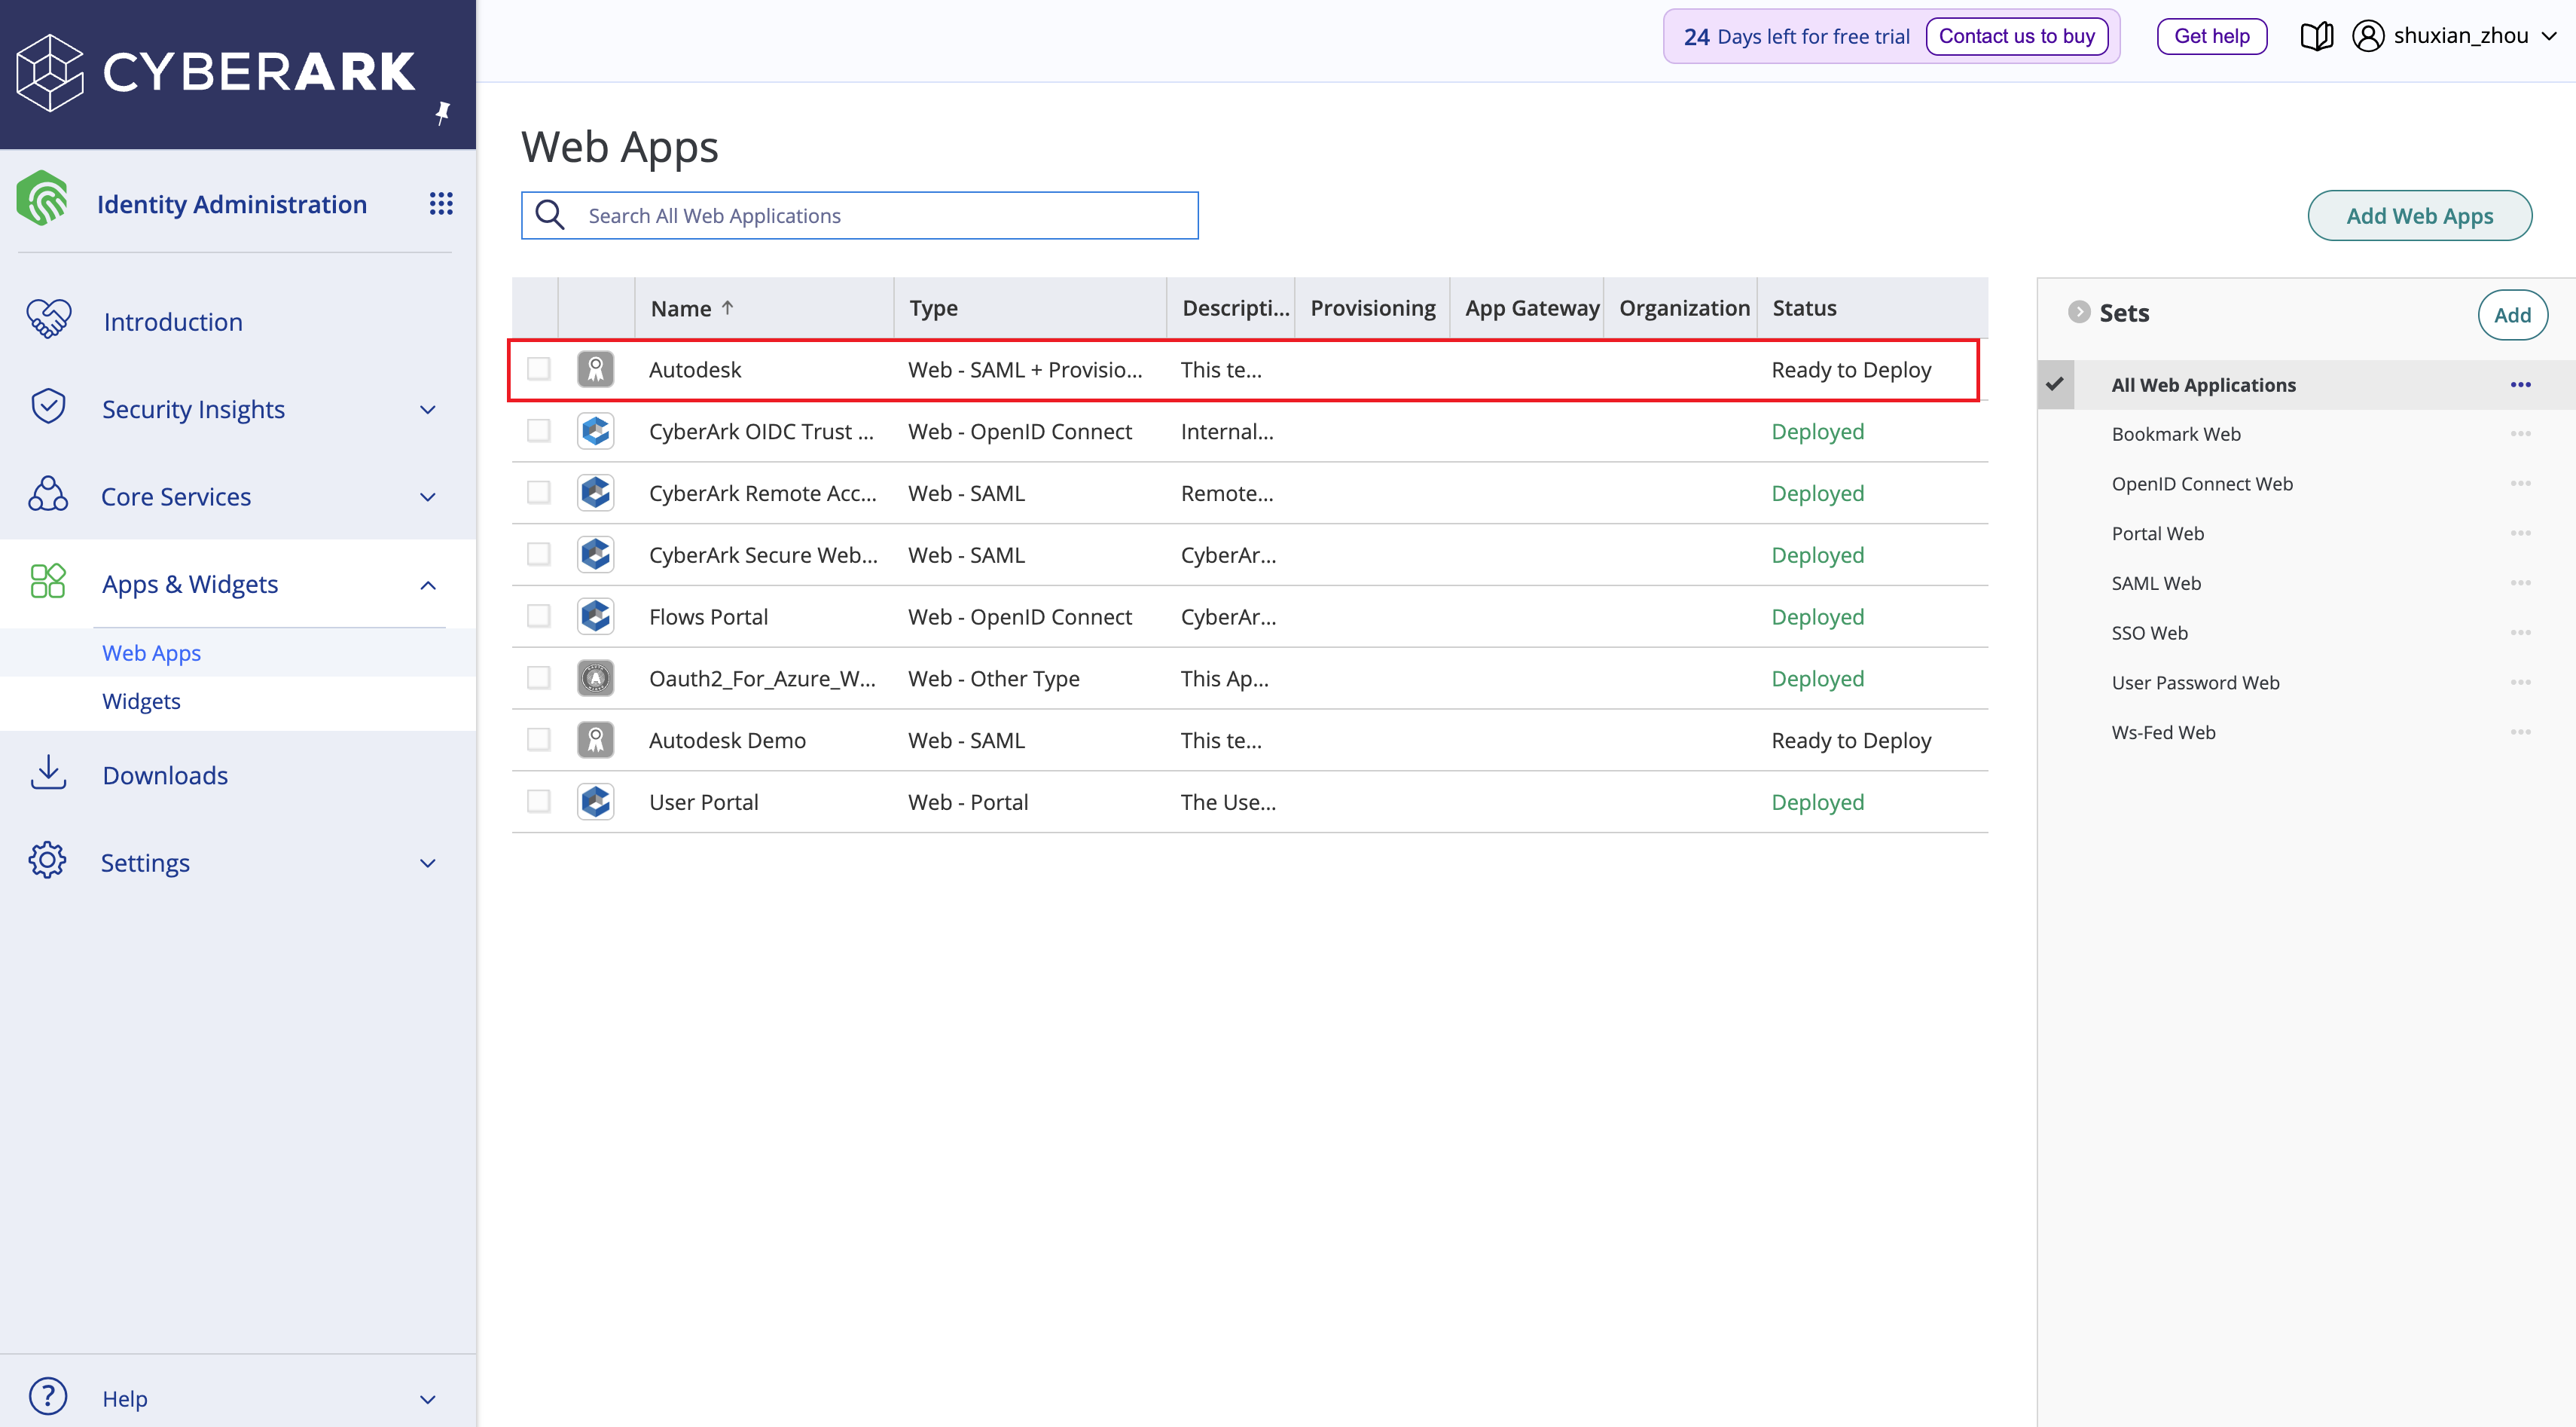
Navigate to App & Widgets dropdown, select Web Apps.
Web Apps page is displayed.
Create a new SAML 2.0 application.
On the top right corner click Add Web Apps to create a new Web Application.
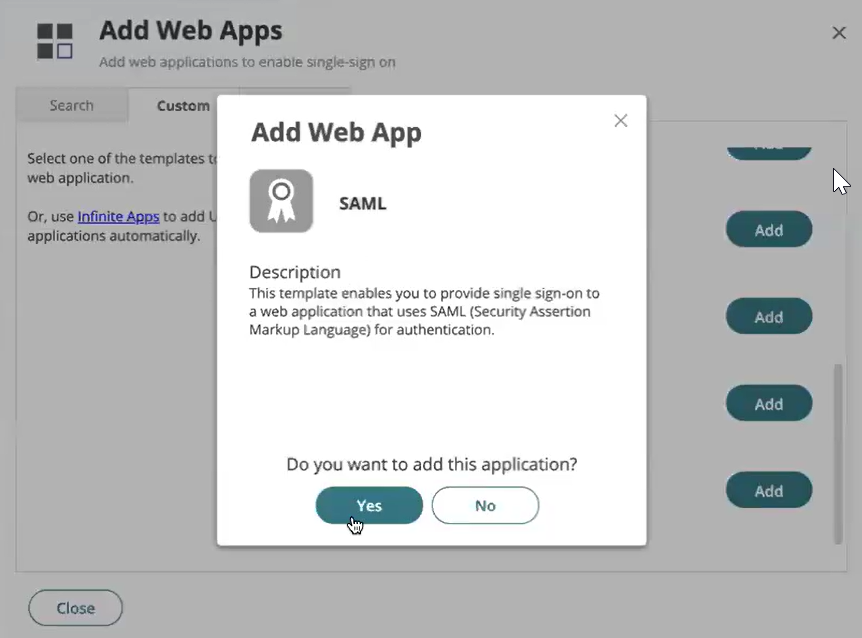
Add Web Apps page is displayed, choose Custom, select SAML and click Add.
A pop-up window to Add Web Apps is displayed, select Yes to add the web application.
A success message Application Added is displayed on successful addition of the web app.
Close the Add Web Apps page, and the verify web application is displayed in the list.
Select the web application.
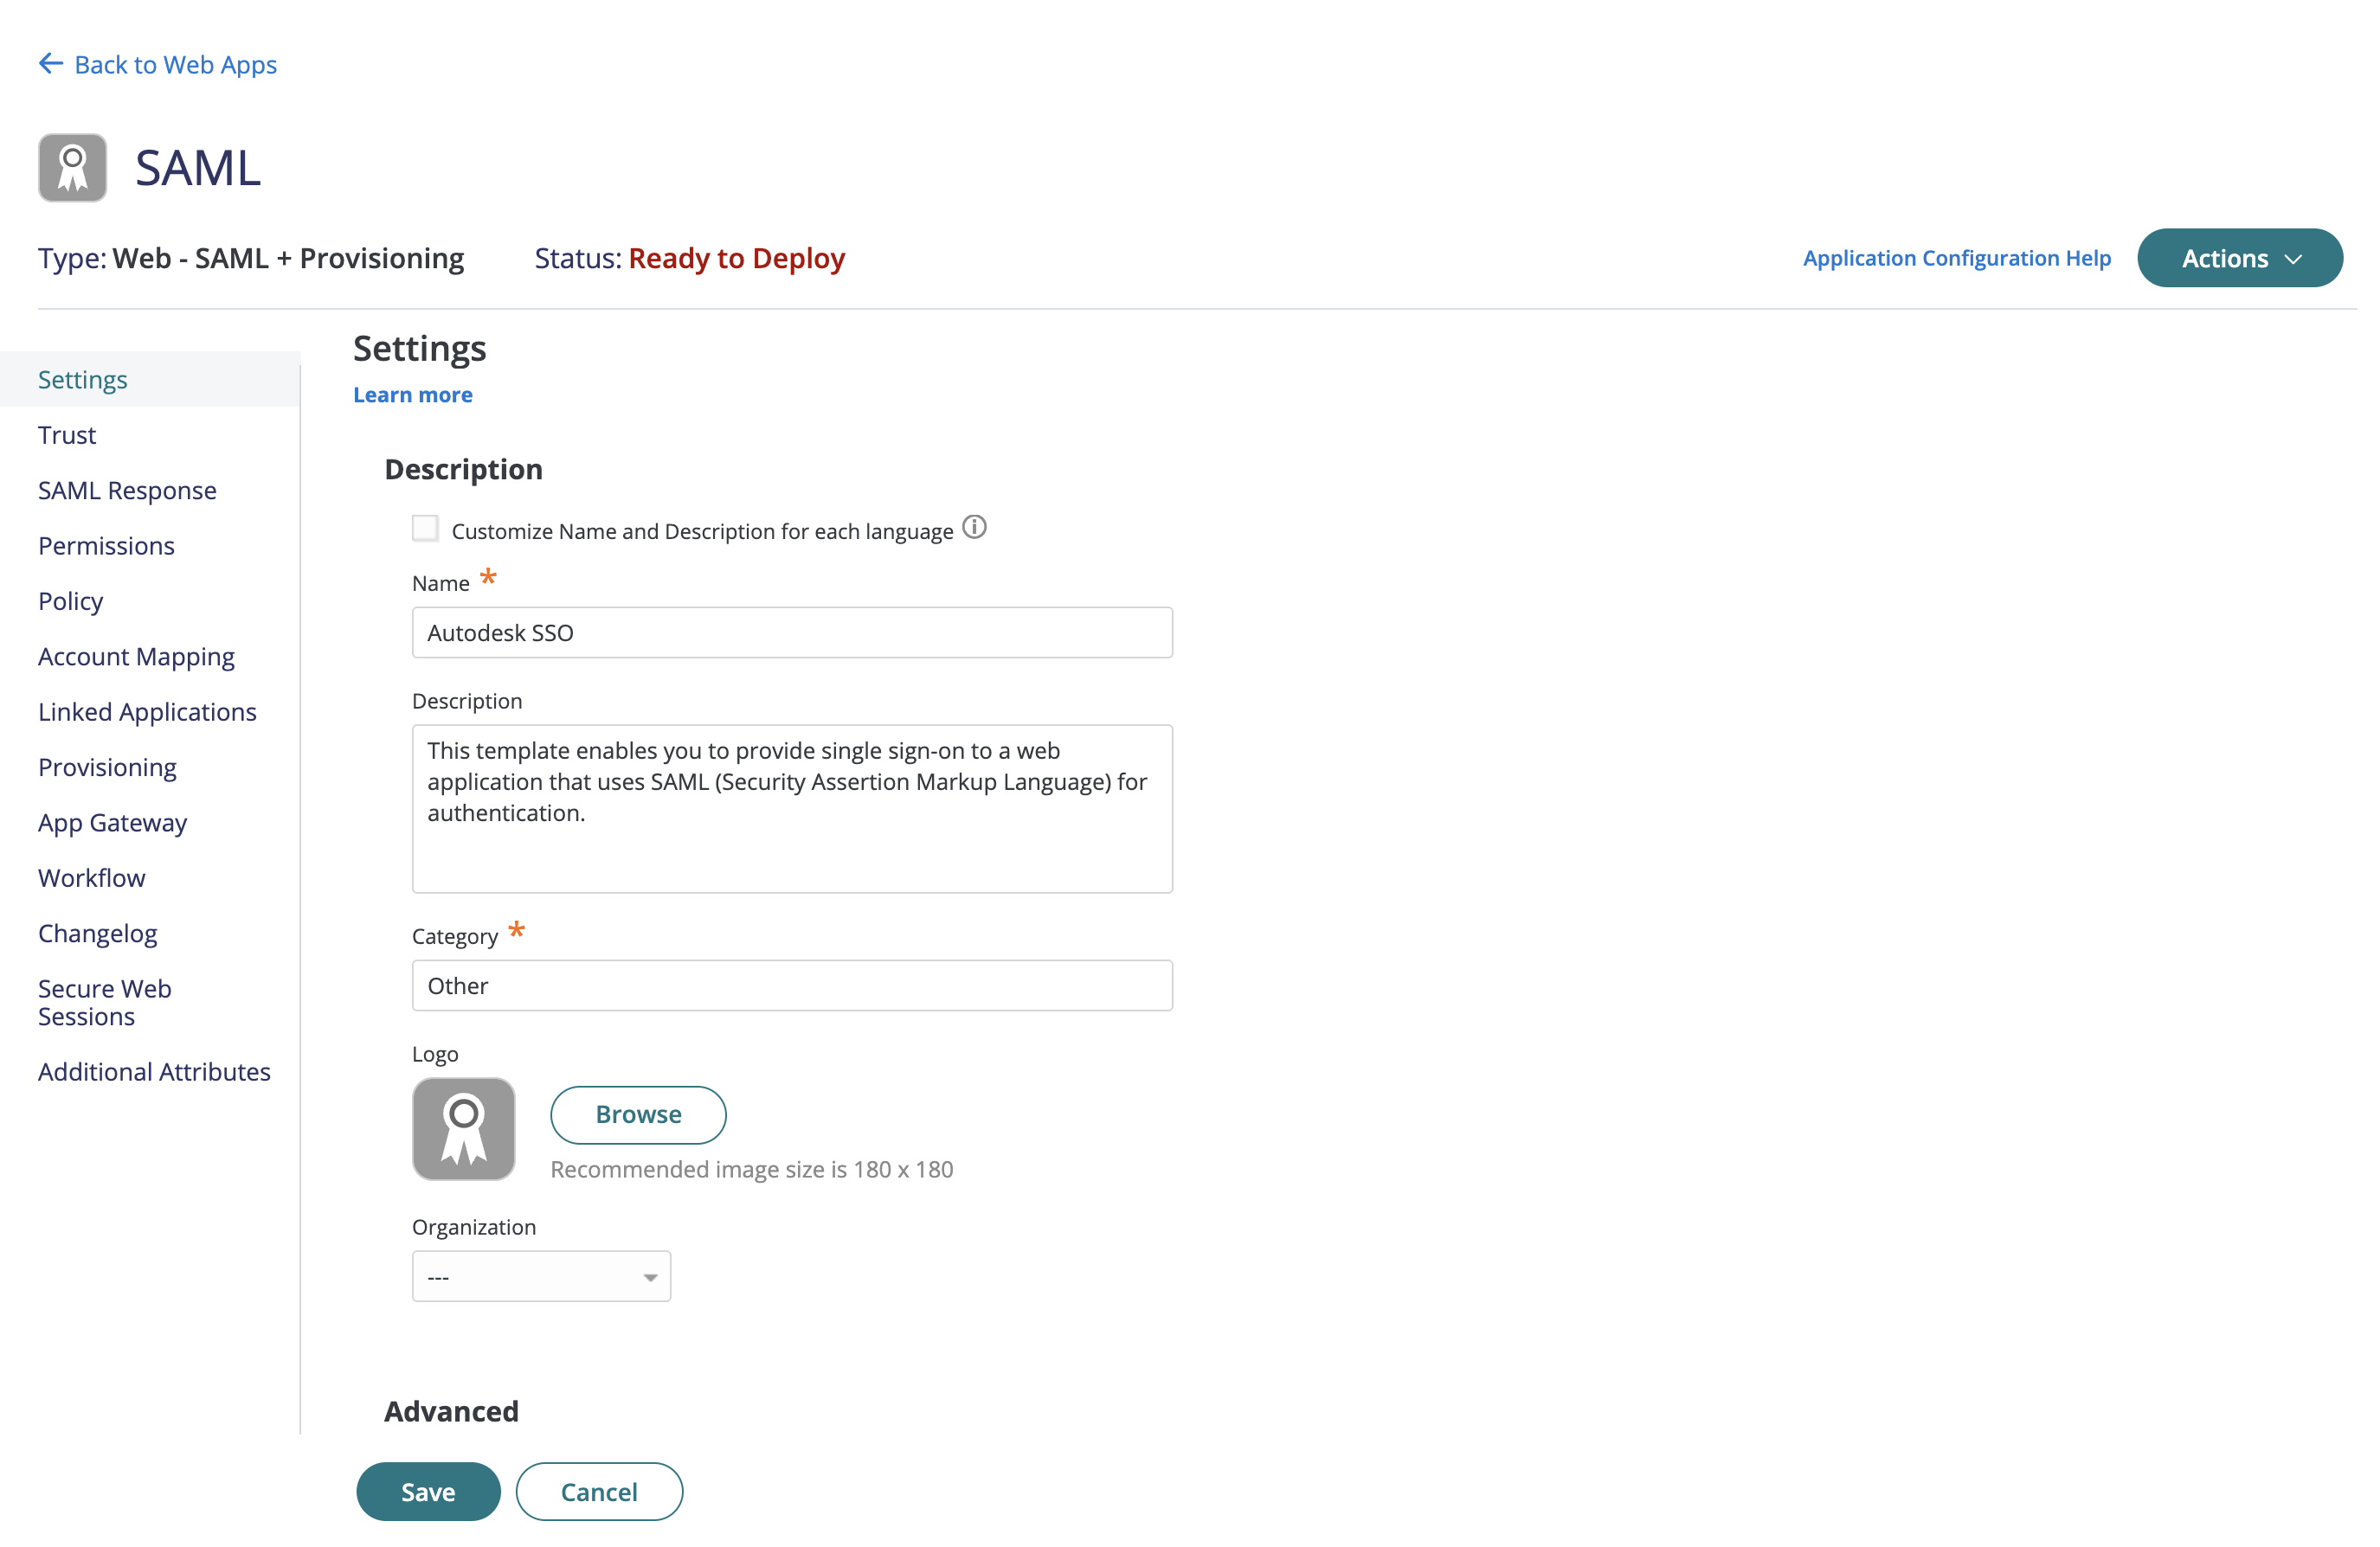
Select Settings to customize the Name and click Save to save the changes.
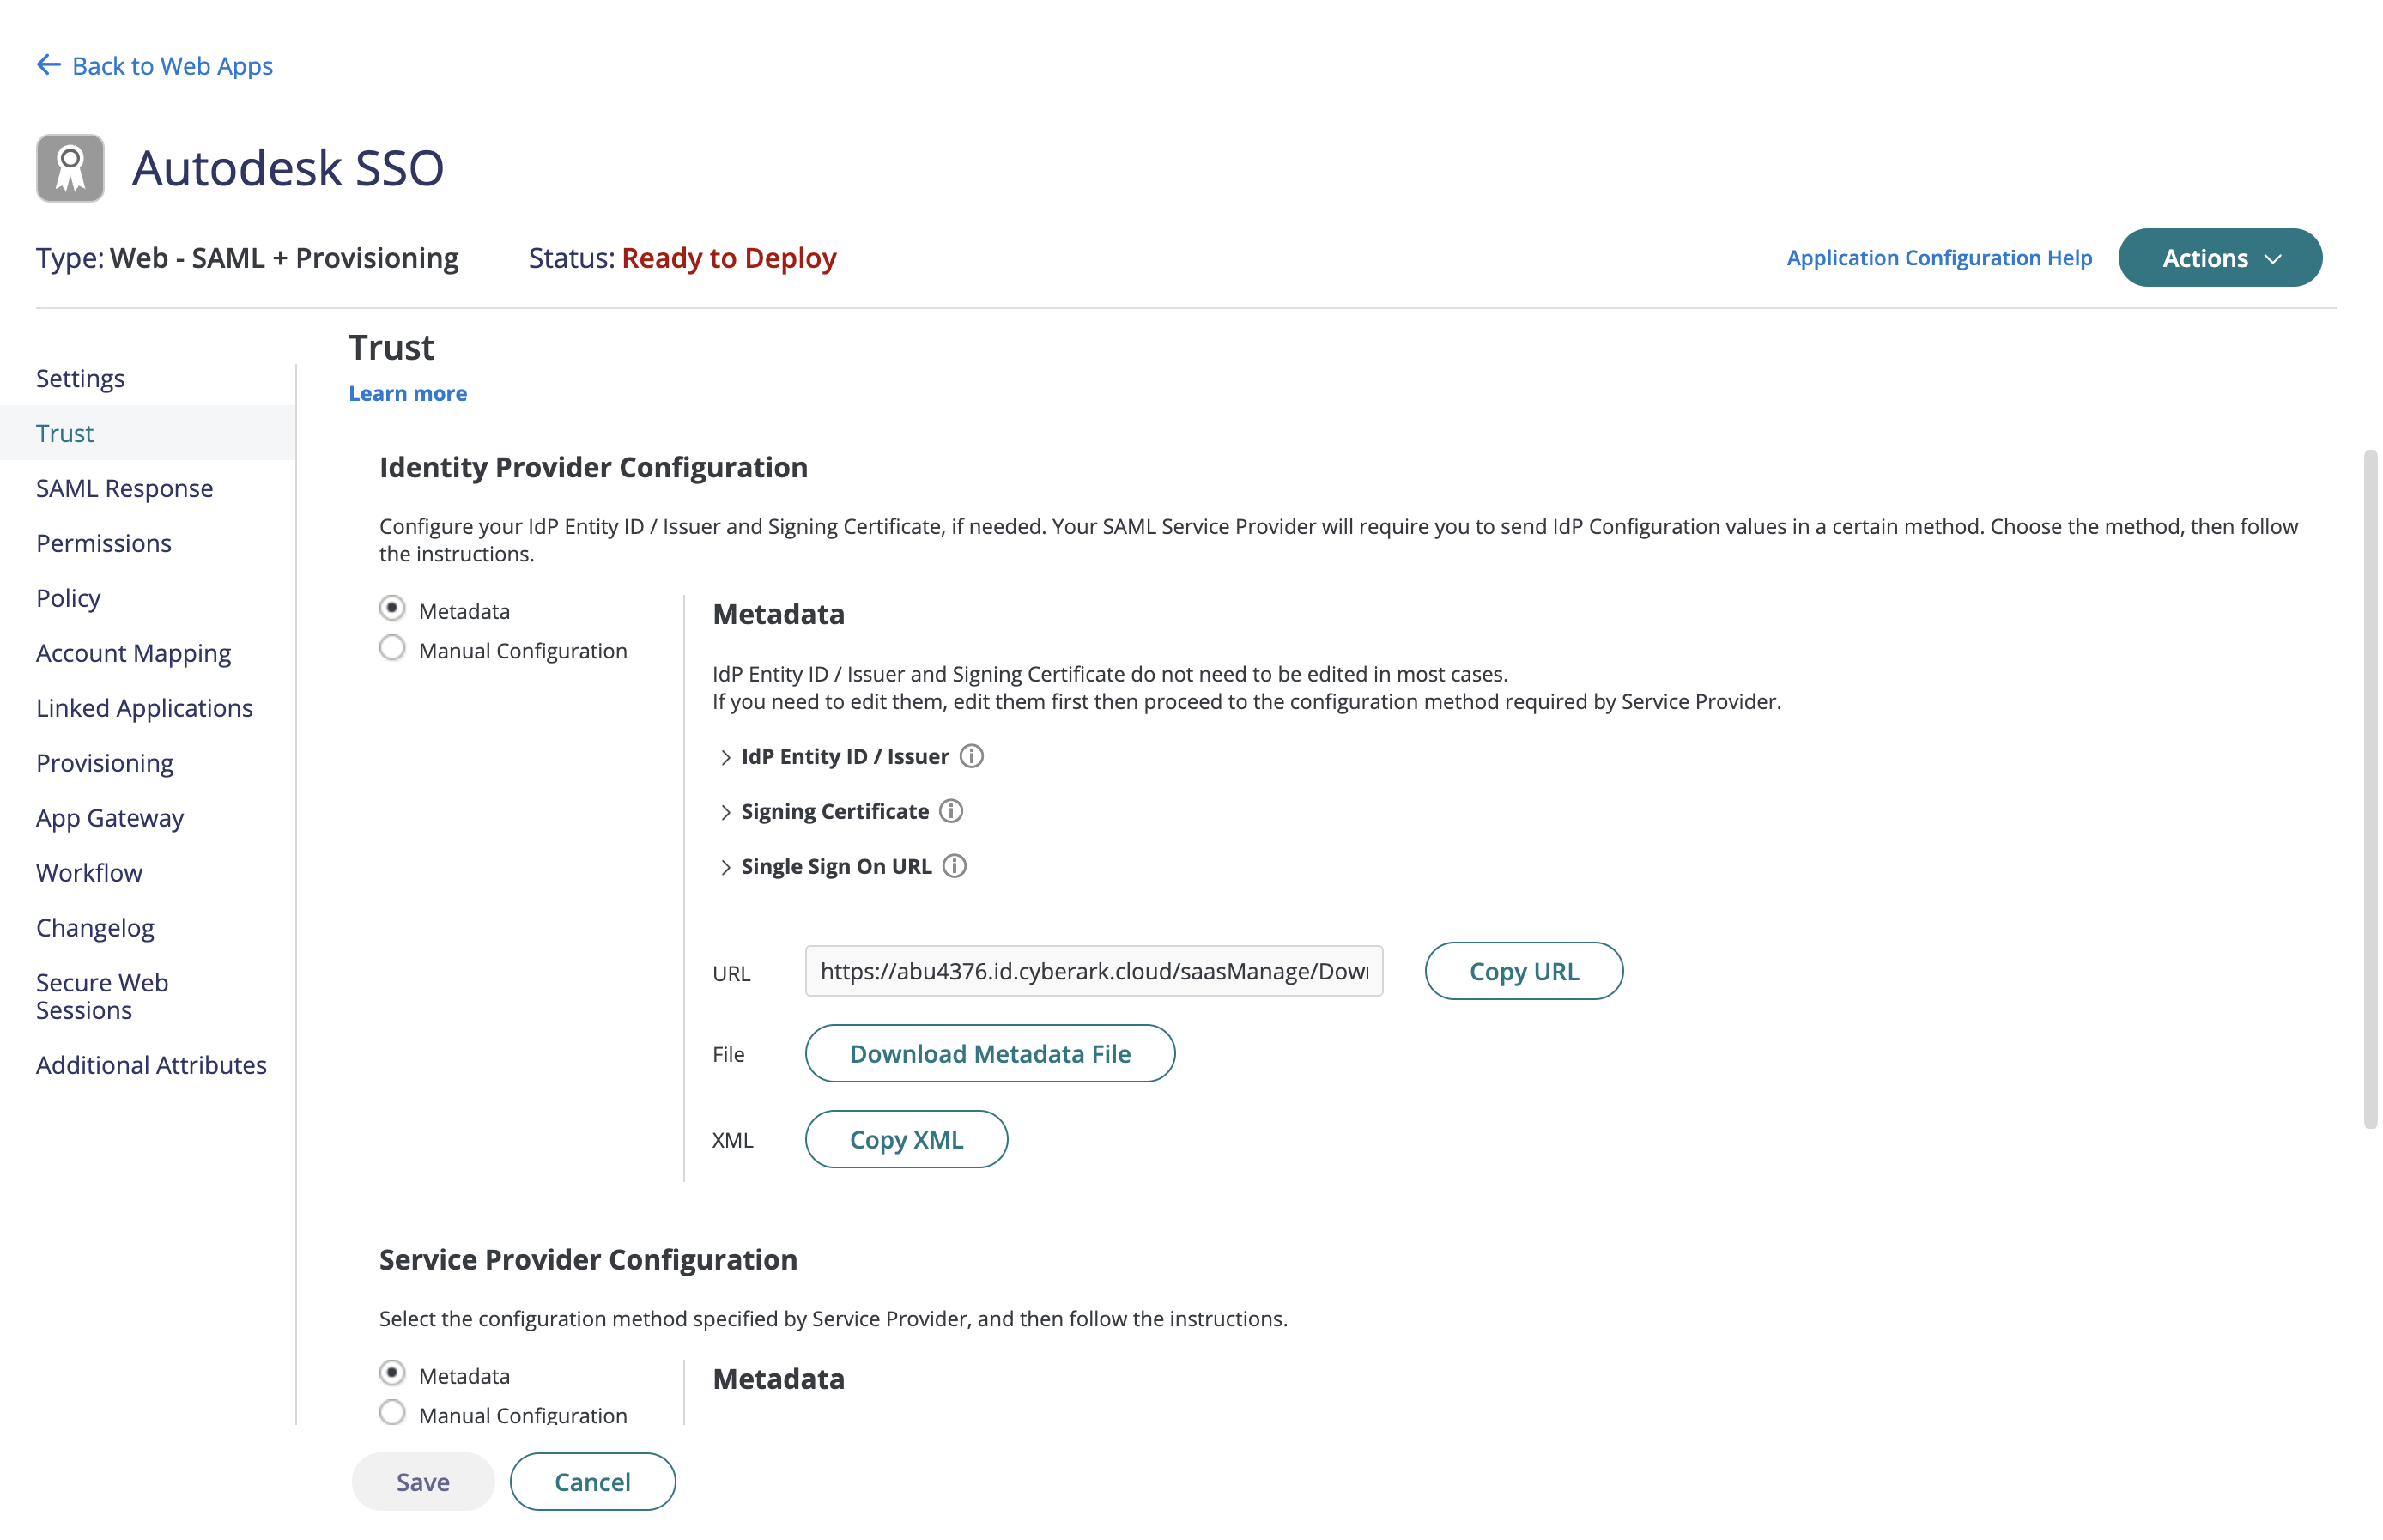
- Configure trust settings.
Navigate to Trust on the left panel in the Autodesk SSO web application.
Select Metadata from Identity Provider Configuration section in Trust.
Ensure that the default values for IdP Entity ID, Signing Certificate, and the Single Sign On URL are filled.
- Map SAML Response attributes.
Navigate to SAML Response on the left panel in the Autodesk SSO web application.
Click Add button in the Attributes from SAML Response
Start adding the following attributes by adding the Attribute Name which is the Autodesk property name or Autodesk attributes and select the respective Attribute Value from the dropdown which is the property name from cyberark:
a. firstName to LoginUser.FirstName b. lastName to LoginUser.LastName c. email to LoginUser.Email d. objectGUID to LoginUser.Uuid
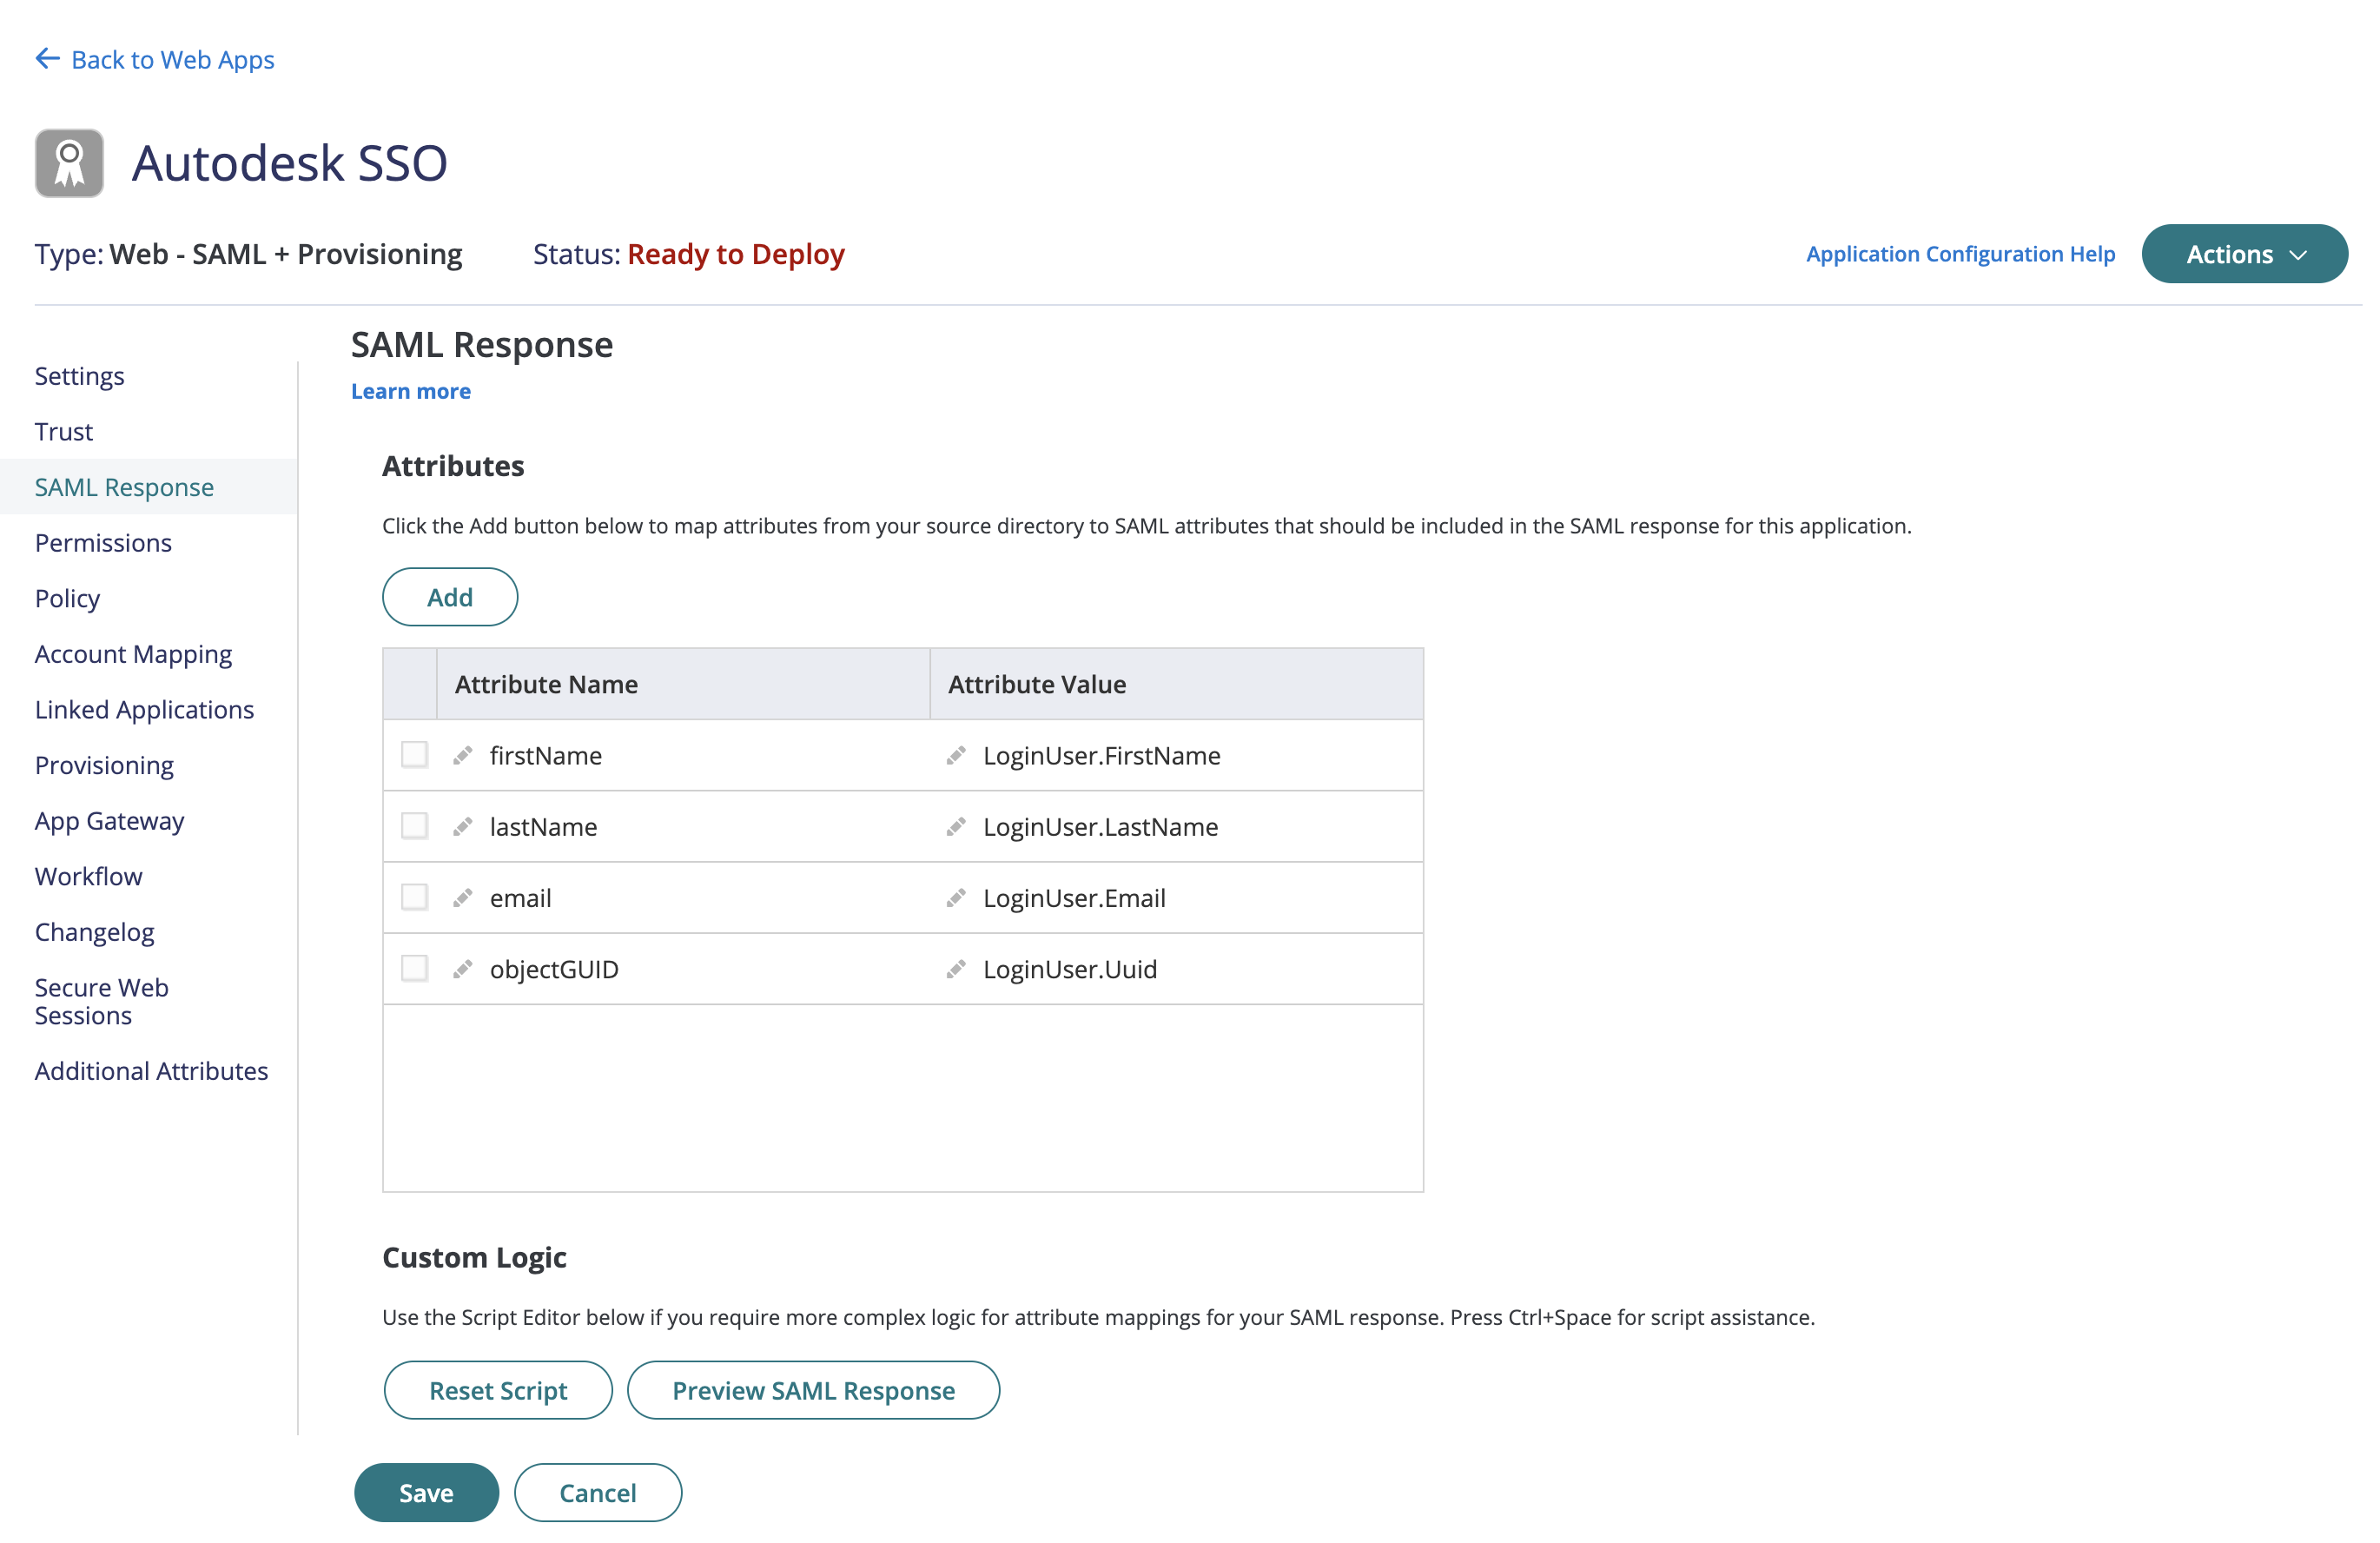
Click Save. A success message Modified is displayed once the SAML response attributes are mapped.
- If the integration with Autodesk app gallery is at the beginning of the setup, then the SAML attributes is pre-configured.
- The attributes to map are case-sensitive and contain no spaces. Do not map additional attributes. For SSO, the backend does not store any other attributes that may have mapped. However, to set up directory sync, additional attribute mapping causes the sync to fail, and the additional attributes have to be removed.
- Download metadate file from cyberark:
- Navigate to Trust on the left panel in the Autodesk SSO web application.
- Click on Download Metadata File from Metadata section in Identity Provider Configuration
- Once the download is complete, save the file.
Begin setup in Autodesk
Follow the steps to Set up your connection or begin setup in Autodesk.
Select the Identity provider from the drop-down as CyberArk.
Add CyberArk metadata to Autodesk
This section provides how to get metadata from CyberArk that is needed to set up a SAML connection with Autodesk. Either one of the following methods to set up is chosen:
Automatic setup to download the metadata file from CyberArk and upload it to Autodesk (recommended),
Manual setup to copy and paste the information manually.
For automatic setup (recommended):
Follow the steps in Begin setup in Autodesk
Under Add Metadata section, select Automatic Setup option and click on the Upload button.
Upload the IdP Metadata XML file downloaded from CyberArk. This automatically fills in the Entity ID, Sign-on URL ,and Identity provider certificate.
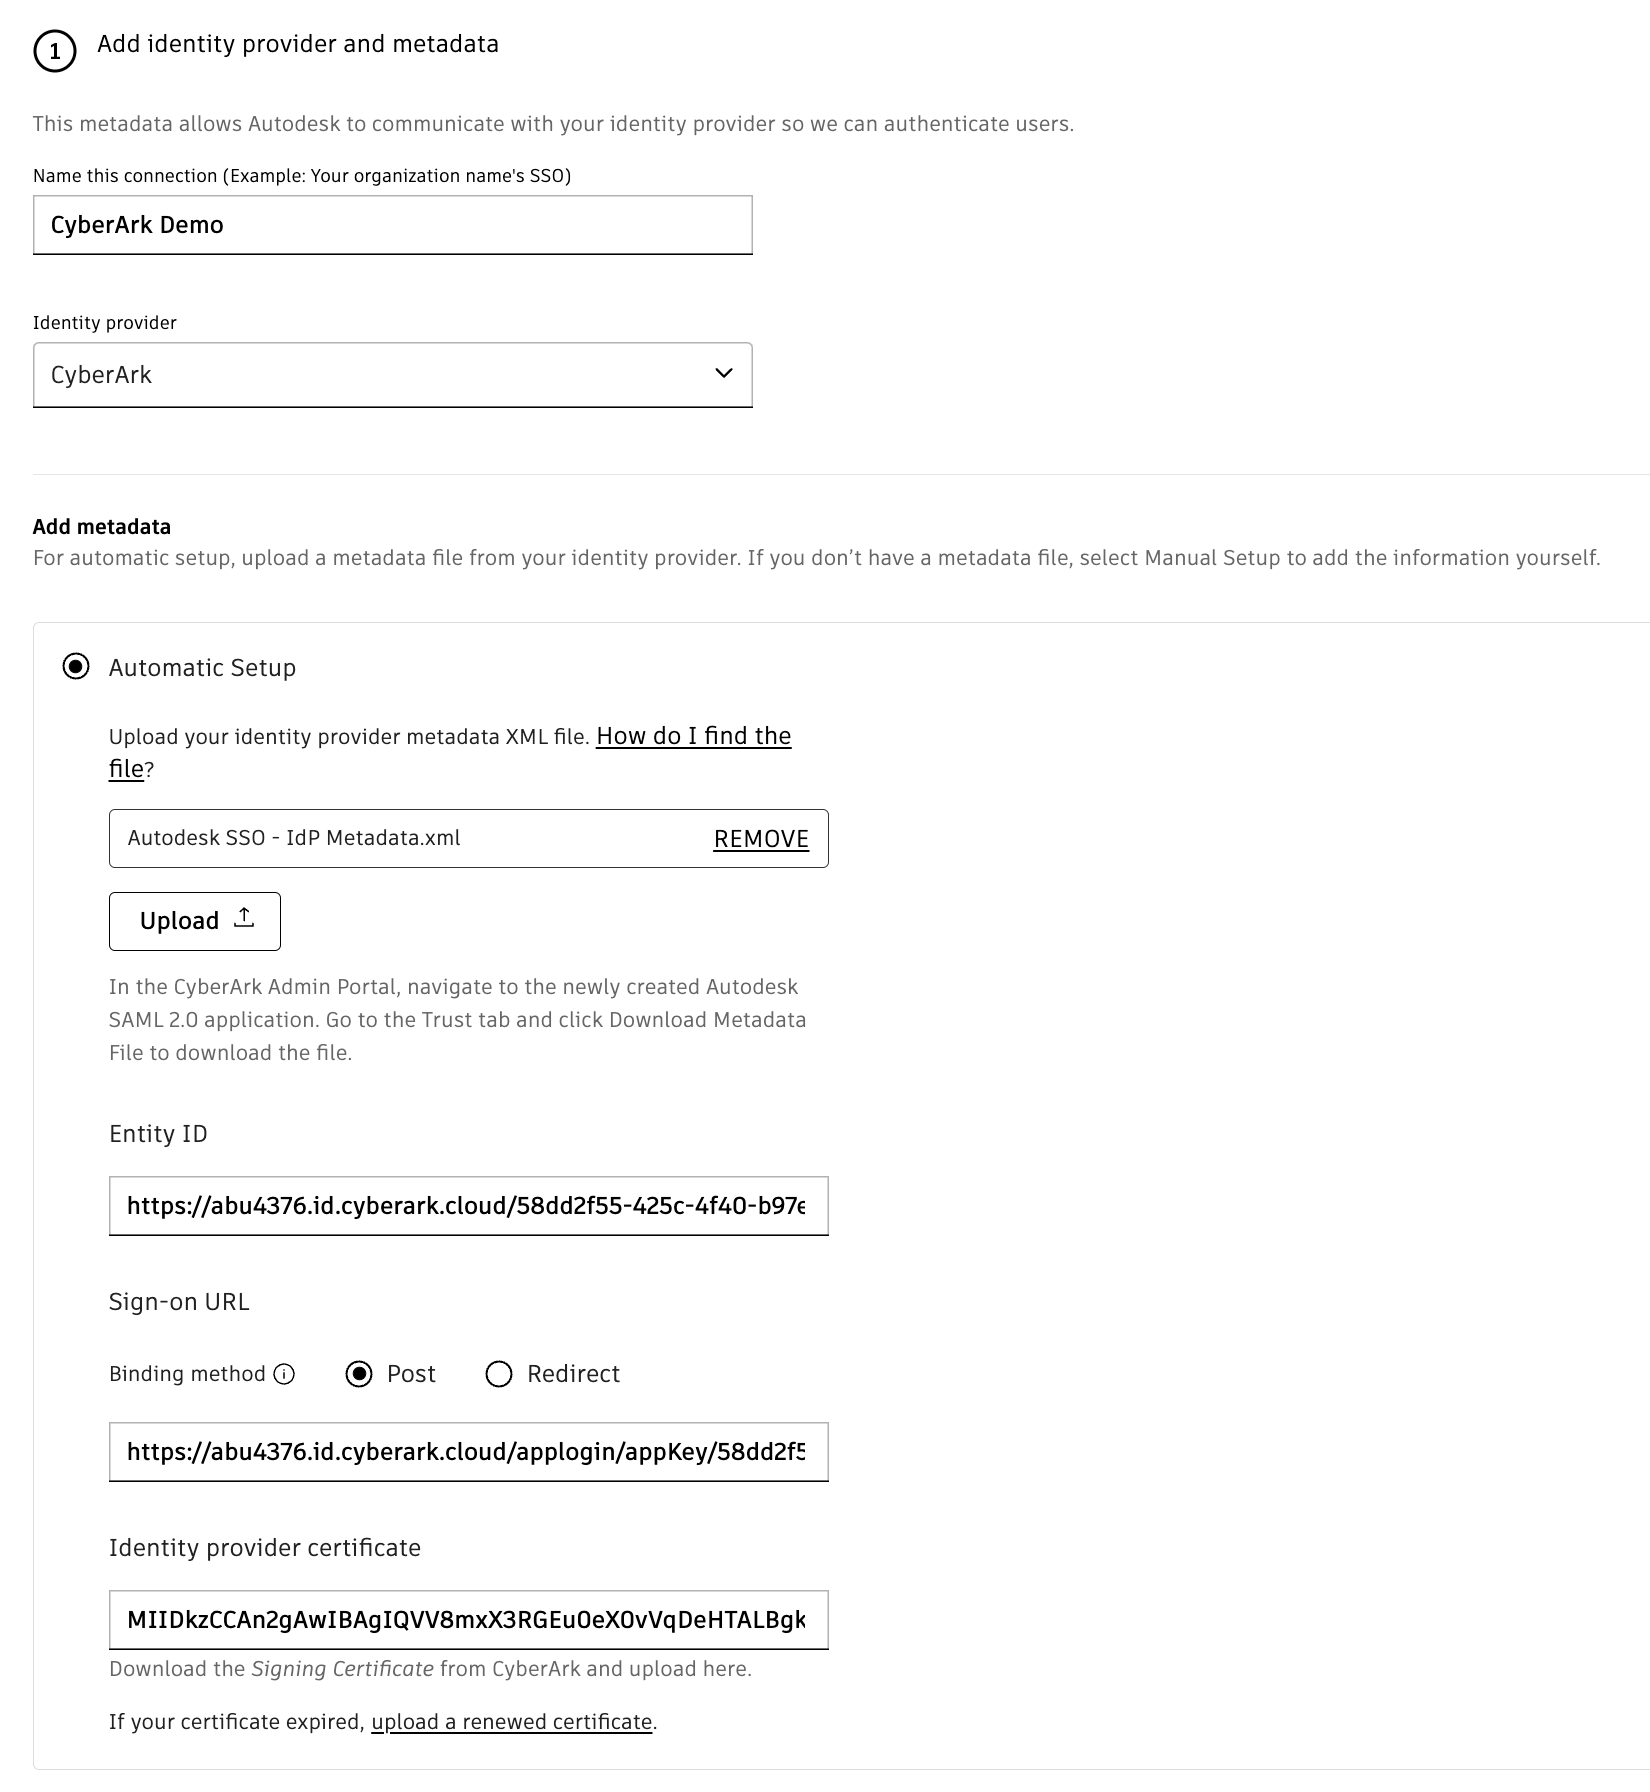
Confirm that the fields are filled in and click Next.
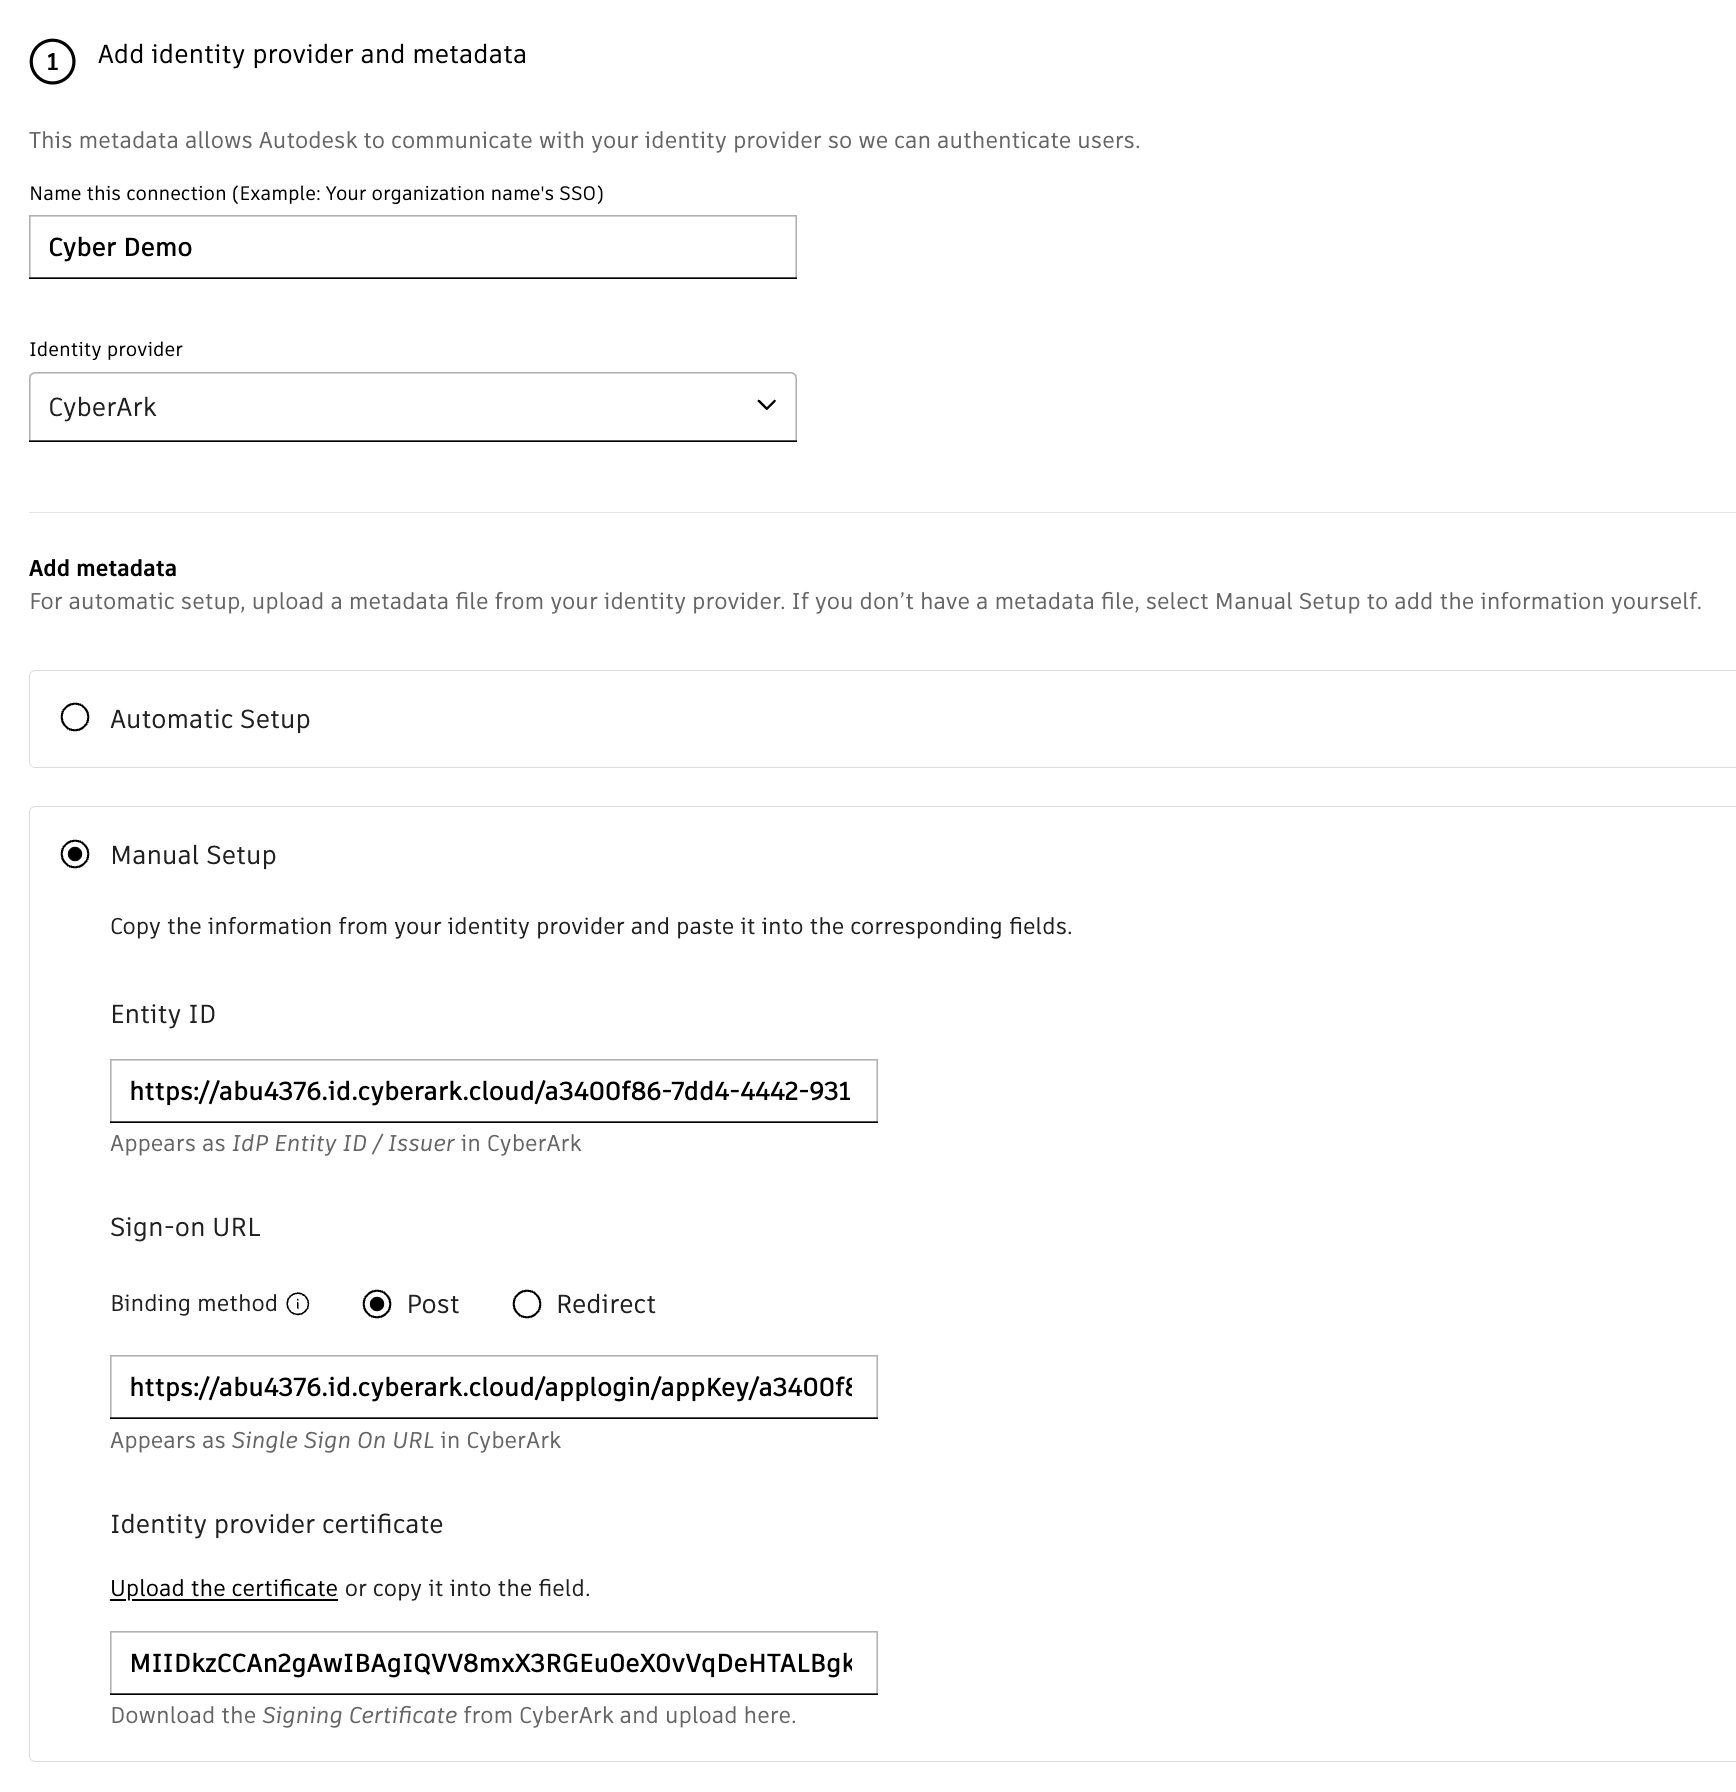
For manual setup:
Skip the manual setup, if automatic setup is chosen.
Follow the steps in Begin setup in Autodesk
Under Add Metadata section, select Manual Setup option.
Manually enter the details from the CyberArk admin portal using the hint text, or use the metadata file downloaded from CyberArk and click Next.
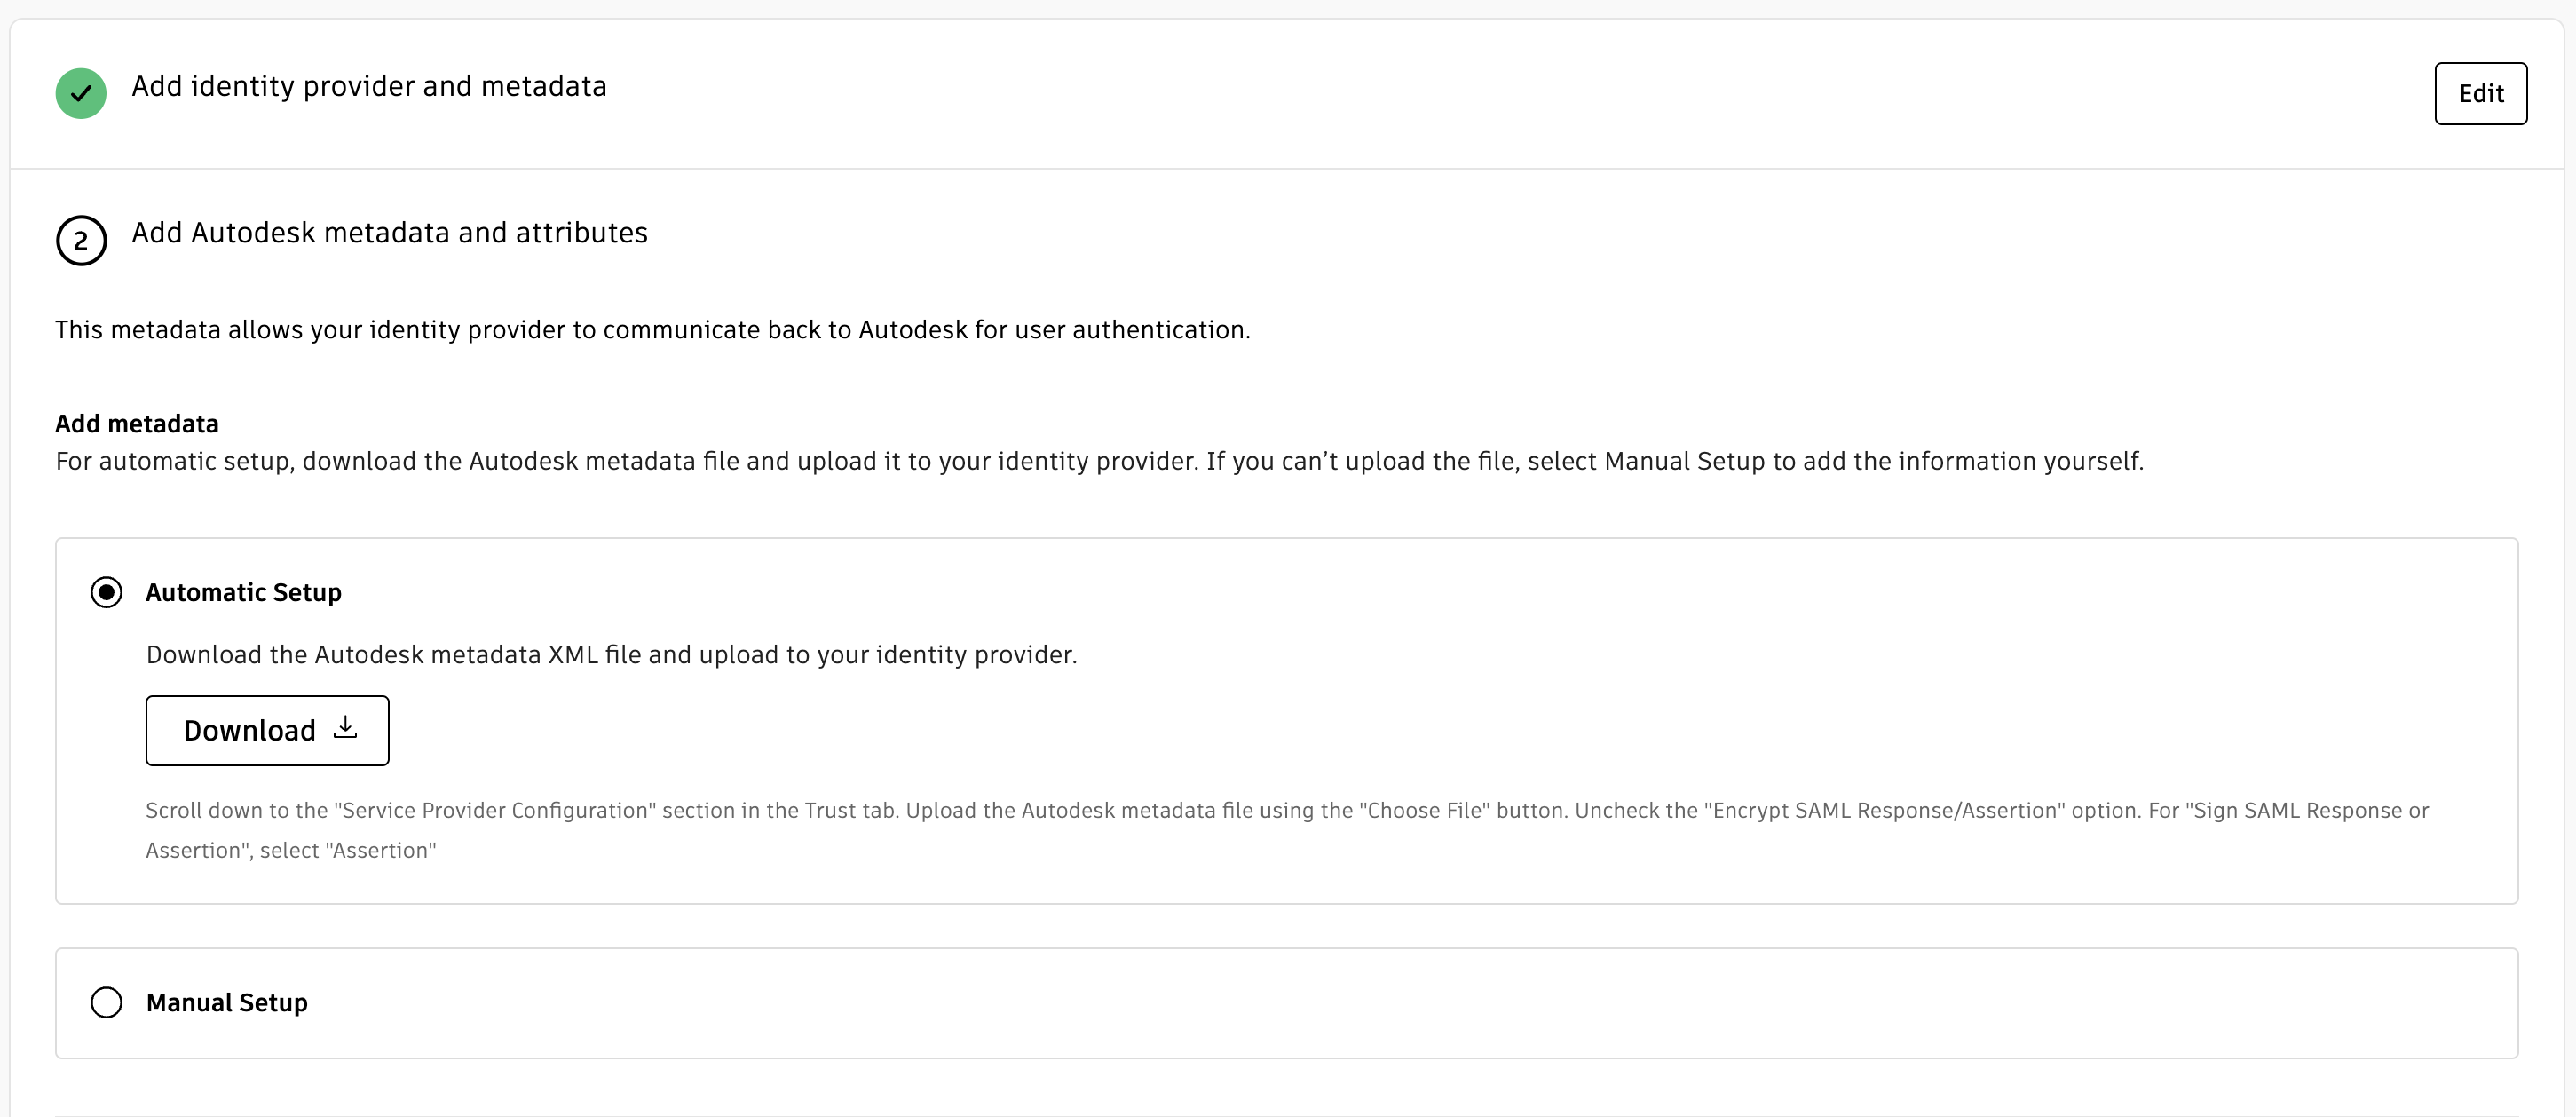
Add Autodesk metadata to CyberArk
This section allows Autodesk to complete the connection with the identity provider for user authentication.
For automatic setup (recommended):
Under Add Autodesk metadata and attributes section, click Download from the Automatic Setup under Add Metadata section. This downloads the Autodesk metadata XML file.
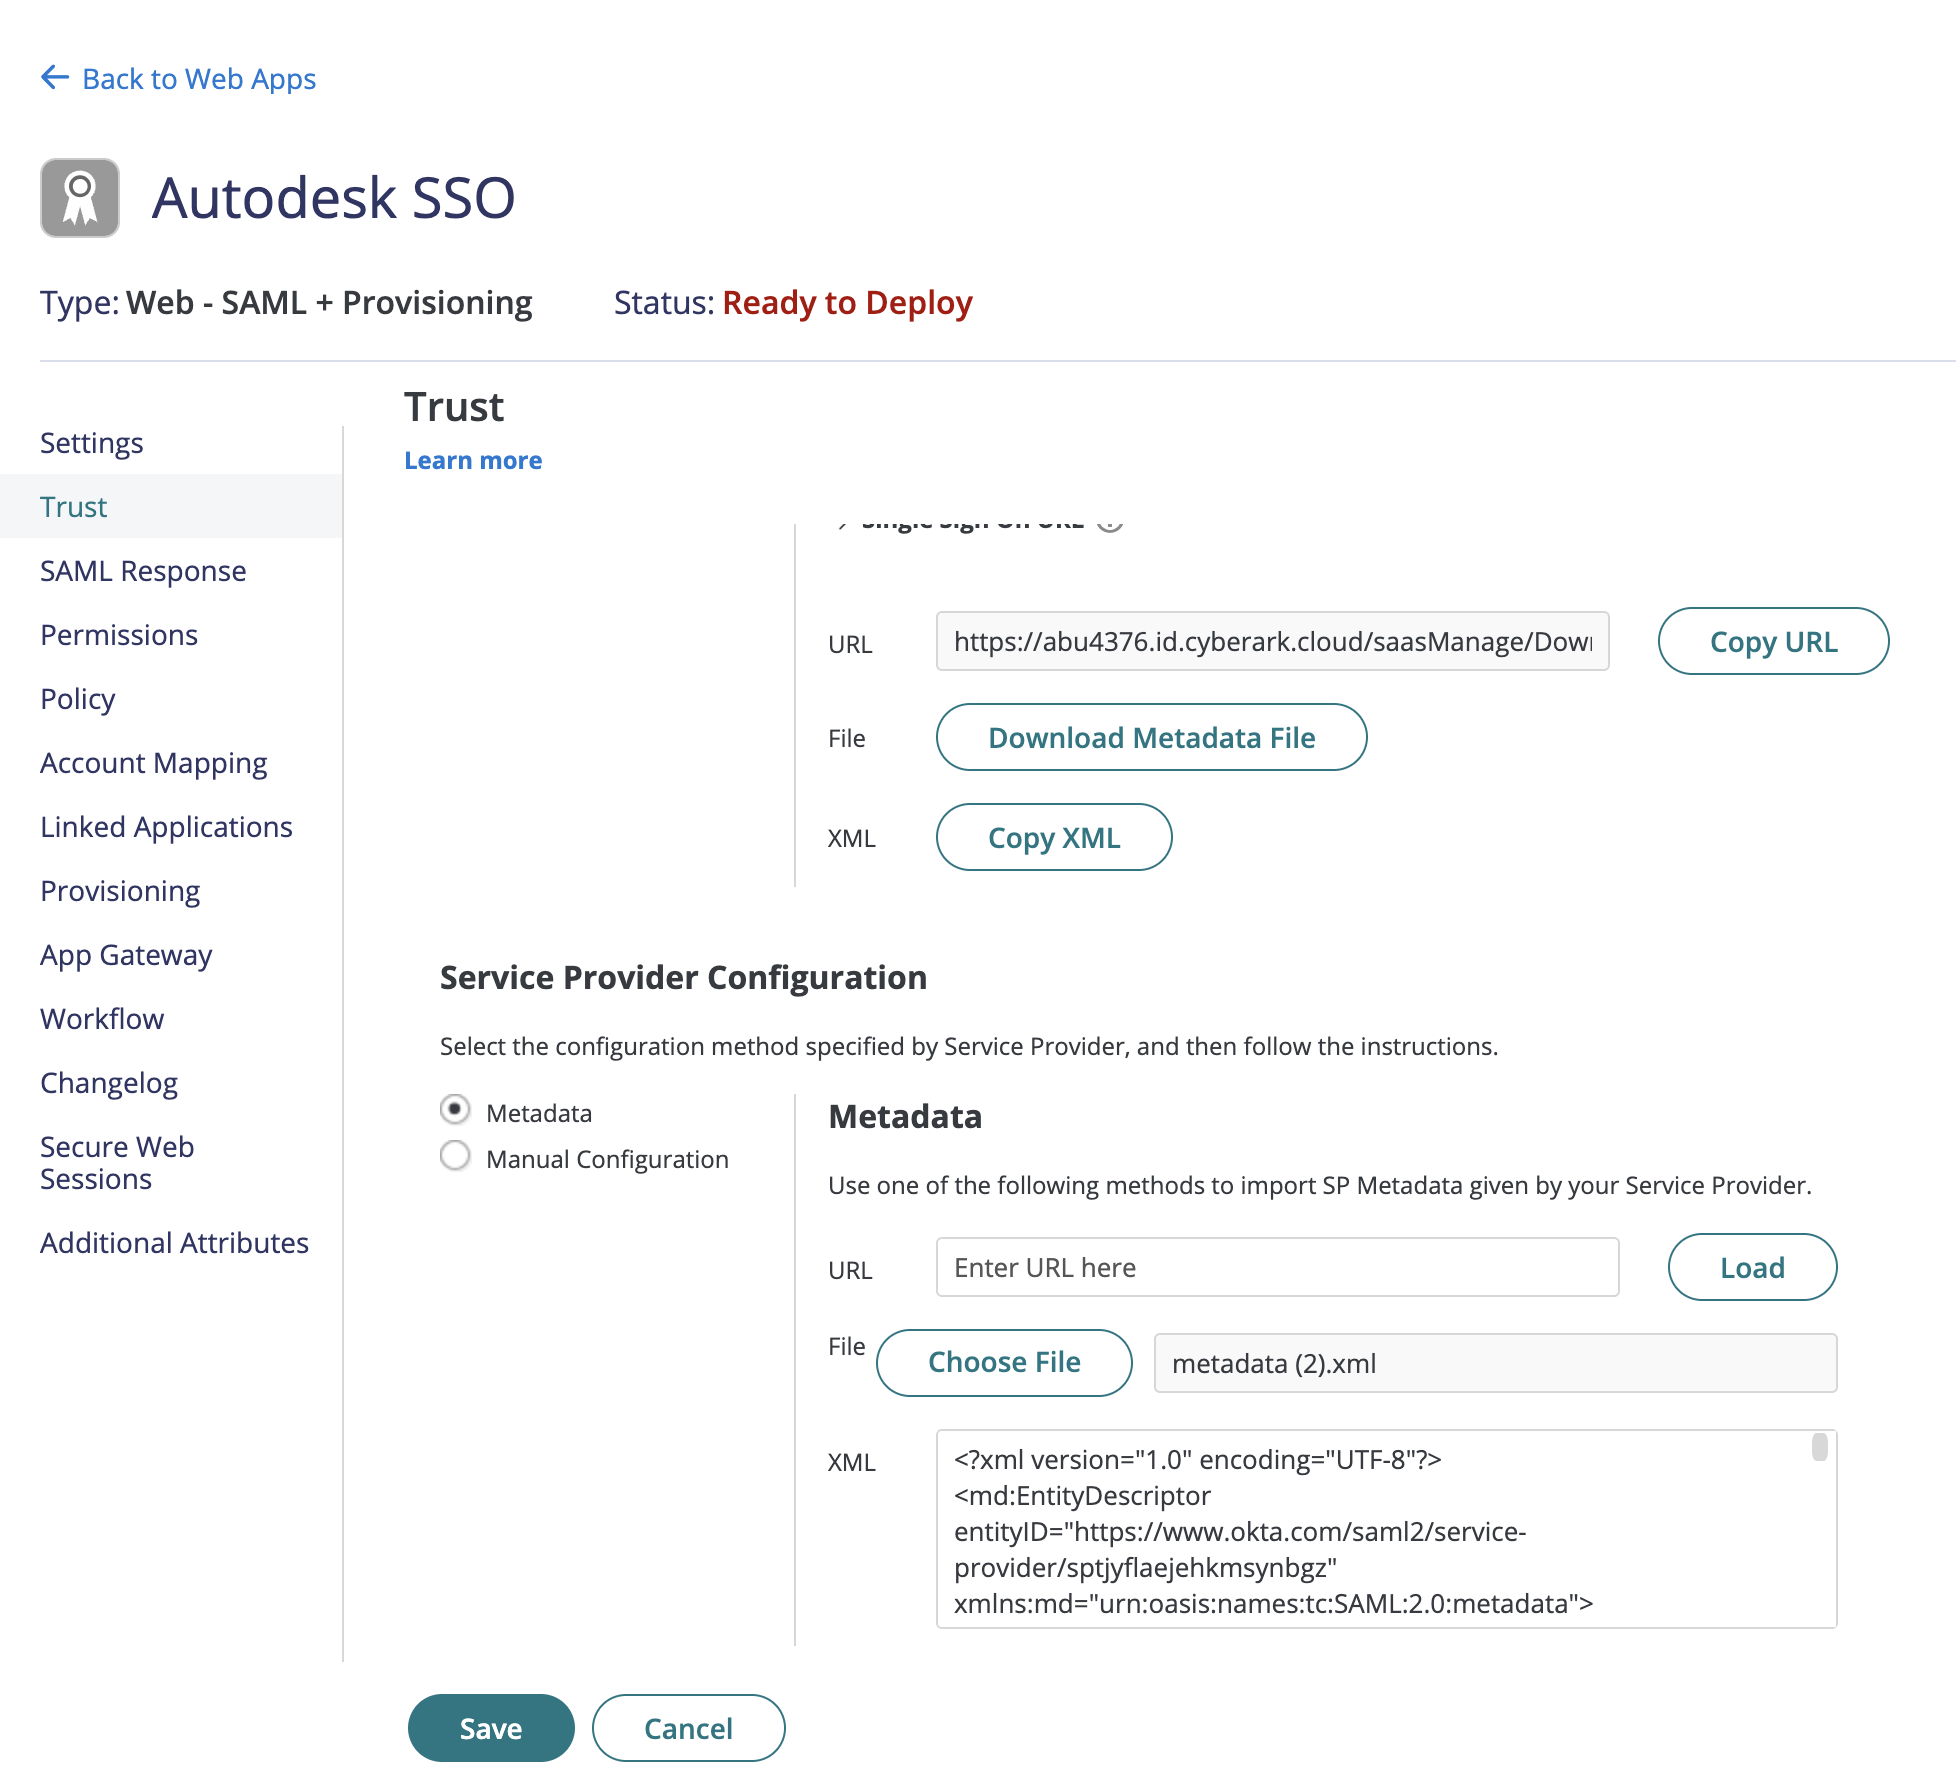
Go to CyberArk portal, navigate and select Trust from the left panel and scroll down to Service Provider Configuration
Select Metadata and click Choose File, upload the metadata XML file saved from Autodesk.
Select Manual Configuration and uncheck Encrypt SAML Response Assertion.
Under Sign Response or Assertion, choose the “Assertion” option.
Under the NameID Format drop-down, choose emailAddress.
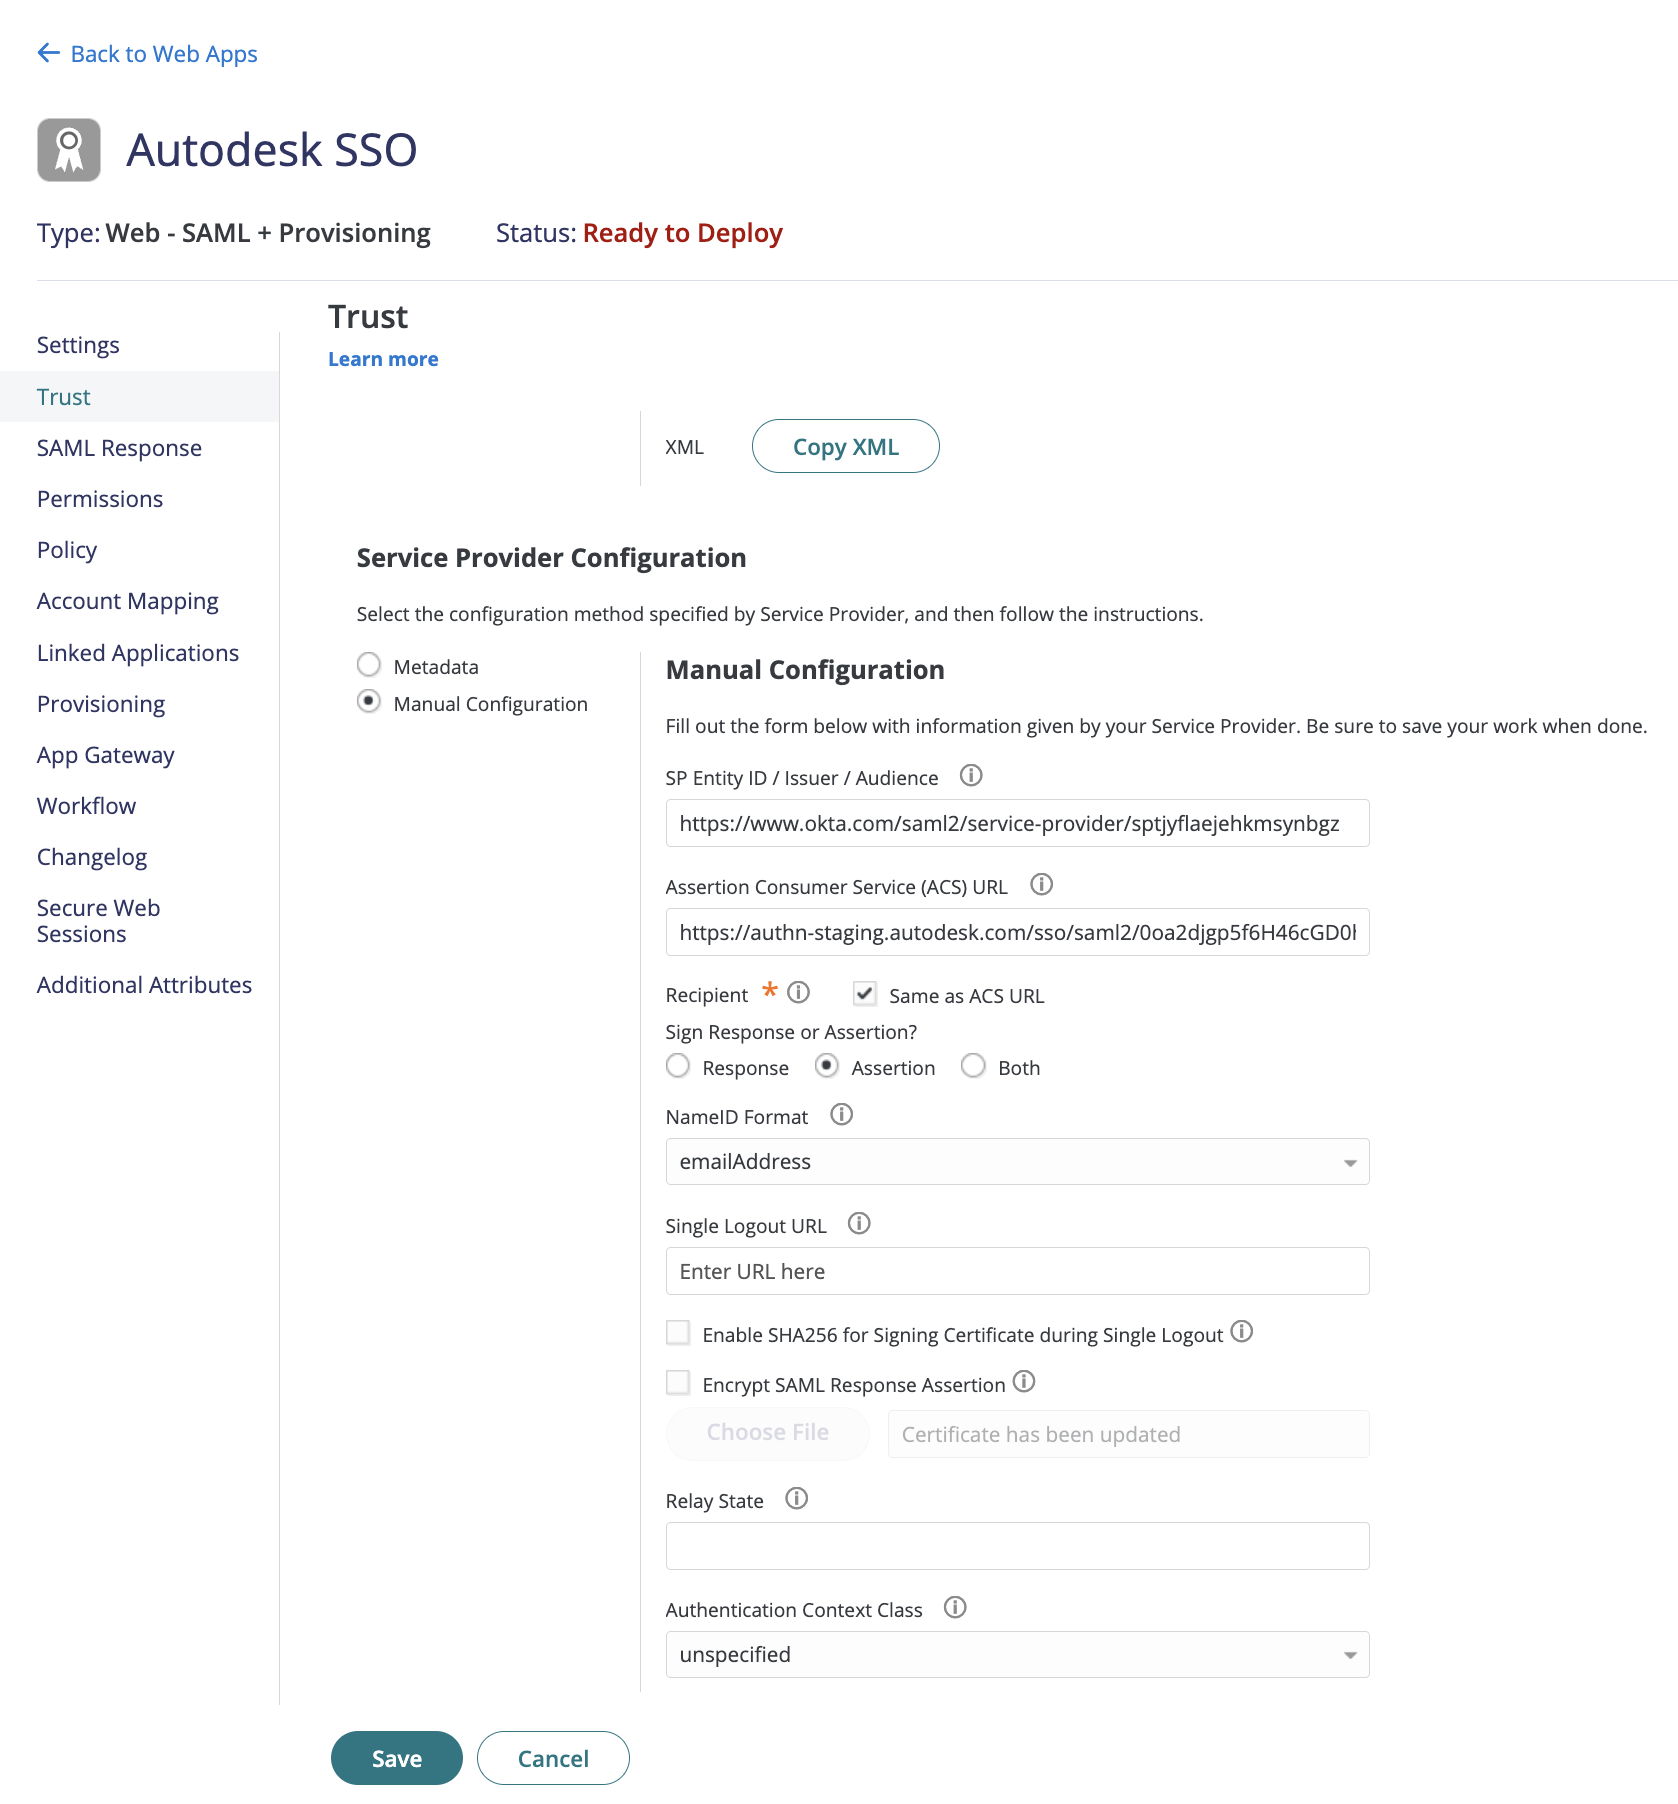
Click Save.
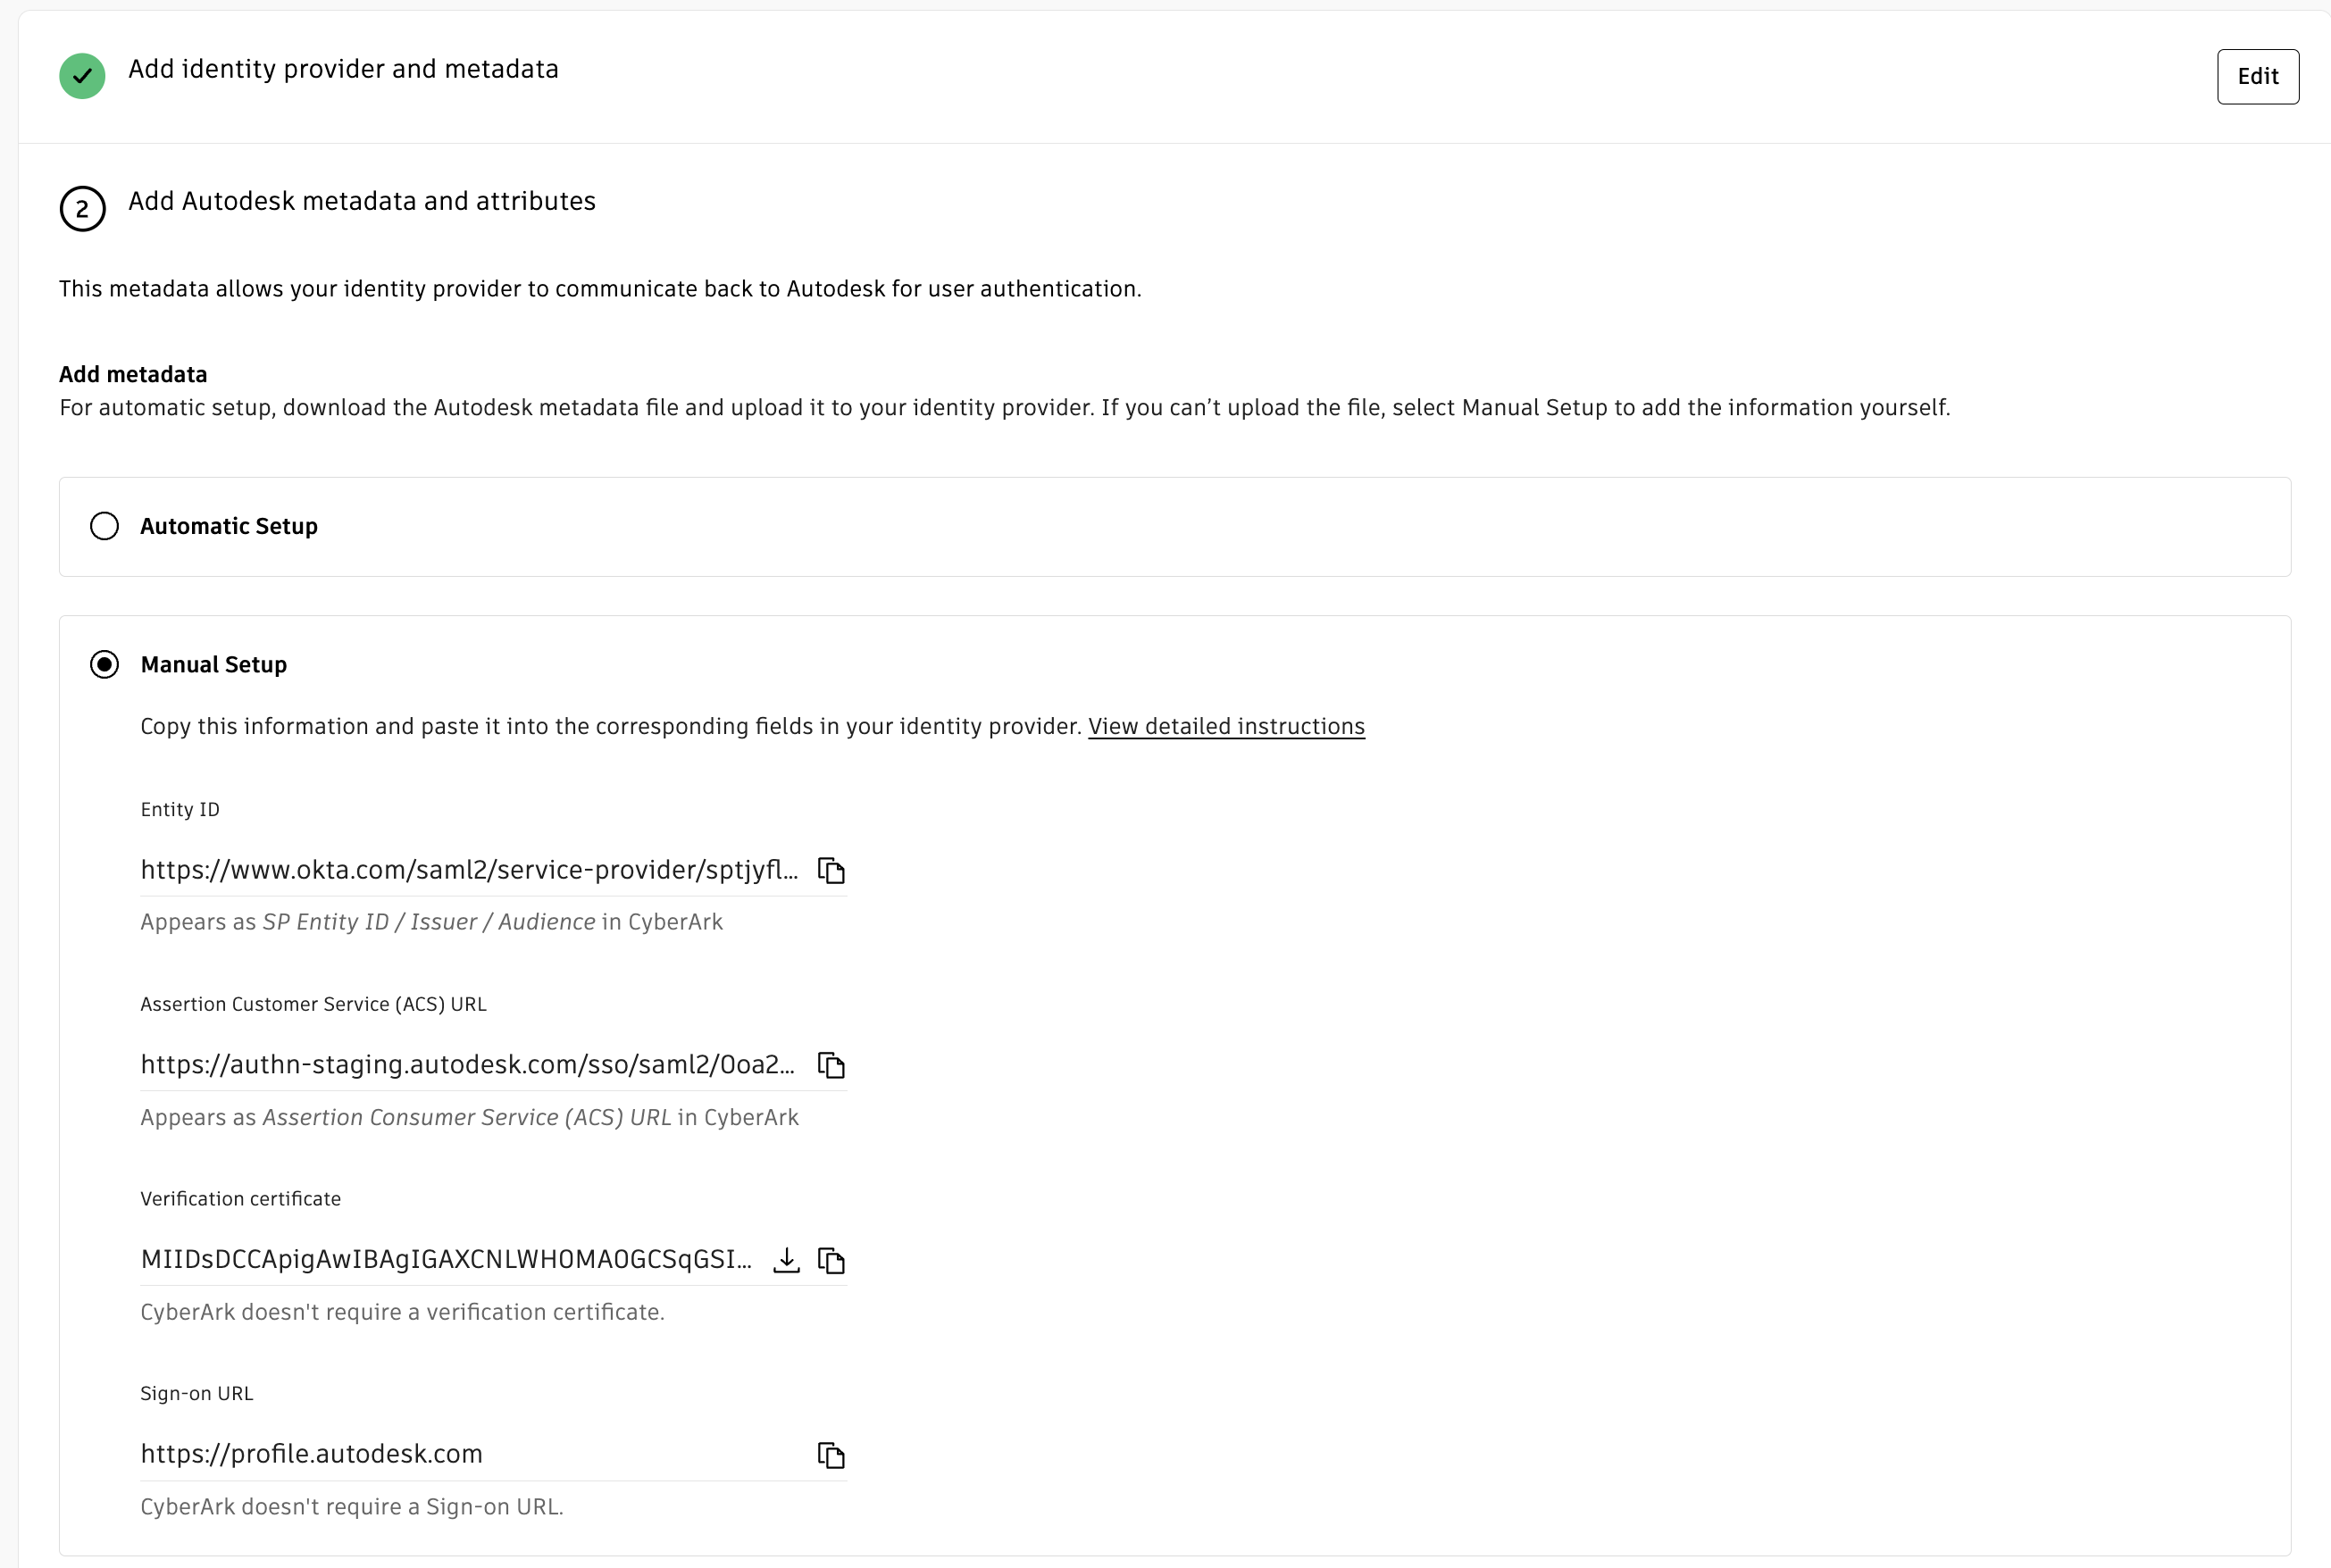
For manual setup:
Under Add Autodesk metadata and attributes section, select Manual Setup.
Manually copy the information from the Autodesk metadata to cyberark and click Next.
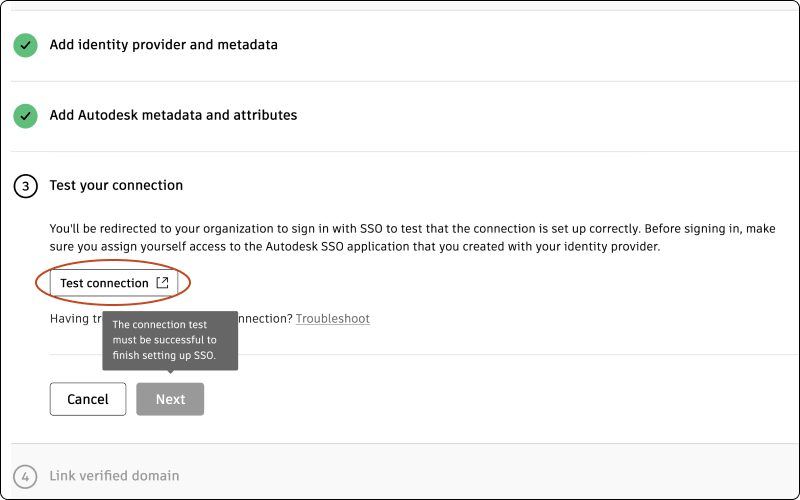
Test your connection
Before testing the connection, make sure you assign yourself access to the Autodesk SSO application that you created with your identity provider. Go to Assign an app integration to a user for more information.
Click Test connection to be redirected to your organization’s SSO sign-in page. (If you are not redirected, see Troubleshooting).
Sign in to make sure that the connection between your identity provider and Autodesk is set up correctly. If the test is successful, you will see the message “Connection Test Result: Success” and a list of properties.
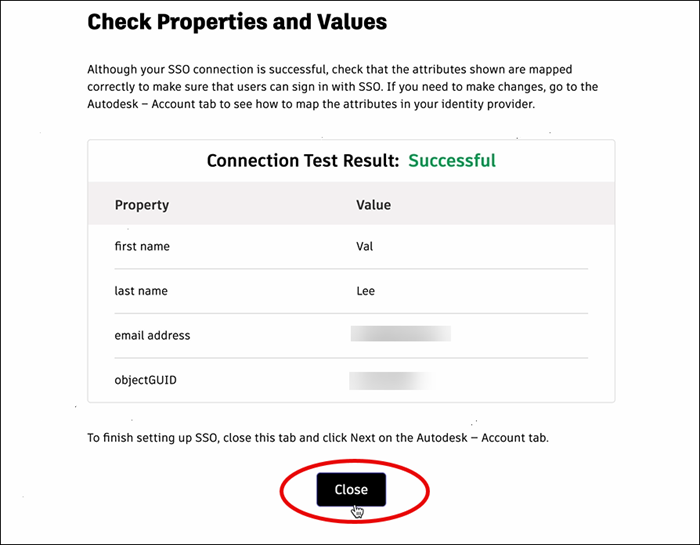
Confirm that the attributes have mapped correctly by comparing the Property and Value columns. The property “first name” should appear next to the user’s first name, “last name” should appear next to the user’s last name, and so on. If you need to make changes, return to the previous step (Mapping attributes) and re-map the attributes.
Once you have confirmed that attributes are mapped correctly, return to the Autodesk Account tab and click Next.
Note:In order to proceed to step 4, which involves linking a verified domain, it is crucial that your connection is tested successfully.
Link verified domains
You will see a list of your verified domains. Select one or more verified domains to link to your connection.

Click Save connection to complete the setup.
If a domain is not verified, you can still save the connection and link it later in Manage SSO.
If you have not finished verifying domains, go to Add and verify domains to complete the process. Once you have finished linking domains, return to Manage SSO to test and turn on SSO.
Previous: Set up your connection
Next: Test and turn on SSO