Platform Console - Overview
Pre-requisites
Make sure you have an Autodesk Tandem account and a Tandem Connect account. If you have not done this yet, visit Access Tandem Connect for details.
Login
When you enter the Tandem Connect URL in a browser you will be presented with a Login page which looks like the following.
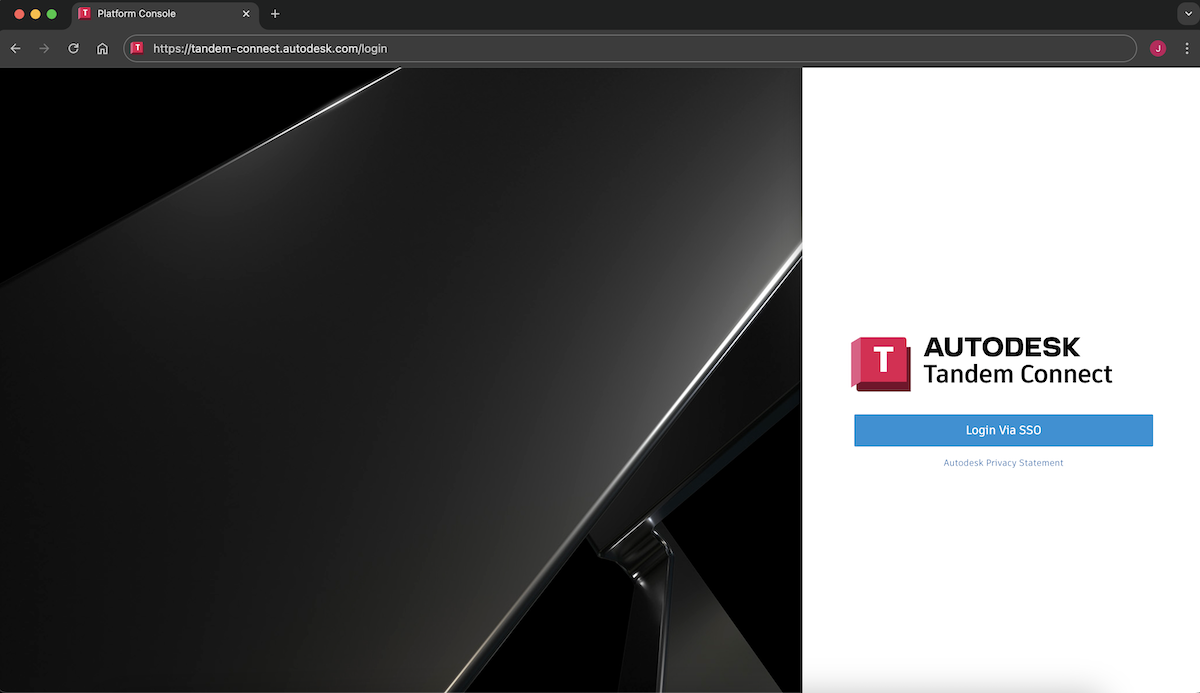
Click on the Login via SSO button to be redirected to the APS account login page.
Platform Console
Upon successful login, you will be presented with the following screen:
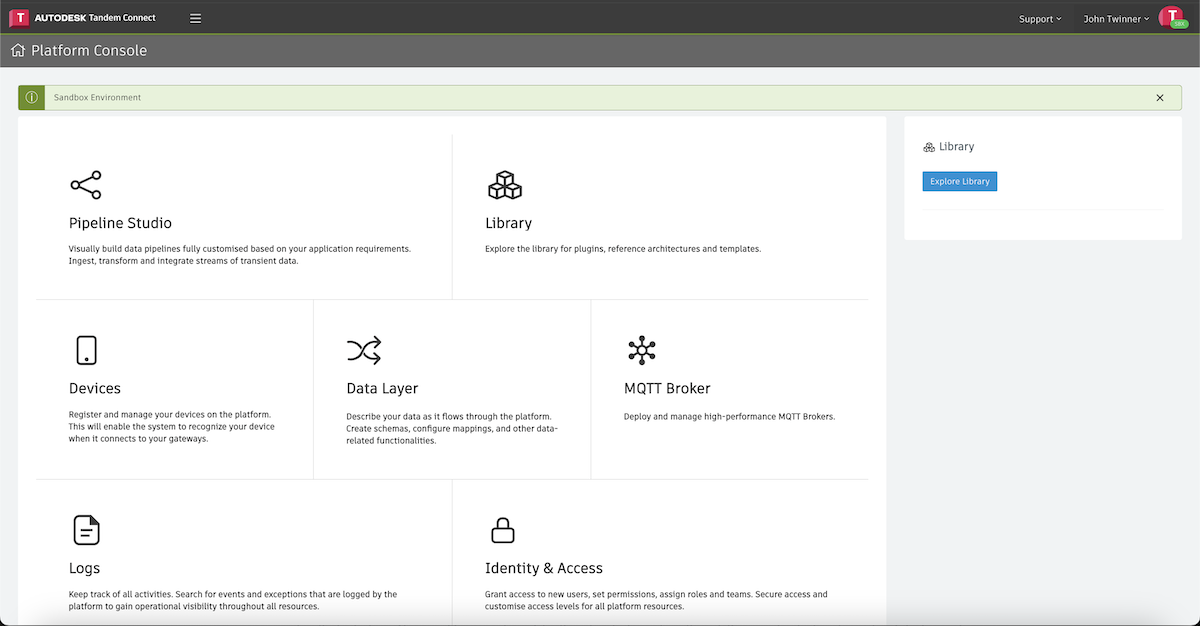
Along the top, there are several modes to view various pipelines. By default, you will see the pipelines that are currently saved in this account. Each pipeline can be in a state of either Deployed or Undeployed. If you have a production account, pipelines will run indefinitely until you manually undeploy them. In a sandbox account, pipelines will be automatically undeployed after a period of 12 hours.
Drafts will show you pipelines that are still work in progress or are being saved as a backup.
Library will show you the pipelines that are available as templates. You can download these Solution templates and modify for your own use.
Plugins will show you all the available plugins that you can use to help construct your pipelines.
Along the right-hand side, there are other modules:
- Data Layer: This module allows users to define data as it flows through the workflow. Users can create schemas and mappings which can be used to map incoming data and produce different outgoing data, as needed by the destination system.
- Devices: Allows users to register their devices and keep them in sync with Inventory Sync plugins. The registry allows users to activate and deactivate devices. In addition, this is where users can register edge devices so solutions can be deployed as outpost deployments.
- Identity & Access: Admin users can create a hierarchy of users and assign them appropriate roles. These roles control permissions for users to access different modules of the platform. The admin can also create API tokens for users to talk to the Tandem Connect platform via APIs and non web-based clients.
- Logs: Allows users to inspect logs to monitor or debug activity in the depolyed/running pipelines.
- MQTT Broker: A cloud based MQTT broker that can scale for huge amounts of data entering the workflow. This is only available for cloud-based deployments, and only for production accounts.
Creating a Pipeline
To create a new piplein, click the Add button. By default, the plugins are all hidden and are not available on the tool window left of the pipeline studio as shown below.
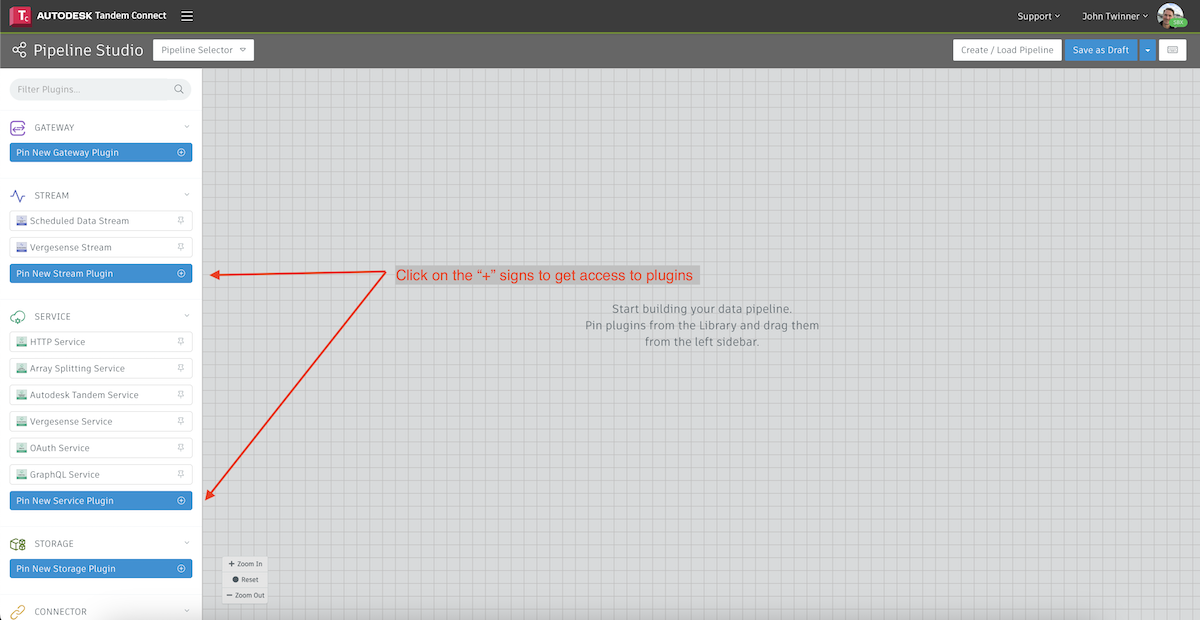
To use a plugin, click on the + button to bring up the following dialog
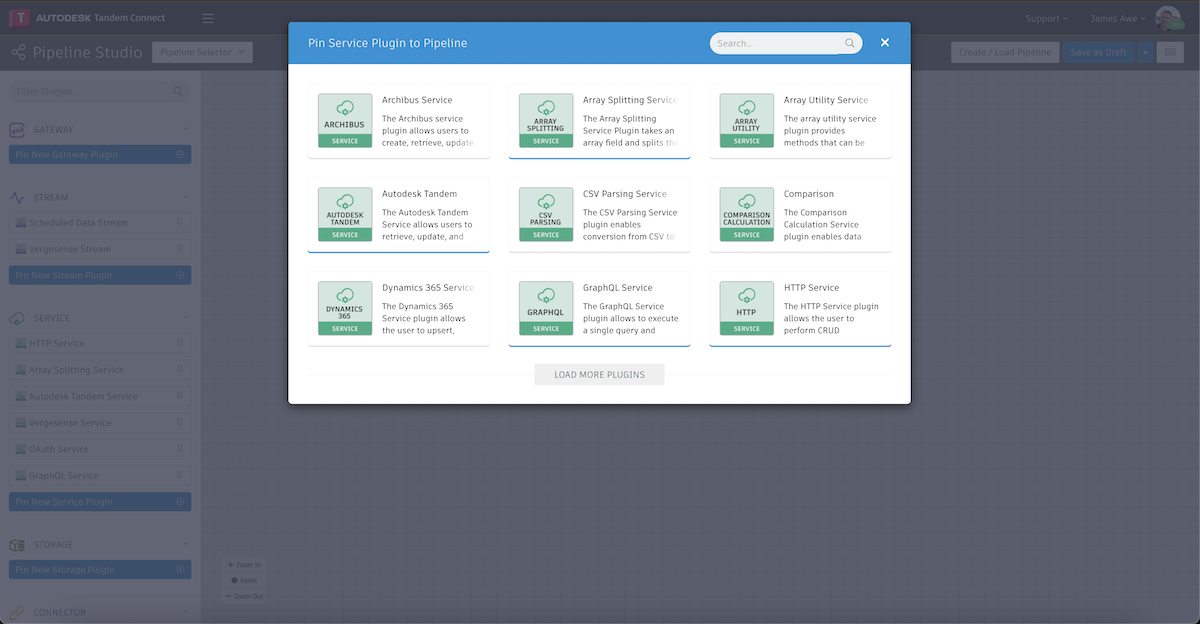
Once pinned, you can simply drag it to the canvas and then double-click to configure it.
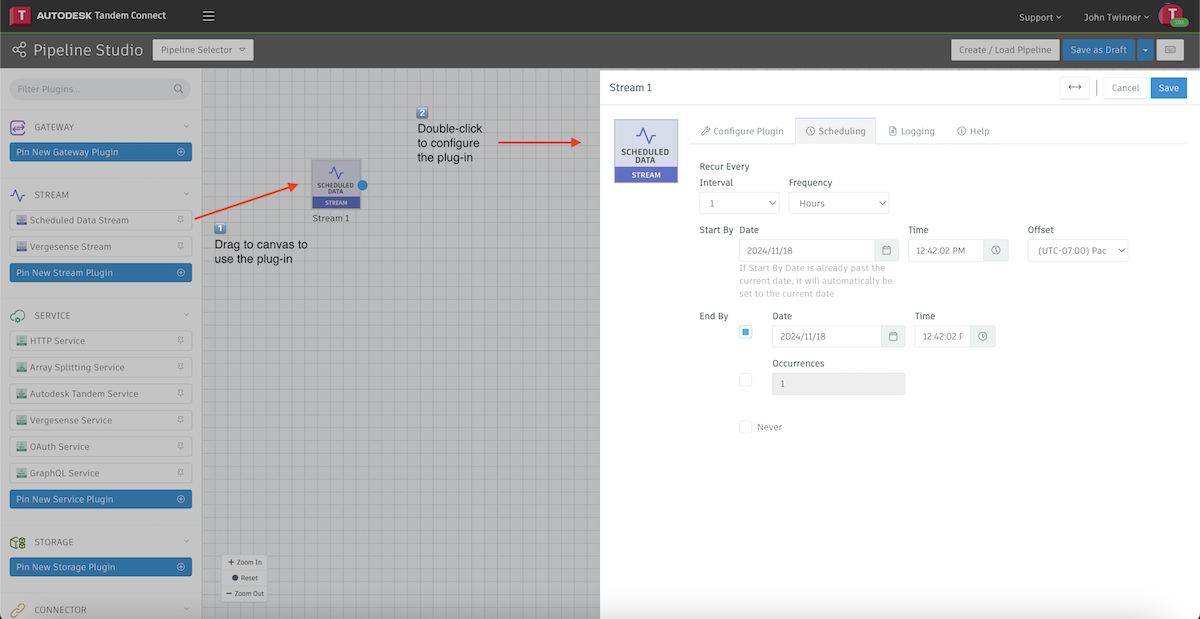
A pipeline is a collection of plugins connected to receive, transform, and send data from one system to another. The plugins are added to the center canvas and are connected by lines to have a workflow.
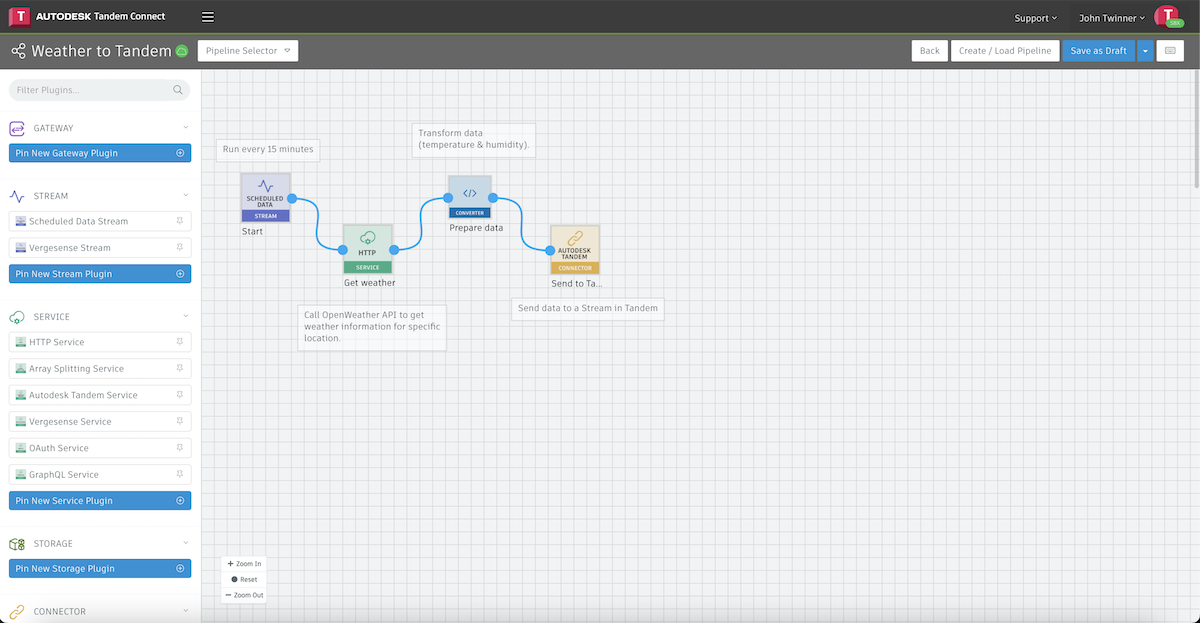
In this example, we are running the pipeline every 15 minutes, calling a weather service and then passing the current weather data into a Stream in Tandem.
See the Tutorials section for a walkthroughs of how to create this pipeline.
Start Point of Pipeline
There are 2 types of ingress plugins which are the starting point for any pipeline.
- A Stream plugin which runs periodically, either reading data by polling an endpoint or subscribing to an endpoint that can produce data. The word "periodically" here means the plugin can be configured to run on a particular schedule which can be configured in the plugin itself. The schedule can also be run at a time specific to a time zone. Please refer to the plugin Help section for more information.
- A Gateway plugin is a simple HTTP server running with an address and path where clients can call this endpoint and send data to it.
Both these plugins can exist in a pipeline where the pipeline can poll itself or accept data from other sources.
End Point of the Pipeline
Any plugin can be the last plugin of the pipeline, but logically a Connector plugin is the best choice as they are designed to be for "egress".
Additional Tips
- The data flow for a pipeline is always from left to right.
- There can be multiple plugins of the same type for a given workflow.
- Special plugins at the bottom of the plugin tool window on the left called "Tools" can be used to create branches and decisions on the workflow.
- A Filter tool can be used to create branches in the workflow based on a variable from the incoming data
- A Converter plugin can be used to write simple to complex JavaScript code to add additional functionality into the workflow. See the examples section for more details.
- A Note tool can be used to document each step of your pipeline to make it easier for you and others to remember the logic of the workflow.
- The plugins can have multiple sources of input and also can send output to multiple plugins.
Plugin Tabs
Each plugin has one or more of the following tabs:
- Configure Plugin: Used to specify options for the plugin to fit the purpose of the pipeline. By default, the plugin comes with a pre-defined configuration except for some mandatory or customer specific fields like credentials, hostnames, ip-addresses, etc.
- Output Scheme: Used to configure how the plugin's output is delivered to the next plugin. Please see the plugin Help tab for more details.
- Exceptions: All errors and exceptions are written into this tab. This is often used to debug the pipeline or to see when it last executed.
- Help: Documentation on how to use and configure the plugin. Note that many fields are optional or only used if some other part of the plugin is configured a certain way.
Save and Deploy
After editing your pipeline, you can deploy it to the cloud where it will execute the given workflow.
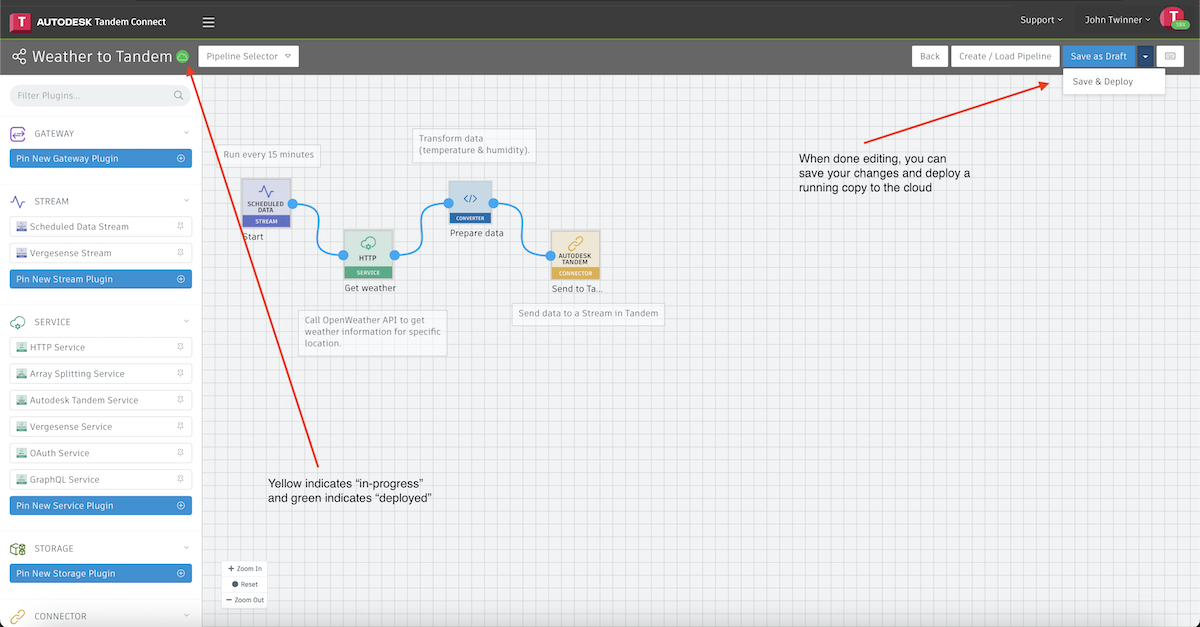
If you get an error message, you will need to go back and address the issue and try again. A common example of an error is setting a "Scheduler" date that is not in the future, or failing to specify a mandatory field in the configuration dialog for a given plugin.
Save as Draft allows you to save edits to a given pipeline without yet depolying it to the Cloud. You have the option of saving the draft under the same name so it retains its relationship to the already delpoyed version, or you can save as a new pipeline, which is the equivalent of a "Save As..." operation, and will create a completely new copy that is not related to the deployed version.
Deploy Immediately is just a streamlined way to "Save and Deploy" without bringing up the dialog with extra options. This is useful if you are in a debugging loop and making frequent updates and redeployment for testing.
Download Solution Templates
The Tandem Connect platform comes with some pre-defined solution templates for common use cases. These can be downloaded and then configured with minimal effort. These solutions are designed to have good default values for most plugins, but sometimes require specific API credentials or URNs for specific Tandem facilities. The platform comes with a feature called "Solution Walkthrough" which guides the user step by step to configure the downloaded solution and deploy it.
For more information on the Solution Walkthrough, click here : Solutions
