OpenXR/OpenVR: HMDs and Controllers
In VRED, since not all HMDs have buttons in the same location, when in VR or XR, use the controller mode to display tooltips to locate tools.
For entering a collaboration session, two controllers are required.
Supported Devices
For the most part, if an HMD runs through OpenVR or OpenXR, it should work with VRED. WinMR Headsets and HP Reverb HMD are supported via OpenVR. As of 2024.1, there is support for VIVE trackers. Here is a list of tested and supported devices.
We recommend using native runtimes over compatibility ones to achieve the best performance.
| HMD | Controller |
|---|---|
| HP Reverb | Windows Mixed Reality Motion Controllers |
| HP Reverb G2 | HP Reverb G2 Controllers |
| HTC VIVE | HTC VIVE Controllers and Logitech VR Ink Stylus |
| HTC VIVE Cosmos & Cosmos Elite | VIVE Cosmos Controller and Logitech VR Ink Stylus |
| HTC VIVE Pro & 2 Series | HTC VIVE Controllers and Logitech VR Ink Stylus |
| HTC VIVE Pro Eye | HTC VIVE Controllers |
| Microsoft HoloLens 2 | N/A |
| Microsoft HoloLens 2 + Win Mixed Reality | N/A |
| Oculus Rift | Touch Controllers |
| Oculus Rift S | Touch Controllers |
| StarVR | HTC VIVE Controllers |
| Valve Index | Index Controllers |
| Varjo | HTC VIVE Controllers and Logitech VR Ink Stylus |
| Varjo VR-1 | HTC VIVE Pro Controllers and Logitech VR Ink Stylus |
| Varjo VR-2 | HTC VIVE Pro Controllers and Logitech VR Ink Stylus |
| Varjo VR-2 Pro | HTC VIVE Pro Controllers and Logitech VR Ink Stylus |
| Varjo VR-3 | HTC VIVE Pro Controllers and Logitech VR Ink Stylus |
| Varjo XR-1 | HTC VIVE Controllers |
| Varjo XR-3 | HTC VIVE Pro Controllers |
| Varjo XR-3 Focal | HTC VIVE Controllers |
| Varjo XR-4 | Varjo Controllers and Ultraleap's Leap Motion Controller 2™ hand tracking module |
| VRHero/VRgineers XTAL | HTC VIVE Controllers |
| WinMR | WinMR Controllers* (such as HP Reverb Virtual Reality Headset, Lenovo Explorer, and Dell Visor) |
* This only works through SteamVR, using the OpenVR HMD mode.
** In OpenXR, the LeapMotion hand tracking needed for Vive headsets requires the latest Ultraleap driver (after 5.17).
To ensure you meet the minimum requirements for VR/XR, check the System requirements for Autodesk VRED products for the version you are running.
You can find controller mappings for your HMD in it topic, as well as in HMDs and Controllers. However, if you are looking to customize these mappings, see the following:
OpenXR
OpenXR support was added in 2023.4, as it is the new open standard for XR (VR/AR/MR) applications and boosts your experience and works with VR devices, tethered or not. It also includes hand tracking to controller input simulation, so that devices using OpenXR can also use hand tracking directly in VRED.
Though not every OpenXR extension is implemented, with each VRED release, you can find additional OpenXR supported features. For example, we currently support several controllers and hand tracking. And, as of 2024, the controller-based blue hands can be used, instead of the 3D controller model.
In 2024.1, support was added for HTC VIVE trackers in OpenXR.
Video Player is loading.As of 2024.2, you can use your own scripts to add custom functionality to VRED for OpenXR, similar to what can be done for OpenVR and other VR modes. Connect signals that are triggered by actions, for example when you teleport. Bind buttons to actions. Do this through the extended OpenXR support for
vrdVRDevice,vrdDeviceInteraction, andvrdDeviceAction.In 2025, we added better support for Varjo's headsets in OpenXR, which includes depth testing, foveated rendering, quad views, and MR/VR toggling.
In 2025.1, we added haptic feedback support for controllers. Use
vrdVRDevice.vibrate(milliseconds, axisId)to activate the vibration andmillisecondsfor setting its duration. We also added a generic controller model for yet unsupported XR controllers, MR hand tracking to display virtual hands over your real hands to help with VR Menu selection, Varjo marker tracking in OpenXR, and hand tracking for XR-4 in Varjo mode.
We have yet to implement the following:
- Eye tracking (Eye tracking is only supported for Varjo foveated rendering)
- AR for OpenXR (AR is supported for Varjo XR headsets)
- Python support for controller interaction is not fully supported (Unsupported functions are marked as such in the Python documentation)
To use OpenXR, simply select the appropriate display mode in the View settings (View > Display > OpenXR HMD).
Controllers for OpenXR
The following controllers are supported for OpenXR use in VRED. Click the links to see the default controller bindings for each controller. For people with unlisted controllers, see the Unsupported Controllers section that follows.
| Supported Controllers | For OpenXR Use |
|---|---|
| HTC VIVE | 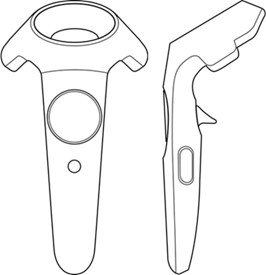 |
| HTC VIVE Cosmos | 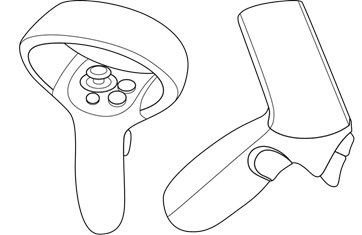 |
| HP MR (HP G2+ MS Motion 2nd generation) | 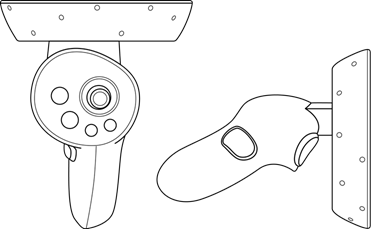 |
| MS MR Motion (Windows Mixed Reality 1st generation) | 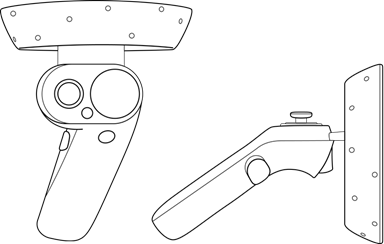 |
| Oculus Touch | 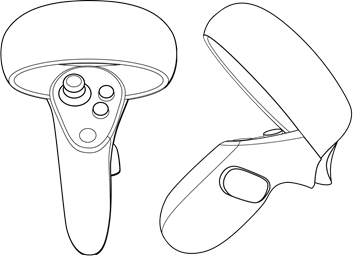 |
Unsupported Controllers for OpenXR
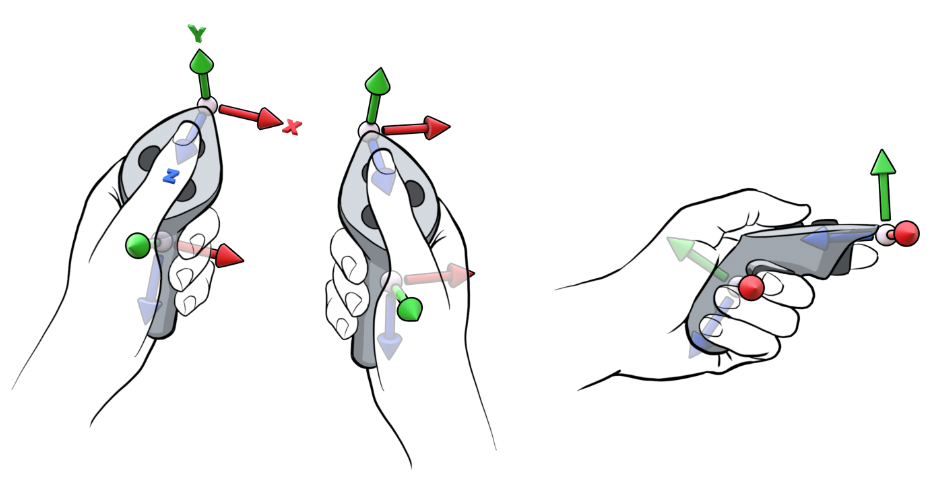
As of 2025.1, we implemented a backup controller model those of you with controllers that aren't yet supported by VRED in OpenXR. This enables you to use VRED with these.
Selecting a Runtime
To use OpenXR, you must be using the correct runtime. If you are not, a notification is displayed. In this case, use SteamVR as the runtime, if your HMD is supported by SteamVR.
The Windows Mixed Reality runtime is currently not supported directly by VRED. Windows Mixed Reality headsets can only be used via StreamVR.
To change the runtime, do the following:
SteamVR
- In SteamVR Settings, select Show Advanced Settings.
- Select Developer, then Set SteamVR as OpenXR Runtime.
Oculus
- In the Oculus App, select Settings.
- Select More and General.
- Under OpenXR-Rutime set Oculus App as active.
Varjo
- In Varjo Base, select System.
- Scroll to compatibility and activate OpenXR.
VIVE
- In VIVE Console, select Settings.
- Go to Advanced.
- Select VIVE OpenXR as current OpenXR runtime.
Controller Bindings
VRED comes with a set of basic tools: VR Menu, Teleport, Tooltips, and the Pointer. By default, these are mapped to the controls on your controllers. See the links that follow for the bindings specific to your HMD's controllers:
Managing Controller Bindings for SteamVR
For OpenXR, you can now manage your controller bindings in the SteamVR settings.
Go to Settings > Manage Controller Bindings > select VREDPro from the drop-down menu.
Set the active controller binding to Custom.
Edit the binding.
Note:For the customization of VRED settings to work as expected, it is important that the settings in SteamVR are reset to default (Active Controller Binding = Default). Otherwise, they will overwrite the controller binding setting in VRED
For the customization in VRED controller settings to work as expected, it is important that the SteamVR settings are reset to default (Active Controller Binding = Default). Otherwise, they will overwrite the controller bindings setting in VRED.
To use OpenXR with SteamVR, enable the OpenXR runtime in the SteamVR settings. Select Settings > Developer, then set Current OpenXR Runtime to SteamVR. It’s also possible to use the OpenXR runtime of Oculus and Varjo Base (System > Compatibility > enable: OpenXR).
Resetting Controller Bindings
To reset all controller bindings to their default values, in the Extended Reality > OpenXR preferences, press Set To Default.
Configuring a Controller
To configure your controller buttons, do the following:
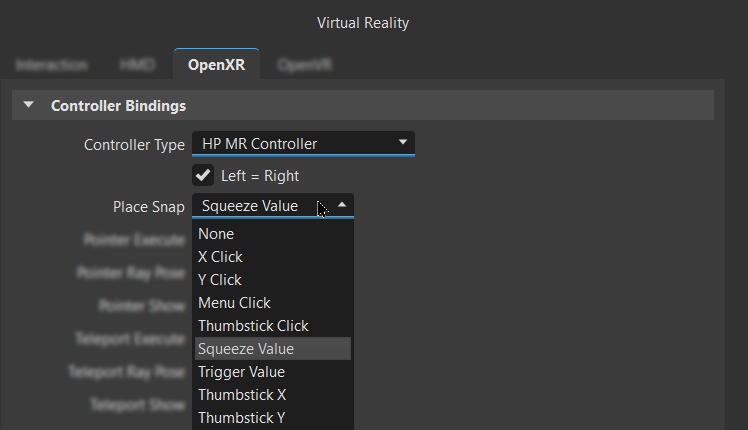
In the Extended Reality > OpenXR preferences, select your controller from the Controller Type drop-down menu.
If you want each controller to have different bindings, enable the Left = Right checkbox; otherwise, ensure it is disabled.
Open the drop-down menu next to each action and select an option.
Tip:Actions can be disabled, so they are not accessing. For instructions, see Disabling an Action. Controller buttons can also be disabled. For instructions, see Disabling a Controller Button.
When finished, press Apply and Save.
Setting Independent Controllers
It is possible to set the left and right controllers independent of one another when setting your controller bindings.
To do this, in the Extended Reality > OpenXR preferences, enable the Left = Right checkbox.
Adding Additional Controllers
You can add other controllers and set their bindings.
- In the Extended Reality > OpenXR preferences, press Add Controller, then select a controller type from the drop-down menu.
- Set the controller bindings.
- When finished, press Apply and Save.
Disabling an Action
To disable an action, so it is not accessible in a session, do the following:
- In the Extended Reality > OpenXR preferences, select the desired action from the list.
- Open the drop-down menu next to the action and select None. Now, the action cannot be triggered during a session.
In the future, to make the action accessible, select a target from its drop-down, such as Menu Click or X Touch.
Disabling a Controller Button
Any controller button can be disabled through the Extended Reality > OpenXR preferences. In the controller bindings list, ensure the button is not assigned to an action. If it is, select another option from the action's drop-down menu.
Setting Your View
In VR and MR, use the Extend Reality > HMD preferences to set your viewing preferences. Set eye tracking, foveated rendering, and depth estimation (occlusion).
Varjo Default Mode
For Varjo users, determine the mode you'll be working in using the Default Mode in the Varjo section.
- In the Extend Reality > HMD preferences > Varjo section, using the Default Mode dropdown menu, choose from VR and MR.
- Click Apply and Save.
Eye Tracking
Use Eye Tracking for tracking your eye movement when wearing an HMD. This is used by Foveated Rendering when it is enabled to determine which areas need high-resolution rendering.
- In the Extend Reality > HMD preferences > Eye Tracking section, enable Eye Tracking.
- Click Apply and Save.
Foveated and Native Foveated Rendering
VRED offers foveated rendering for setting eye-tracked high resolution rendered areas and peripheral in low resolution areas.
For a helpful Python function, see vrHMDService.
For Varjo users, use native foveated rendering with OpenXR to reduce peripheral resolution (image quality), while setting tracking areas to be rendered at high resolution. This improves performance in scenes with compute intensive materials, and when using real-time antialiasing.
For a helpful Python function, see vrdVarjoRenderSettings.
In the Extend Reality > HMD preferences > Foveated Rendering section, enable Foveated Rendering, then use Foveal Region Size to set the default size of the foveal region and Shading Quality to set the default level used for foveated rendered shading.
For Varjo users in MR, in the Extend Reality > HMD preferences > Varjo section, enable Native Foveated Rendering.
Click Apply and Save.
Quad Views
Varjo's quad views enable rendering to all four Varjo viewports to take advantage of Varjo’s human eye resolution displays for two viewports per eye.
To use the quad view, do the following:
- In the Extend Reality > HMD preferences > Eye Tracking section, enable Eye Tracking.
- In the Varjo section, enable Native Foveated Rendering.
- Click Apply and Save.