
Using the VR Menu
Scripts > VR Menu > Show VR Menu
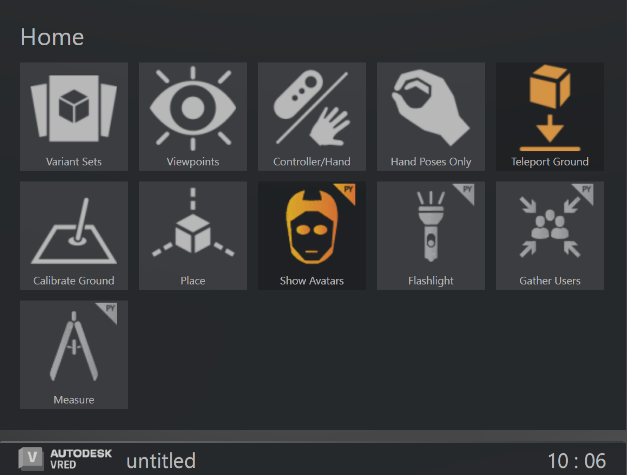
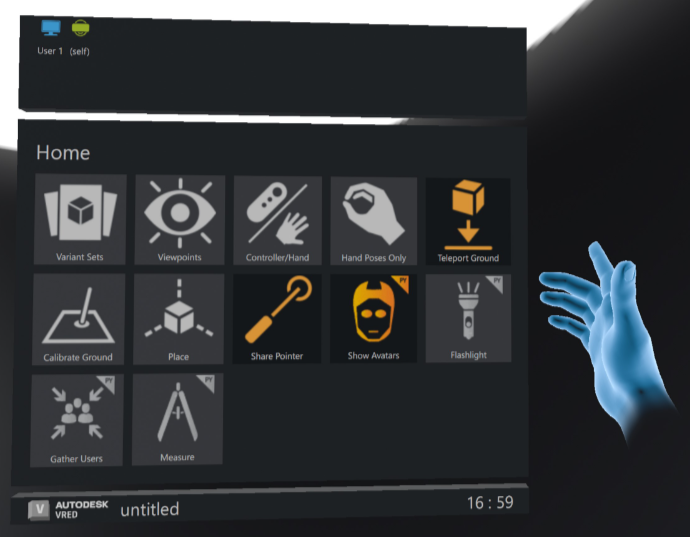
What is the VR Menu? It is a virtual interface that houses a collection of tools that are accessible while in VR. Some tools perform an action, while others open another panel with more options. Initially, a default set of available tools displayed, along with the current file name and time found along the bottom.

More tools can be added through the use of Python scripting. Once added, these will appear listed in the Scripts menu. Select one to enable it and add check to indicate it's active.
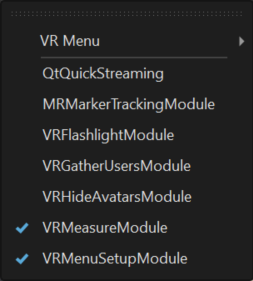
Added Python tools appear in the VR Menu and will display this badge ![]() in their upper right corner. See VRED Python Examples for more examples of Python scripts.
in their upper right corner. See VRED Python Examples for more examples of Python scripts.
You can also use the Scripts > VR Menu option to see a list of available tools that can be enabled or disabled. To set the default behavior of a tool, use the Extended Reality > Interaction preferences.
For collaboration session participants not wearing an HMD, all tools accessed through the VR Menu are accessible in the VRED desktop UI.
Before we continue, let's find out how to display the VR Menu.
Displaying the VR Menu
For participants in VR, there are two ways to display the VR Menu, either use a hand gesture or click the corresponding VR Menu controller button for your controller.
For information on how to display and use hands in VR, see Hands in XR.
Now, let's take a look at the tools.
VR Tools
The home panel contains an assortment of tools, some appearing by default, others through enabling a Python scripts or using the Scripts > VR Menu options. The following are a list of the tools listed in the Scripts > VR Menu list, along with some of they standard Python tools.
Show All Tools - Displays all default tools in the VR Menu.
Hide All Tools - Hides all tools in the VR Menu. Use Show All Tools to return them.
 Clear - Turns off virtual or mixed reality, so the user can see their actual surroundings while still wearing the HMD. This helps the user to avoid cables and other obsticles, as VRED uses the camera lenses of the headset to see the contents of the room.
Tooltips - Displays or hides tooltips when in VR/MR.
 Controller/Hand - (Default tool) Switches between displaying the controllers or hands. To do this another way, see How to Switch Between Hands and Controllers.
To set the displayed default, see Default Visualization.
 Calibrate Ground -
(Default tool) Provides a way to set where the ground plane is. When working with a model not created at the origin, participants will need to calibrate the ground to match that of the model.
Calibrate Ground -
(Default tool) Provides a way to set where the ground plane is. When working with a model not created at the origin, participants will need to calibrate the ground to match that of the model.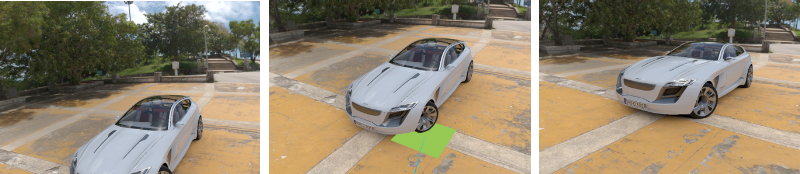
To change the VR ground plane to the height of the camera, see Use Camera Height as VR Ground Plane and Advanced Viewpoints in MR.
 Hand Poses Only - (Default tool) Toggles between using the pointer or hand gestures for communication. When enabled, you can point, give a thumbs up or down, make a fist, punch, or open your hand. It also disables all tools mapped to these button, with the exception of the VR Menu button. Use hand poses to interact with touch sensors and communicate with others, while in a session.
Depth Estimation - Toggles between seeing your real-world hands in front of virtual objects, such as the VR Menu or 3D geometry, or not.
 Mixed Reality - Switches from virtual reality to the mixed reality mode. Avatars disappears. In their place is the user's nametag, displayed above the user's location.
 Place - (Default tool) Use for placing objects on and moving them along the ground of the scene, using the laser pointer. These objects must have an assigned scene tag, called
 Place.The Place tool uses a similar approach to Teleport for rotating objects, that is rotating your wrist. You can snap the rotation to a 10° angle by pressing the controller's Grip button. Use this when trying to align one object with another. It is also possible to place objects atop one another.
 Share Pointer - (Only available for VR Room participants) Changes whether other participants see or do not see your pointer. The default state is for it to be seen by others, enabled. For you, your pointer will be visible, whether this option is activated or not.
Since the pointer is meant to draw participants' attention to things during a collaboration session, when activating touch sensors or WebEngines, disable Share Pointer. Enable Share Pointer again when you need to get the others' attention.
 Teleport Ground - (Default tool) Sets the teleporting ground mode to either On Geometry or On Ground Plane. When Teleport Ground is enabled, teleport around the scene or into spaces, such as inside a car. When disabled, teleport onto geometry in the scene. To set a teleporting Ground Mode preference, see Virtual Reality Preferences.
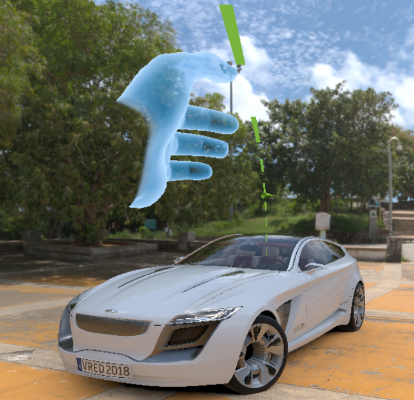 Note:
Note:When Use Camera Height as VR Ground Plane is enabled, the teleporting ground mode changes to the camera height. However, if teleport On Geometry is enabled, Use Camera Height as VR Ground Plane is ignored.
Microphone On - Enables or disables the use of the microphone for communicating with others in a session.
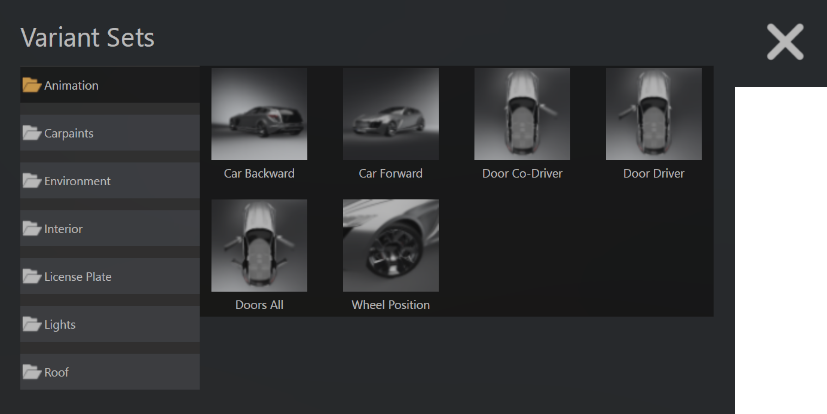
 Variant Sets - (Default tool) Opens the Variant Sets (VSets) panel to access all variant sets created for the scene. Any variant sets set in a scene are automatically loaded into the Variant Sets panel of the VR Menu.
 Viewpoints - (Default tool) Opens the Viewpoints panel to access all viewpoints, cameras, and camera tracks created for the scene. For camera and camera track labelling, when there is only one camera, the
 camera track nameis displayed; however, if there are more, they are labelled as thecamera name: camera track name.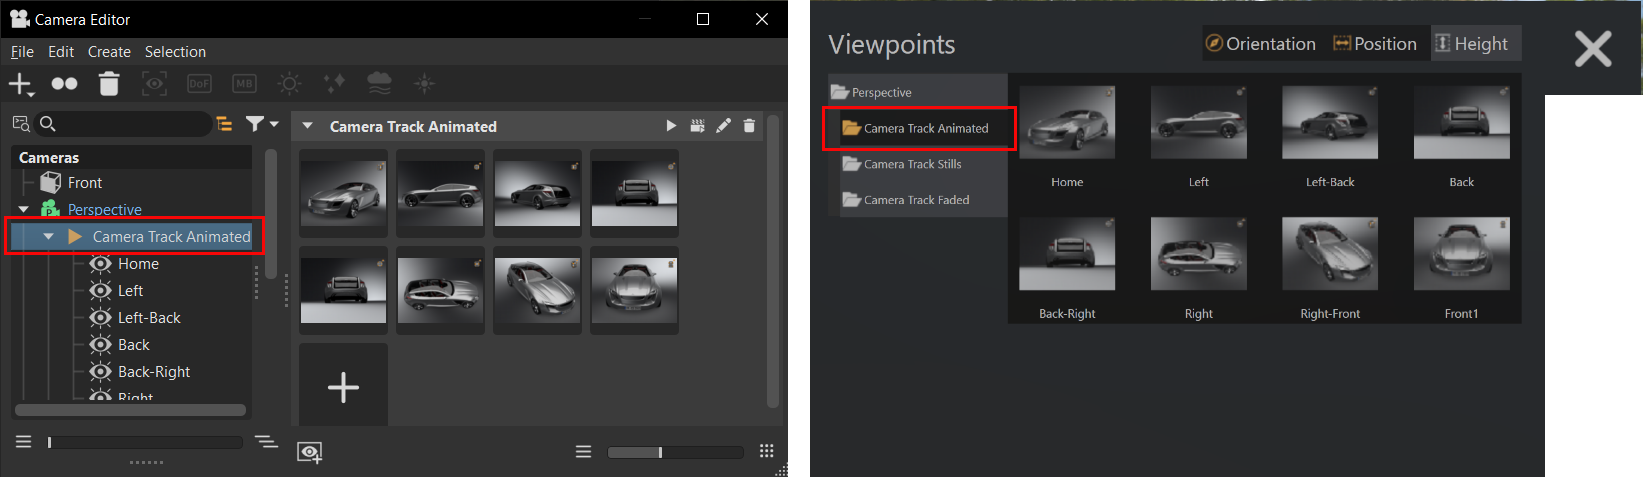
Any viewpoints set in a scene are automatically loaded into the Viewpoints panel of the VR Menu. However; cameras and camera tracks are not updated in realtime. For the app to detect these changes, you must use
Ctrl + R. Virtual Reality - Switches from the mixed reality mode to virtual reality.
 Flashlight - Only available for VR Room participants. (Python tool) Shows or hides a flashlight. See Showing a flash light in VR.Note:
As of version 2022.2, we replaced the previous VR flashlight with a new poly model.

 Gather Users - (Python tool) Teleports all users in a collaboration session to a shared location. This enables all participants to look at the same thing from the same view. This is useful for design reviews. See Gather all users in a collaboration session.Note:
Since participants are teleported without consent, we recommend using this only when necessary. This experience can be a bit unnerving, as participants' view and virtual surrounds instantly change.
 Show Avatars - (Python tool) Shows or hides avatars. See Hide Avatars in a collaboration session.
 Measure - (Python tool) Measures the distance between two selectable points in VR. See Measure Distances in VR.
Show Status Panel - Displays or hides the Status panel, which provides the time and scene name, floats below the VR Menu.

Show Participants Panel - Displays or hides the Participants panel, which lists all participants who have joined the session. It also indicates whether they have loaded the model. If a room location is supplied, it is also listed here, indicating the VR room(s) used in the session. Find it along the top.
If you are in a collaboration session, the names of all participants will be displayed. To disable this feature, use the Python command, vrImmersiveUiService.setHideParticipantsVRPanel(true).
Show VR Menu - Displays or hides the VR Menu.
 Marker - Only available for Varjo MR mixed reality headset users. Use a visible marker, known as the origin marker, for easy placement of objects in a mixed reality scene. The coordinate system is automatically synced. Your nodes need to be prepared before entering MR. Check out the Preparing Nodes for Placement section in Markers in Mixed Reality.
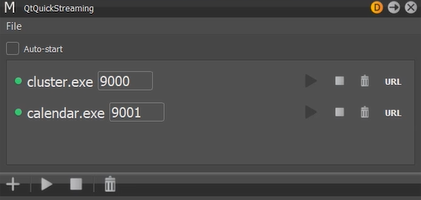
QtQuickStreaming - Opens the QtQuickStreaming dialog for streaming QT content directly into the VRED scene, using a newly built script module. See Using QtQuickStreaming for how to use it.
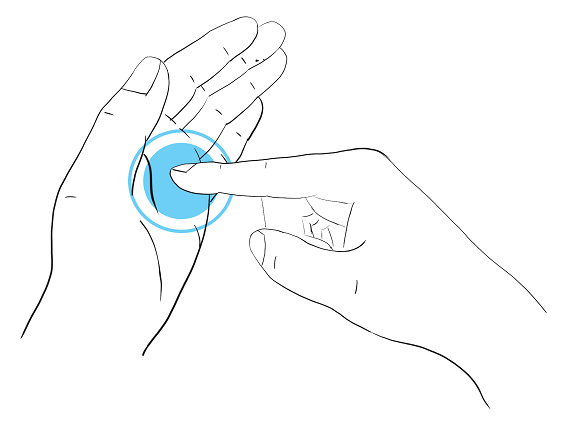
Accessing the Menu
To open the menu, move your index finger to the palm of your other hand. Repeat this gesture to close the VR Menu.
Triggering Tools
To trigger a tool, either tap with your virtual hand or use the pointer.
Troubleshooting
See Using the VR Menu if you are having issues with triggering a tool or your real-world hands are behind virtual objects.
How to Scroll Through Lists
There are two ways to scroll through lists in the VR Menu.
Click and drag a scroll bar up or down.
Press the trigger and move the controller up or down to scroll through lists of options.
Pressing and releasing the trigger will select the highlighted option.
To exit a panel and return to the previous one, press the X in the top right.
How to Add Functionality to the VR Menu
Use Python add functionality to the VR Menu, such as web content and access to VRED modules.
To see sample Python functions for adding functionality, select File > Open Example > vr > customMenuButton.py and click Open.
Select Edit > Script Editor to open the editor and take a look at the code.
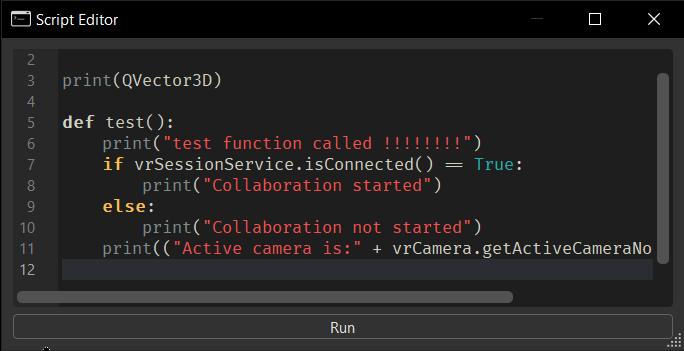
Select Help > Python Documentation to refer to the Python documentation for details on these functions.
For more information on how to create VR Menu entries with Python, see Creating VR Menu Entries.
How to Hide Options in the VR Menu
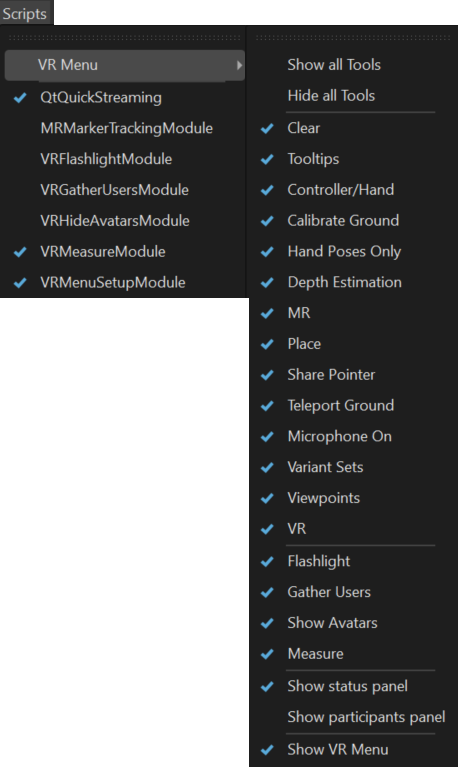
If there are options you do or don't want displayed in the VR Menu, use Scripts > VR Menu to toggle them on or off.
In the menu bar, select Scripts > VR Menu, then either check an option to display it or uncheck it to hide it.
Variants Set and the VR Menu
How to Remove Variant Sets from the VR Menu
There are two ways to do this:
To turn off the display of Variant Sets in the VR Menu from the desktop, select Scripts > VR Menu > Variant Sets, then remove the check next to it.
To remove Variant Sets from the VR Menu while in VR, so they cannot be seen in VR, use the Variant Sets module.
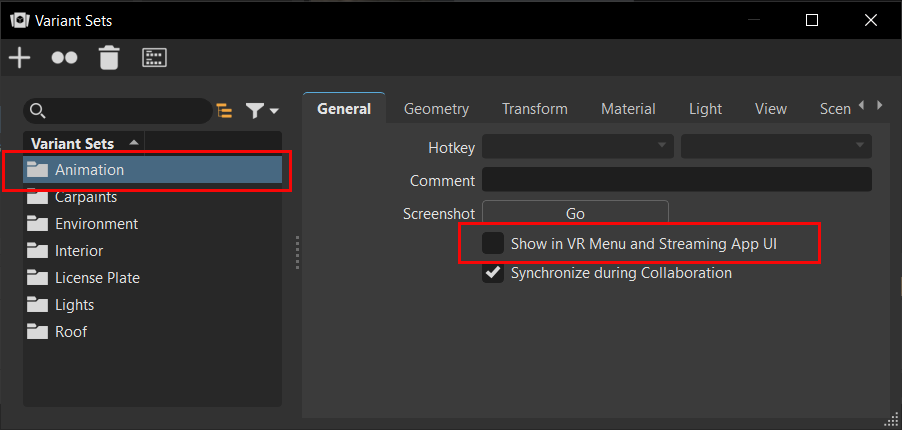
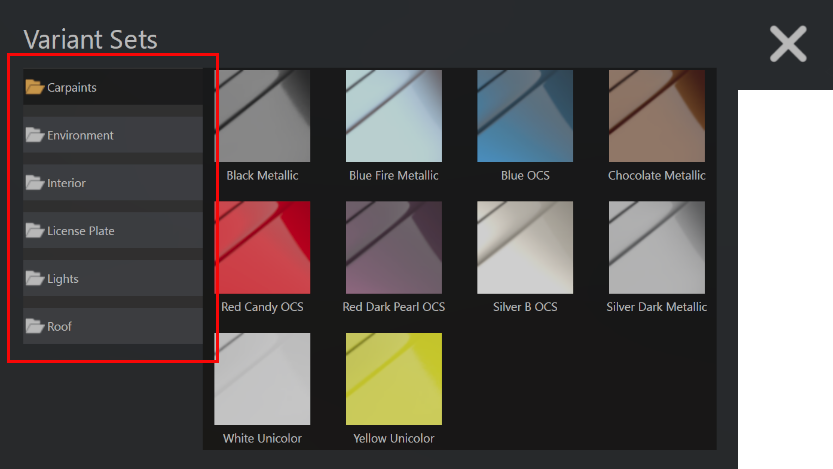
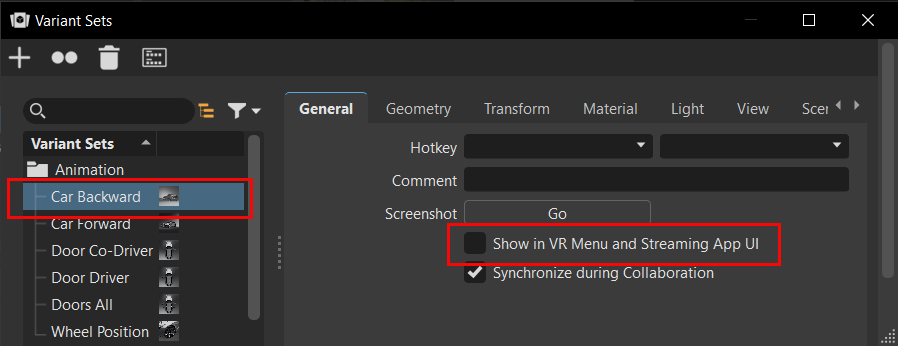
In the Variant Sets module, select the Variant Set groups to be removed from the left side.
In the General tab, uncheck Show in VR Menu. This removes all the selected Variant Sets from the VR Menu.
How to Display Hidden Variant Sets
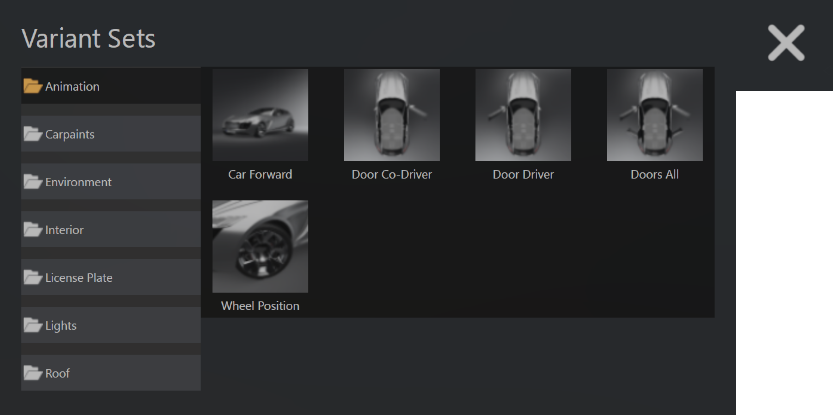
To display hidden variant sets groups in the VR Menu, select the variant sets group along the left of the VR Menu, then in the Variant Sets module General tab, check Show in VR Menu.
How to Remove and Display Single Variant Sets
To remove single vaiant sets from a group, in the Variant Sets module, select the individual variant set, then uncheck Show in VR Menu.
To display a hidden variant set, select it, then in the General tab, check Show in VR Menu.