
Activity 1: Create a problem report
Fusion Manage requires a separate license and can be used with Fusion or independently. Learn more.
In this activity, you are playing the part of a service engineer. A customer has encountered an issue with their Wireless Speaker where the speaker charges very slowly, and you need to log this as a problem report. You'll include all information needed at this stage and then send it for review.
- It is assumed that you are performing these tutorials in your production environment. Therefore, we recommend that you read through the relevant help pages and activities so that you know what the result will be before creating or modifying anything.
Prerequisites
Before you can complete this activity:
- You or the person completing this activity must hold the Creator [Problem Reports] role (or the Editor [Problem Reports] role).
- You must complete Tutorial 4 so that you have a released Wireless Speaker assembly.
Steps
Read the help for more information on the purpose of a problem report.
Create a problem report.
Log into the Fusion Manage site.
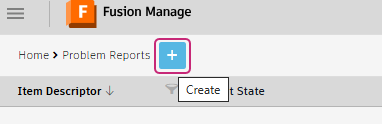
From the Navigation menu, select Workspaces > Change Management > Problem Reports.
Click Create.
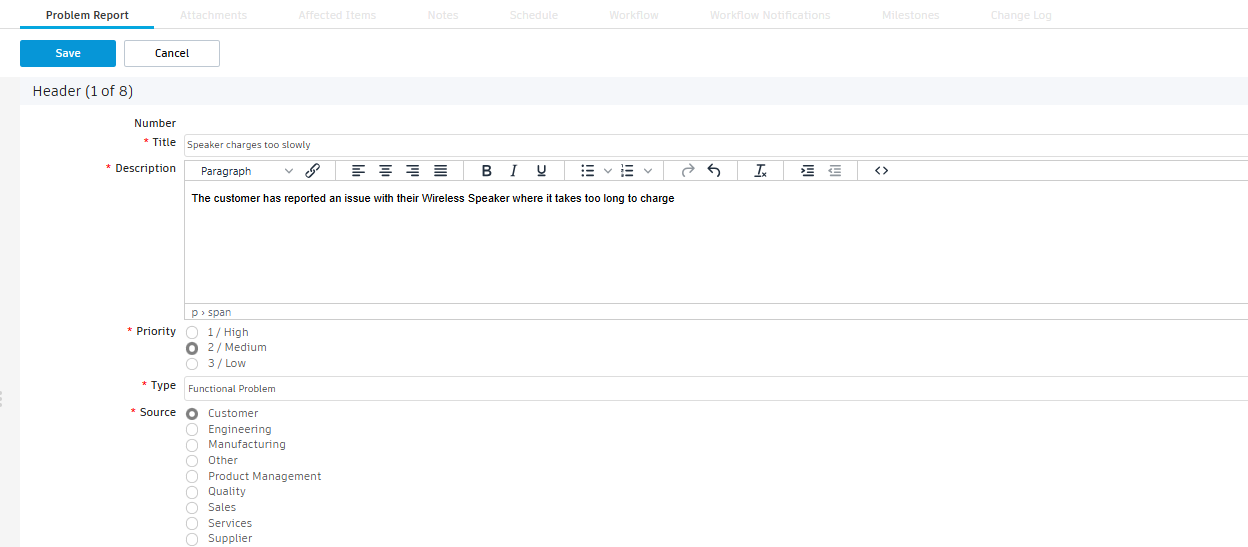
In the Header section, fill in all fields as necessary. Required fields are marked with a red asterisk.
Enter the Title:
Speaker charges too slowly.Enter the Description
The customer has reported an issue with their Wireless Speaker where it takes too long to charge.Set Priority to Medium.
Set Type to Functional Problem.
Select Source as Customer.
In the Details section, add the Wireless Speaker item and add additional information about the problem.
In the Affected Item field, select the Wireless Speaker REV:A assembly that was previously released in Tutorial 4.

Optional: Fill out the Affected Quantity, Sequence Leading to Issue, Impact, Proposed Actions, and Target Resolution Date.
Click Save.
Optional: Add images to the problem report.
- Click Edit.
- In the Images section, click Choose File to upload images from your computer. Alternatively, drag and drop the images into each cell.
- Optionally add comments to each image.
- Click Save.
Optional: Add supporting documentation to the problem report.
Open the Attachments tab.
Here you can attach any supporting documentation if needed to provide additional information on the problem report.
Click Upload.
Select documents from your computer, then click Open.
Observe the current workflow state and send the problem report to be reviewed.
Notice the problem report header at the top shows the Create workflow state.

Open the Workflow tab and notice the current state Create is highlighted blue.
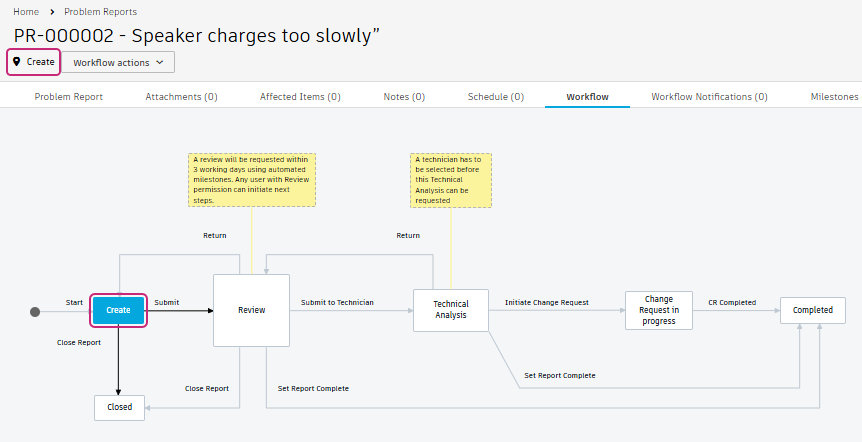 Tip: Click a blue workflow state to see who can perform each action.
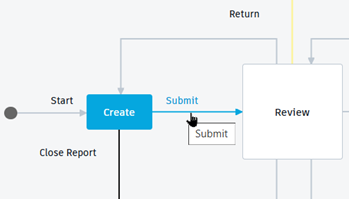
Send the problem report to the Review state.
Option 1: In the header, click the Workflow actions drop-down and select Submit.
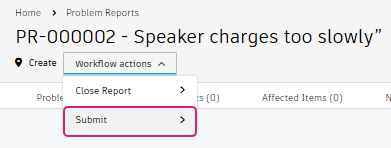
Option 2: In the Workflow tab, click the Submit transition.
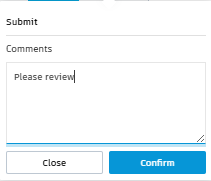
Enter optional comments, then click Confirm.
Notice the problem report header at the top now shows the Review workflow state.
Open the Workflow tab and the current state Review is highlighted blue.
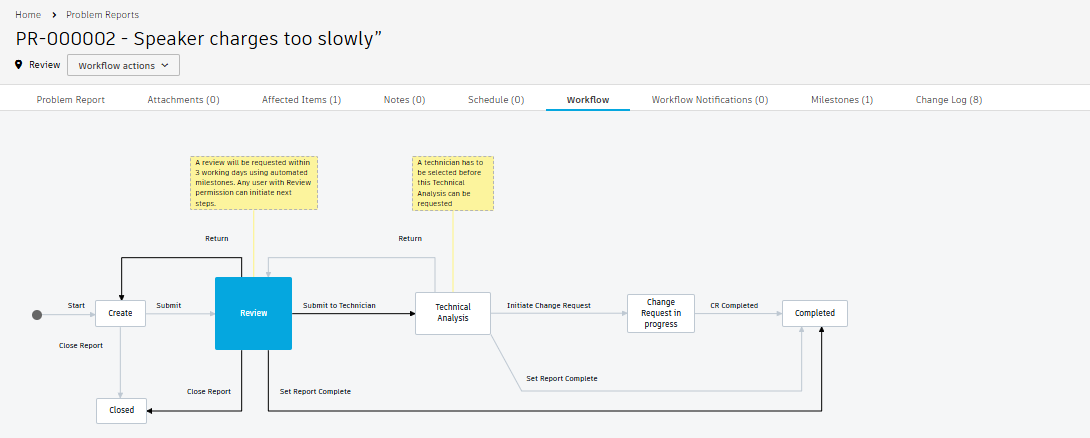
Also notice the affected item selected in the Details section has been copied to the Affected Items tab.
Activity 1 summary
In this activity you:
- Explored the purpose of a problem report
- Understand some reasons why someone might create a problem report.
- Listed some people who might create a problem report and when.
- Created a problem report.