Morphs are created by creating corresponding splines on two clips and linking them together. You then set interpolation values controlling how the features contained in the first set of splines morph into the features contained in the second set of splines. This method is called source interpolation. Finally, you blend the two clips over time to complete the morph. For example, you can draw splines around the outline of an actor and each of the actor's facial features. Then duplicate these splines onto a second clip containing the actor to whom the first actor will morph into. Edit the copied splines to more accurately contour the features of the second actor, link the corresponding splines, and then blend the two clips to complete the morph. Both sets of splines, those on the first clip, and those on the second clip, can be animated. Additionally, you can edit and animate the interpolated splines.
 Source splines drawn on actor .Image courtesy of Behavior Communications Inc. |
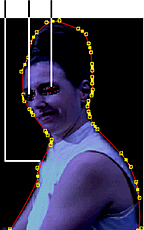 Corresponding splines on second actor are linked .Image courtesy of Behavior Communications Inc. |
Distort Morphing Workflow
The general morphing workflow in the Distort tool incudes the following steps.
| Step: | Refer to: |
|---|---|
| 1. Load clips into the Distort tool. | Accessing Distort. |
| 2. Draw a source spline on the Front1 clip. | Drawing Splines. Tip: Use Distort's schematic as you work with splines to help organize your work. See Using Distort's Schematic.
|
| 3. Edit the Front1 source spline. | Editing Splines. |
| 4. Animate the Front1 source spline. | Animating and Tracking Splines. |
| 5. Display the Front2 clip. | GUID-9A8FAAA2-B769-4B77-B2E4-2C4C077B06EB.htm#WSCBA3EE2B36D8CB6F-195644721162BE4157F-7FF6. |
| 6. Duplicate the Front1 spline, then toggle the duplicated spline to become an Front2 spline. | Toggling Spline Nodes from One Input to Another. |
| 7. Edit the Front2 source spline. | Editing Splines. |
| 8. Animate the Front2 source spline. | Animating and Tracking Splines. |
| 9. In the Distort schematic, link the spline on the Front1 clip with the spline on the Front2 clip. | Linking Source Nodes. |
| 10. Set Blend and Interpolation values. | Blending Clips and Interpolating Features. |
| 11. Refine the morphing effect. | Refining Distortions. |