Use the individual Toolpath menu to manage and edit the selected toolpath.
To display the menu, in the Explorer, right-click on a toolpath.
Simulate from Start — Select to simulate the selected toolpath. The Simulation tab > Simulation Path panel > Entity list is updated with this Toolpath. You can then use the Simulation tab to simulate the NC program. For more information see Example of Toolpath Animation, ViewMill Simulation Procedure or Example of Machine Tool Simulation. This feature is for visualisation purposes only and is not intended for use as a gouge checking tool.
Activate — When selected, activates this toolpath and de-activates any currently active toolpath. When deselected, de-activates this toolpath.
Activate Workplane — Select to activate the workplane used to create this toolpath.
Settings — Select to display the parameters used to create this toolpath in the strategy dialog.
Initially the
Name
is the only editable field. To edit other fields first click either
Recycle toolpath
 , to edit the existing toolpath, or
Copy toolpath
, to edit the existing toolpath, or
Copy toolpath
 , to create a new toolpath based on this one.
For more information, see Toolpath Strategies.
Queue — Select to check all the parameters used to calculate the toolpath are acceptable, adds the toolpath to the calculation queue and closes the dialog. The toolpath is calculated in the background when PowerMill would otherwise be idle.
Recreate Block — Select to re-create the block used to create this toolpath.
Select Surfaces — Select to select the surfaces used to create this toolpath. This option only displays a result if you had to select specific surfaces to create the toolpath.
View Picked Z Height — Select to enable you to view the active toolpath at a specific Z height.
View Feed Rates — Select to display the Cutting Feed Rate in an Information window. The variable feed rates on a toolpath are represented in different colours.
Draw — When selected, displays the toolpath. Deselect to "hide" it. This option toggles between
 and
and
 .
.
Drawing Options — Select which toolpath components are displayed the screen.
Colour — Select the colour of toolpaths that are drawn but not active.
- Edit — Click to specify the colour of Drawn, but not active toolpaths. Selecting this option displays the standard Select Colour dialog. Select the required colour and click OK. This updates colour of the toolpath.
- Reset — Click to reset the colour back to the default setting.
The colour of the active toolpath is unaffected by any colour allocated here.
Rename — Select to rename the entity.
Save as Strategy — Select to save the toolpath as a strategy. This is beneficial because, when you use the strategy to create a toolpath in the future, the strategy applies the parameters of the original, saved toolpath to the new toolpath.
Add to — Select to add the toolpath to the selected entity.
- Add to Stock Model — Click to apply the active toolpath and places the toolpath at the bottom of the stock model list. If the stock model is newly created (no block has been applied) then the block associated with the toolpath is applied automatically. This is the same as the individual Stock Models Object context menu option, Apply > Active Toolpath Last.
- Add to NC Program — Click to add the toolpath to the currently active NC program. This option is available only if there is a currently active NC program.
- Add to Group — Click to add the toolpath to the currently active group. This option is only available if there is a currently active group.
- Add to Folder — Select to add the entity to the active folder. If the Folder option is unavailable then activate the folder. You can add an entity only to a folder within that entity type. For example, you cannot add a toolpath entity to a NC program folder.
Create Individual NC Program — Select to create an NC program for the toolpath. The NC program has the same name as the toolpath.
Batch — When selected, enables the batch toolpath. When deselected disables the batch toolpath. To create a Batch Toolpath click OK rather than Calculate on a strategy dialog. To calculate a batch toolpath from the Toolpaths context-menu, select Batch Process.
This toggles between
 and
and
 . When you process a batch toolpath (by selecting
Batch Process
from the
Toolpaths context menu) only the batch toolpaths marked
. When you process a batch toolpath (by selecting
Batch Process
from the
Toolpaths context menu) only the batch toolpaths marked
 are processed. If a batch toolpath requires a disabled batch toolpath
 to create the toolpath, the disabled batch toolpath
is calculated so that the batch toolpath
can be calculated.
to create the toolpath, the disabled batch toolpath
is calculated so that the batch toolpath
can be calculated.
Batch processing works by creating an unprocessed toolpath, containing all of the parameters that would be used if you clicked on the Apply
button on the current machining strategy dialog. This toolpath appears in the toolpath list with the prefix
.
Load Settings — Select to load the parameters used to define the toolpath into the Finishing dialog.
Statistics — Select to display the length and time of all the leads, links and cutting moves as well as the number of lifts relating to the active toolpath.
Properties — Select to display the toolpath name, the extents of the toolpath, and information on the cutting moves.
Verify — Select how to verify the safety of the toolpath.
- Toolpath — Select to check the safety of the toolpath.
- Tool Axis — Select to check the toolpath against the Tool Axis Limits. If the toolpath exceeds these limits then it is limited back to the limits.
Analyse — Select to ensure there are no problems with a 3-axis area clearance toolpath. If there are any issues with the toolpath, PowerMill automatically generates a new toolpath containing the problem area. This is most useful for Vortex toolpaths but can be used for any 3-axis area clearance toolpath as it shows areas of excess tool engagement which minimise tool life. This option checks for:
- Plunges into stock.
- Excess tool engagement.
- Excess depth of cut
- Small arc movements.
If the toolpath passes all these tests a PowerMill Information dialog states "No problems found with this toolpath", otherwise it gives details of the problems, for example "There are plunges into stock" or "The maximum engagement angle is too large".
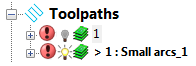
If there are problem areas:
-
PowerMill locates any problems and creates separate toolpaths highlighting the problem areas, in this case
1 : Small arcs_1.
- Look at the problem area and make some changes to the toolpath settings to resolve the issue (such as reducing the Stepover by a small amount). It is not advisable to edit the original toolpath by removing the problem areas as this is likely to make the problem worse.
- Re-calculate the toolpath to check your changes result in a safe toolpath.
Invert Selection — Select to deselect the part of the toolpath that is currently selected and select the part of the toolpath that is currently unselected. This can be useful when you want to work on (edit, delete..) all except one area of toolpath. It is much easier to select just the area you do not want to work on and reverse the selection before editing/deleting the rest, than to select all segments all around the graphics struggling to avoid the segments you want to keep.
Edit — Select how to edit the active toolpath. Some of these options create new, modified toolpaths. Others modify the existing toolpath.
Unlock Toolpath — Select to unlock the toolpath for editing. This overrides all locks on the toolpath and invalidates all references to the toolpath.
Remove From Folder — Select to remove the toolpath from the current folder.
Delete Toolpath — Select to delete the toolpath.