Create Meetings
Click Create meeting to add a meeting. This is the first step in the workflow. Fill in details, invite attendees, and prepare your agenda. Once invited, attendees can see the details.
Once created, even without a title or details, it shows on the Meeting series list. Click the title to open and edit.
In this topic:
- Meeting Details
- Add a Video Conference Link
- Invite People
- Meeting Discussion
- Add References
- What's Next
Meeting Details
Once you click Create meeting, you can edit the details.
Fill in the title, date, time, and location by clicking the pencil icon  .
.

Add a Video Conference Link
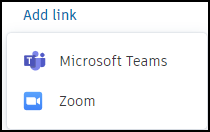
To add a video conference link, click Add link and choose Microsoft Teams or Zoom.

- For Microsoft Teams: Edit the generated link using the pencil icon
 .
. - For Zoom: Sign in to your Zoom account and authorize Autodesk Construction Cloud on first sign in.
Learn more: Video Conference Links.
Invite People
Add attendees to your meeting and assign their roles:
Click Invitees
 .
. Click Add invitees.
Select members or create a nonmember.
Note: By clicking Create nonmember, you'll add invitees that aren't the project's members. Add their name, company, and email. Those nonmembers won't be added to the project.After adding invitees, select Confirm.
Members and nonmembers are added automatically to the Invitees list. By clicking the More menu  next to their name, you can:
- Assign the Organizer role to members. See Meetings Permissions for details on user roles and what each can do.
- Remove an invitee from the list.
Share the Agenda
Adding invitees does not email an invitation. To share the agenda with invitees:
- Click the More menu
 .
. - Choose Share with invitees. The new window opens.
- Choose to share through:
- Email with a link to the meeting
- Designated link to the agenda in Autodesk Build
- If shared through email, click Share to finish.
Add a Meeting to a Calendar
You can add a meeting to your own calendar for better scheduling. To do so, click the More menu  and choose the Add to calendar (.ics) option.
Meeting Discussion
The discussion consists of topics containing meeting items. For example, a topic called Safety could contain items for safety issues or concerns about equipment availability. Add references to items for easy access to relevant information.
Within Meeting discussion, after you name the topic, click Add item to add items. Pressing the Enter key while in an item creates a line for the item, not a new item. To create another item, click Add item once again. Each item gets the Open status, which can be changed.
Once items are created: add a due date, assignees, or reference items to items using the More menu  .
.

You can also delete an item or topic by clicking the  icon.
icon.
Topics and items have character limits. See Product and Tool Limitations for details.
Add References
To view and manage meeting references, click ![]() . Clicking a reference under an item opens the reference drawer. Files open in a new browser tab; RFIs and issues open the respective tools.
. Clicking a reference under an item opens the reference drawer. Files open in a new browser tab; RFIs and issues open the respective tools.
- Meeting references: add documents or sheets relevant to the entire meeting.
- Item references: attach Files, Sheets, RFIs, Issues, Photos, Submittals, Assets, Forms, Schedule items, Plan Tasks, or Cost items to individual meeting items from the More menu
 .
.
Learn more: Meeting References.
What's Next
After creating your meeting:
- Run your meeting and track attendance
