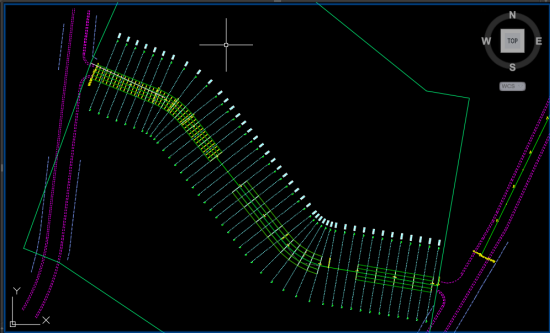
You can use Autodesk Civil 3D rehab corridor modeling to optimize the cross slope of rehab corridors, such as roads and highways.
Just like any other Autodesk Civil 3D corridor model, a rehab corridor model builds on and uses various Autodesk Civil 3D objects and data, including subassemblies, alignments, profiles, surfaces, and targets. The rehab corridor manages the data, tying various rehab subassemblies (applied for different ranges of stations) to the baselines and their finished grade profiles.
Once you have created your rehab corridor model, the corridor name is displayed in the Corridors collection on the Prospector tab. You can perform any edits on it that you would perform on a standard corridor model. You can add additional non-rehab subassemblies to your rehab corridor as well. See About Subassemblies for more information.
- Create sections of a rehab corridor to display in section view.
- Extract feature lines or solids from a rehab corridor.
- Create surfaces from a rehab corridor.
- Create data references for a rehab corridor.
You can review About Corridor Modeling for more information.
However, the workflow to create a rehab corridor is slightly different from the standard workflow used to create other corridor models. To create a rehab corridor object, you must specify a corridor style, corridor layer, a baseline (alignment and profile), rehab region start and end stations, and a target surface. Next, you will use the Rehab Parameters palette to specify lane inputs and properties, and modify the rehab input parameters such as cross slope adjustments, and milling and leveling parameters. Once you apply rehab parameters to your rehab corridor, Autodesk Civil 3D will automatically build the rehab assembly for your rehab corridor, and will automatically assign the appropriate rehab and/or cross slope optimization subassemblies to your rehab corridor regions. You can review the assembly that was created when you applied rehab parameters to the rehab corridor, in the Corridor Properties dialog box. You can also review the rehab subassemblies that were assigned to the rehab assembly for your rehab corridor in the Assembly Properties dialog box.

Rehab Corridor Editor ribbon tab
When you select a rehab region within a rehab corridor, the Rehab Corridor Editor ribbon tab is displayed and the Rehab Parameters palette is automatically docked to the right side of your Autodesk Civil 3D application window. See To Edit An Existing Rehab Corridor for information on creating and/or selecting rehab corridor regions.
- Add rehab regions to your rehab corridor.
- Navigate between stations in the selected rehab corridor region.
- Open the Rehab Parameters palette.
- Open the Rehab Manager, modify accepted slope, and generate reports.
- Modify the Station Tracker line display in your viewports.
- Configure Station Tracker options.
- Zoom to extents, zoom to an offset and elevation, or zoom to a subassembly.
- Modify View/Edit Corridor Section options.
- Modify default Rehab Corridor Editor viewport configuration.
- Modify the display of objects.
Managing and Editing Rehab Corridors
Rehab Corridor Section Views
When editing an existing rehab corridor region, by default Autodesk Civil 3D will display three custom viewports that can be used to review and/or modify parameters on a section-by-section basis to meet design requirements for selected stations within your rehab corridor regions. See About Rehab Corridor Sections for more information.
Generating Rehab Reports
You can use the Rehab Manager to generate Cross Slope Correction and Milling and Leveling reports for selected stations within your rehab corridor regions. The Rehab Manager can also be used to review violations to design geometry requirements, and modify rehab parameters on a section-by-section basis. See To Generate Rehab Corridor Reports for more information.
