Power Automate Connector - Data Exchanges through Excel
In the following steps, you can populate an Excel table with the data from a previously created Data Exchange using the Autodesk Data Exchange Connector.
Prerequisites
To use the Autodesk Data Exchange connector in Microsoft Power Automate, you need:
A full or trial subscription to access your Autodesk Construction Cloud projects.
An account administrator must enable the Power Automate app for your account.
Microsoft Excel (Online). Ensure you’re using an Excel file that’s saved in the cloud.
Microsoft Power Automate Premium plan (or equivalent trial).
Create an Excel table
Go to Microsoft Excel online and create an Excel file.
Next, you'll create a table populated with the properties from a specific Data Exchange.
Create a new sheet.
Type Name in cell A1.
Type Category in cell B1.
Type Area in cell C1.
Select a cell next to A1 or C1.
Click Home > Format as Table and select a theme.
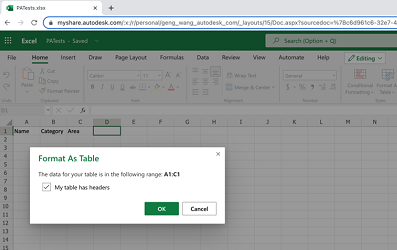
In the Format as Table dialog box, check My table has headers and click OK.
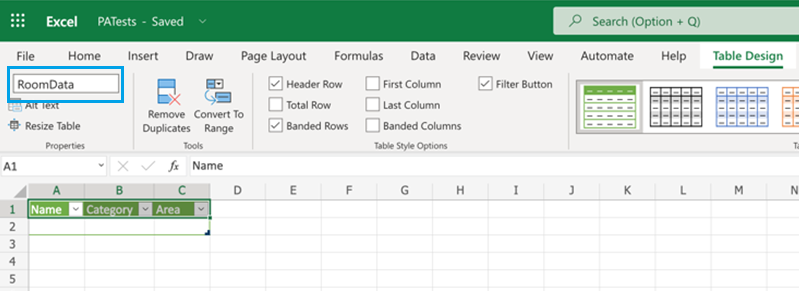
Under the Table Design tab, enter a unique name for your table. For example, RoomData.
Create a Power Automate flow
- Sign in to your Microsoft Power Automate account.
- Click the Create tab on the left and select Automated cloud flow.
- Enter a name for your flow. For example, Data Exchange to Excel Table
Specify the flow trigger
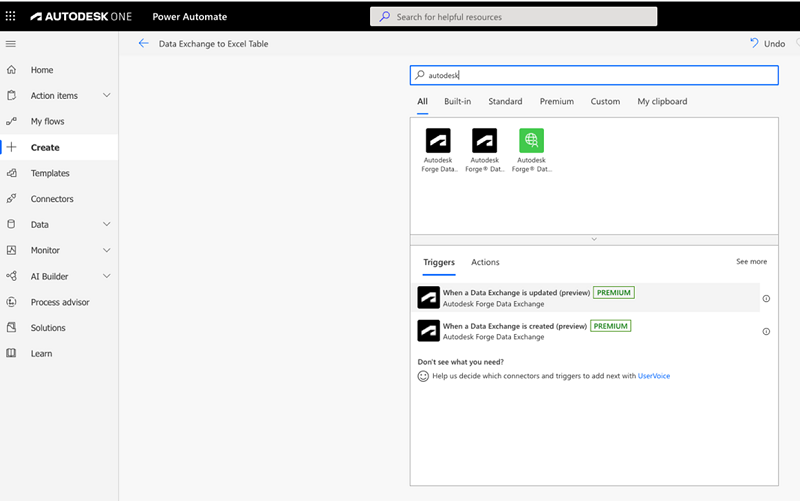
In the Search connectors and triggers search box, type Autodesk, and select When a Data Exchange is updated trigger.
Specify the Data Exchange by completing the following fields:
- Hub
- Project
- Top Folder
- Data Exchange
Initialize a Cursor variable
Click + New Step below the first step and add an Initialize variable action.
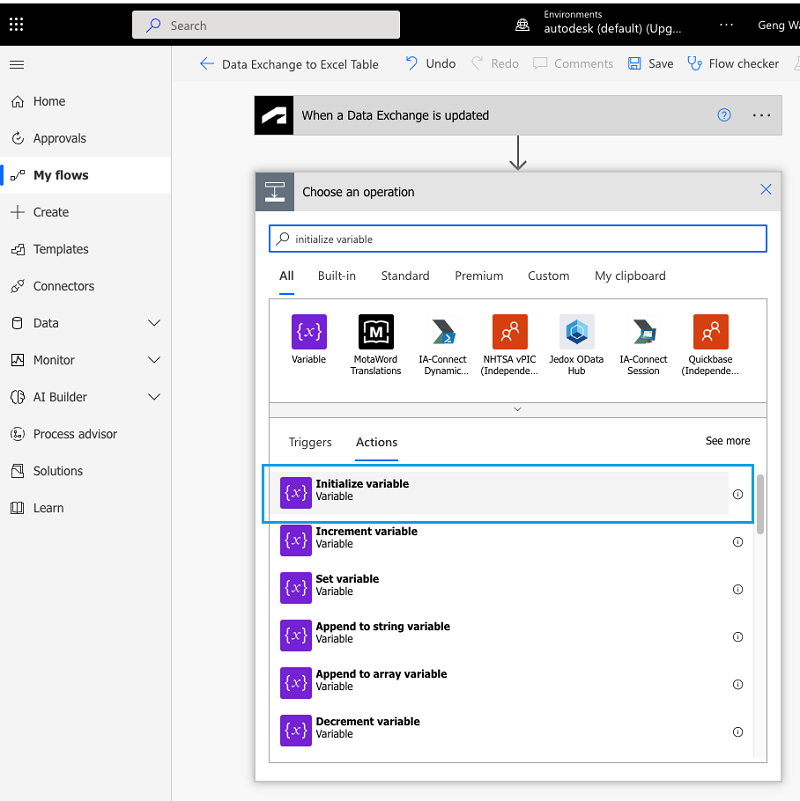
Fill in the details for this variable:
- Enter Cursor for Name
- Select String for Type
- Enter a null expression for Value. Click the Enter initial value box. In the pop-out menu, click the Expression tab and type 'null'.
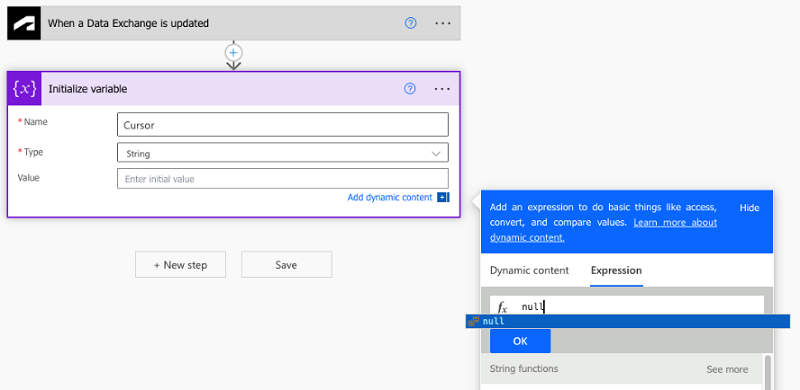
In case your Data Exchange contains a large amount of data (such as a large model that has many elements), the Data Exchange service will break them down into pages. The Cursor variable will be used by our flow to handle these paginated responses.
Add a Do Until action
Click + New Step below the first step and add a Do until action.
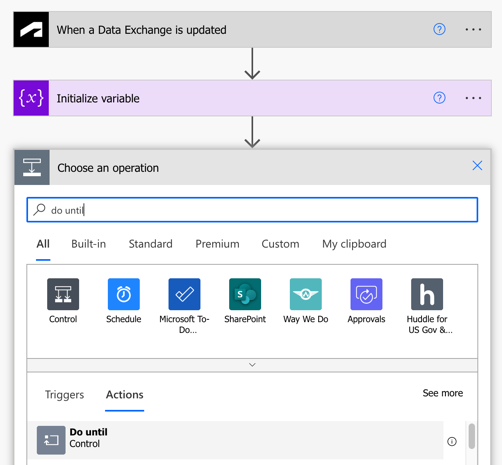
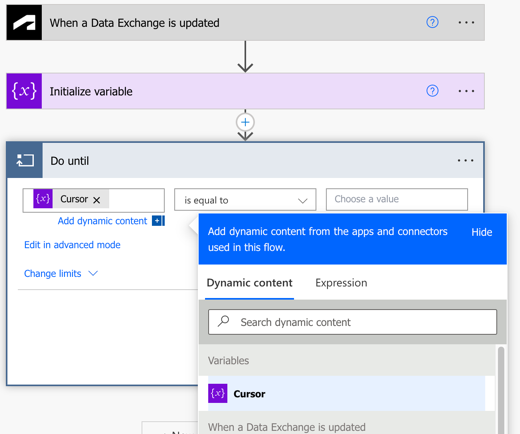
Add the Cursor variable in the first field in the Do until action. Leave the second (is equal to) and third field (Choose a value) blank.
Specify the Data Exchange properties
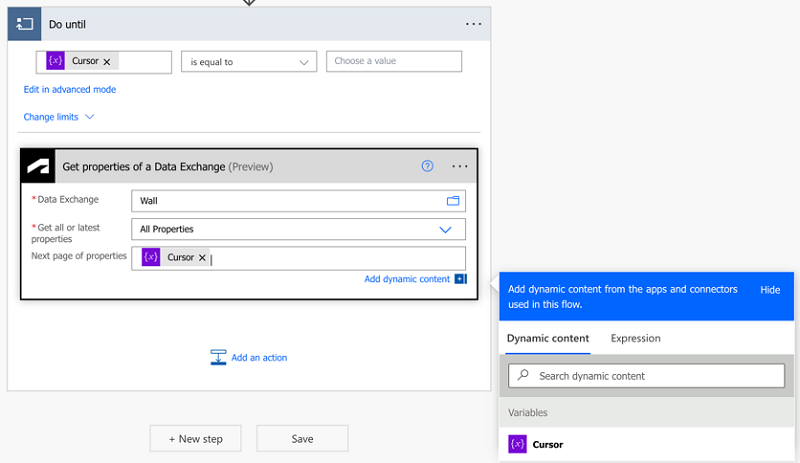
Click Add an action at the bottom of the Do until step and choose Get properties of a Data Exchange action.
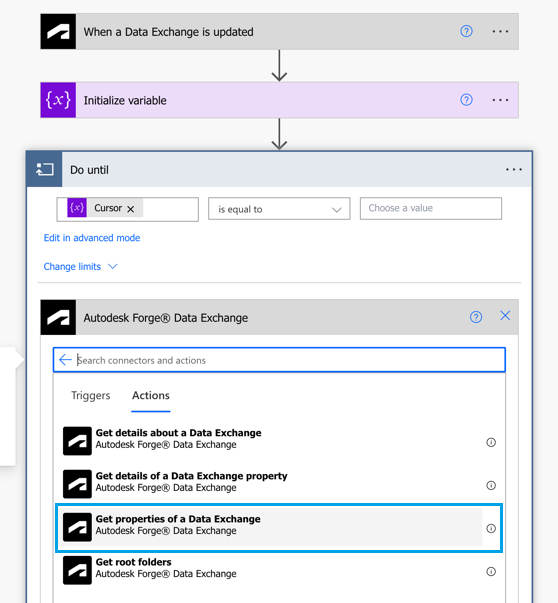
Complete the following fields:
- Data Exchange: Choose the same Data Exchange you’ve selected in the first step of the flow
- Get all or the latest properties: Choose All properties
- Next page of properties: Choose the Cursor variable
Specify the Cursor for pagination
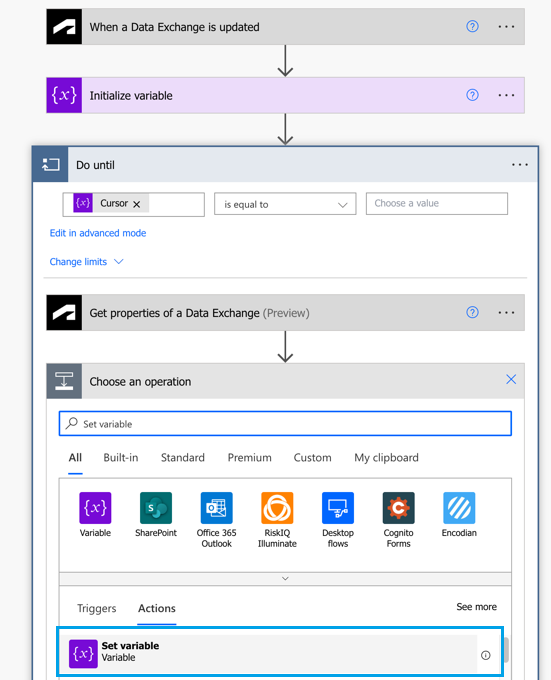
Click Add an action under the previous step and select the Set variable operation.
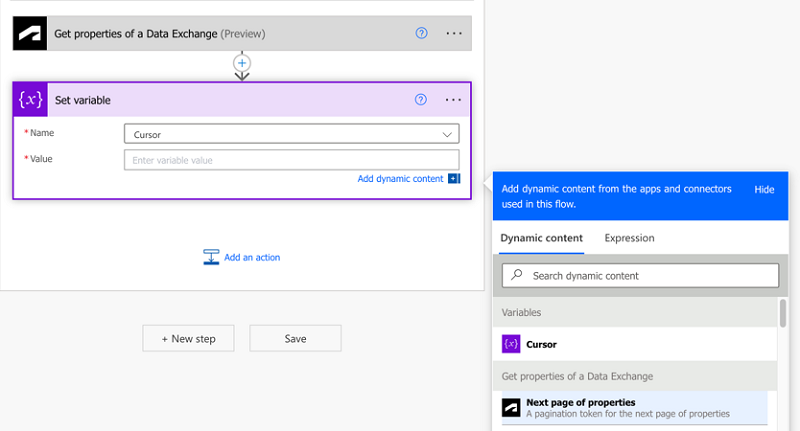
Complete the fields in Set Variable:
Select Cursor for Name
Select Next pages of properties for Value
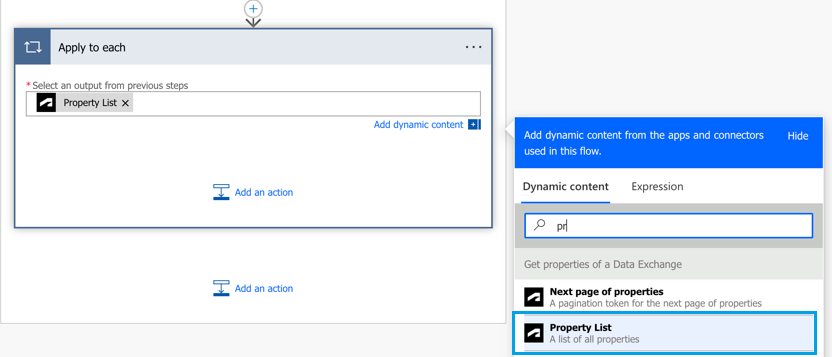
Add Apply to each action
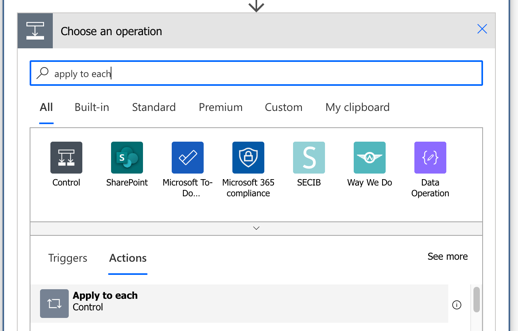
Click Add an action under the Set variable action.
Select Apply to each in Choose an operation
Select Property List
Specify the Excel file
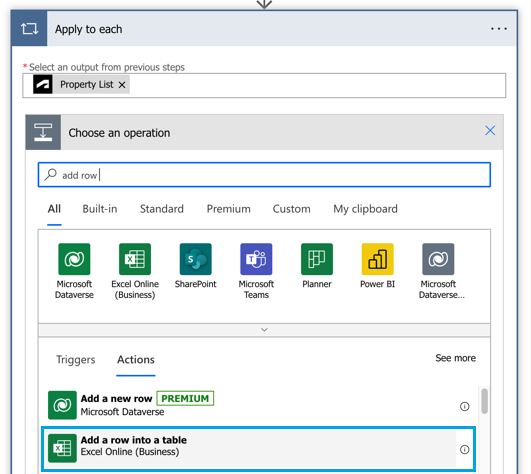
Click Add an action at the bottom of Apply to each
Select Add a row into a table action
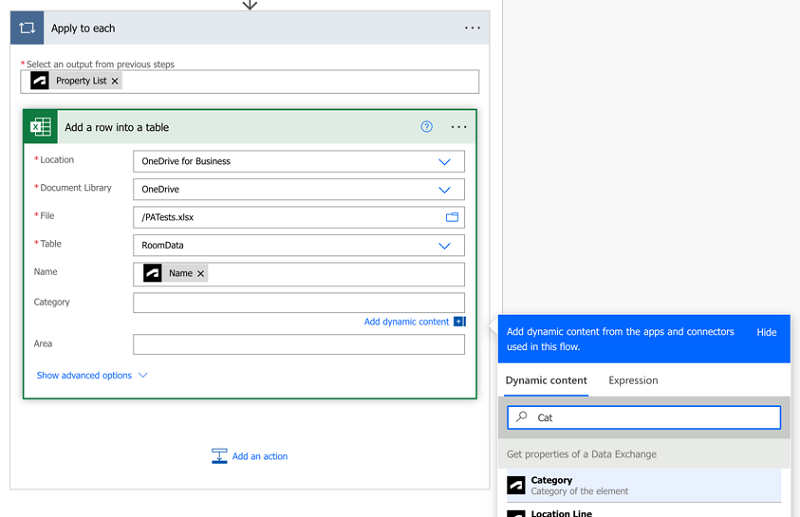
Specify the table we've just created at the beginning by filling in the following fields:
- Location
- Document Library
- File
- Table
Map Data Exchange properties to Excel table columns
Fill in Name, Category, and Area fields under the Dynamic content tab.
Test the flow
- Click Save to save your flow.
- Click Test at the top-right of the screen.
- Select Manually
- Click Test.
- Open the Files tool in Autodesk Docs
- Upload a new version of the source RVT file for the Data Exchange
This triggers an automatic update of your Data Exchange and Power Automate flow. The Excel table will be updated.
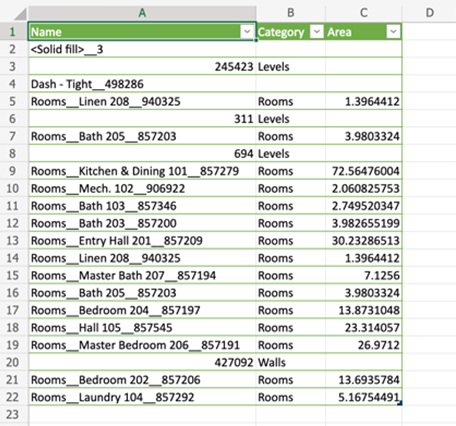
In Power Automate the Your flow ran successfully message indicates that your flow has completed populating the table with data from the Data Exchange. If you have a Data Exchange with many objects, this process can take a while.
