
Open the part, situate it, and repair it.
- In
Netfabb, in the main Display window, right-click and select Add Part.
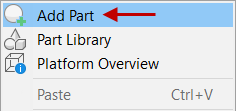
- Browse to where you stored the Tutorial parts and add sus_part_2.stl.
- In the Toolbar, click the
Move icon
 , and translate the part to the platform origin. You can do this in the
Move dialog as follows:
, and translate the part to the platform origin. You can do this in the
Move dialog as follows:
- Click
Absolute Translation, and then set Translation values for X, Y, and Z all to 0.00.
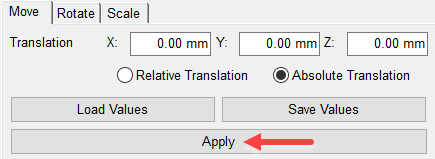
- Click the Apply button.
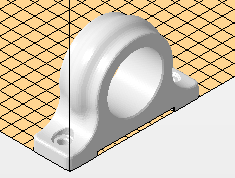
The part should align with its corner on the edge of the platform.
- Click
Absolute Translation, and then set Translation values for X, Y, and Z all to 0.00.
- In the Toolbar, click
Repair Part
 .
.
- In the Properties Panel, click the
View tab, and under
Show Slim Faces, select
Colored and
Highlight Edges.
You should see a green check mark, indicating that the mesh is ready for the Optimization Utility.
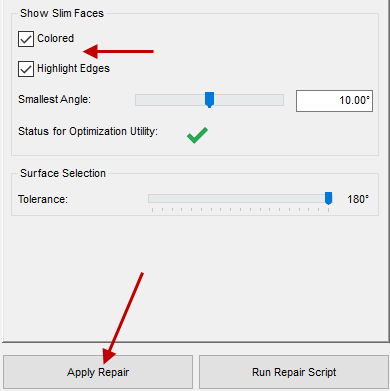
- Click
Apply Repair, and then in the
Apply Repair dialog, click
Remove old Part.
Doing this exits the Repair module.
- Right-click the part and select
.
Optimization Utility launches, and loads the repaired part.