
Set lattice properties, then create skin and hollow surface regions.
- In
Optimization Utility, in the
Properties Panel,
Parts tab, expand
and set X, Y, and Z values all to
10 mm.
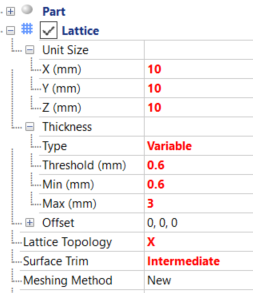
- Expand Thickness and set values as shown to Type Variable, Threshold 0.6 mm, Min 0.6 mm, and Max 3 mm.
- Set Lattice Topology to X, and Surface Trim to Intermediate.
- In the Toolbar above the display window, click
Create Component
 .
.
- In the Properties Panel, select the
Parts tab and then click
Lattice to see the lattice inside the part bounds.
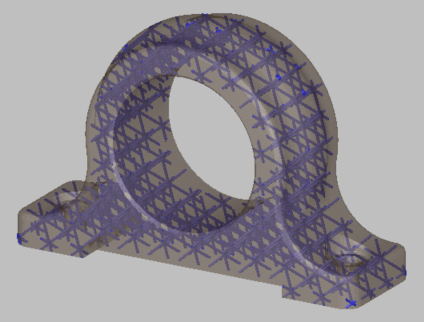
Visually examine lattice symmetry within the part to see whether it appears to provide balanced support for the skin elements. If necessary, you can adjust Unit Size to change the cell dimensions or apply Offset values to shift the lattice position. If you make any such changes, click Create Component again to regenerate the lattice.
- Collapse the Lattice tree, and expand
Surface Regions.
Note that Region1 exists by default.
- Right-click
.
Region2 is created.
- Expand Region1 and set
Type to
Skin. Under
Thickness, set
Type to
Variable, with Threshold and Min values of
1 mm, Max value of
3 mm.
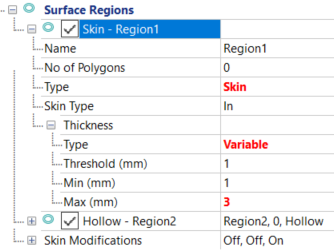
- Set Region2 Type to Hollow. This Hollow region will apply to the Lattice.