
Dynamically generated breakaway tags with text
- Select the part to be labeled.
- Click .
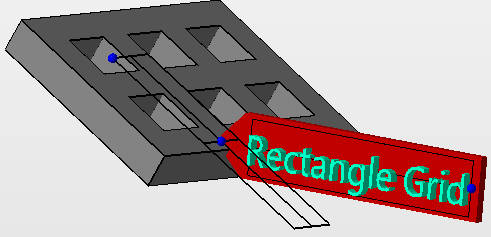
- Click on the part to place a template for the label.
- Click and drag the blue nodes of the template to adjust the position, rotation, and size of the tag.
Tip: Use the Ctrl key and the corner node to rotate the tag without adjusting the size. Use the Shift key and the corner node to adjust the size without adjusting the orientation.
- Click and drag the blue node on the tag to adjust the orientation of the shield relative to the surface the label is applied on. Any movement of this node is always performed parallel to the screen. Change the camera perspective to rotate the tag accordingly.
- Click Apply to create the text label.
- Click Yes to remove the old part or No to keep the old part and the newly labeled part.
Tag labeling controls in the context view
| Caption |
Enter your text here. |
|
| Font |
Choose typeface and variation here. |
Note: The font size controls the tessellation resolution of the text, not its actual size. Use
Height and
Width/Keep aspect ratio to control the size instead.
|
| Height |
Size of the active embossing or impressing area. The tag is scaled to this size in the vertical. |
|
| Width, Keep aspect ratio |
Size of the active embossing or impressing area. The tag is scaled to this size in the horizontal. If Keep aspect ratio is active, this is calculated automatically from Height and the text's aspect ratio, and Width is grayed out. |
|
| Depth |
Distance by how much to emboss or impressing applicable mesh areas |
Uses positive values only. To perform impressing, switch Build type accordingly. |
| Thickness |
Thickness of the tag plate itself |
|
| Variant |
Embossing or impressing, flipping or no flipping, mirroring or no mirroring |