
The tool currently selected for the Steep and Shallow Finishing strategy dialog is the same tool that was used for the rest roughing toolpath. This tool is not appropriate for the current toolpath strategy, and must be changed. This example uses an 8 mm (5/16 inch) ball nosed tool.
- In the
Steep and Shallow Finishing strategy dialog, click
 to select the
Tool page.
to select the
Tool page.
- On the
Tool page, from the tool list, select
 to create a
Ball Nosed Tool.
to create a
Ball Nosed Tool.
- On the
Tool page, click
 to display the
Ball Nosed Tool dialog.
to display the
Ball Nosed Tool dialog.
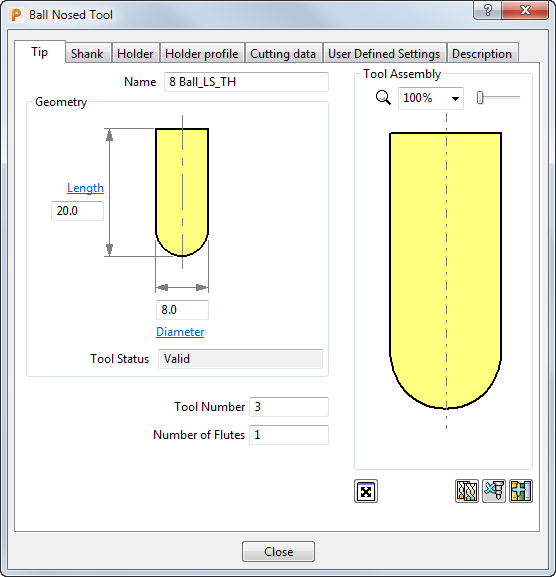
- In the
Ball Nosed Tool
dialog, enter:
- Name: 8 Ball_LS_TH
- Length: 20 mm
- Diameter: 8 mm
- Tool Number: 3
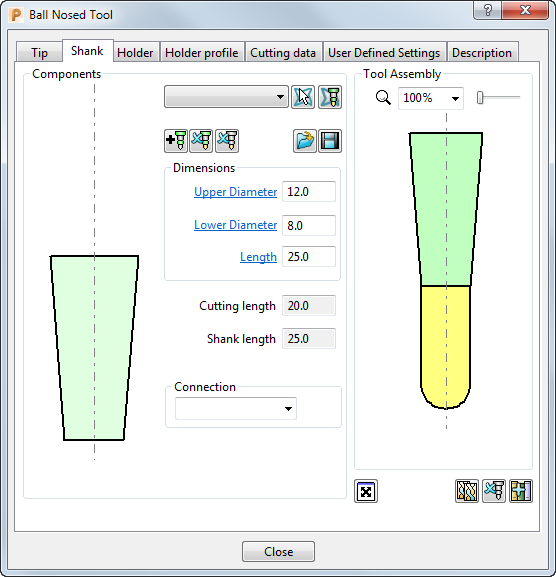
- Select the
Shank tab, click
 to add a shank component. Enter:
- Upper Diameter: 12
- Lower Diameter: 8
- Length: 25
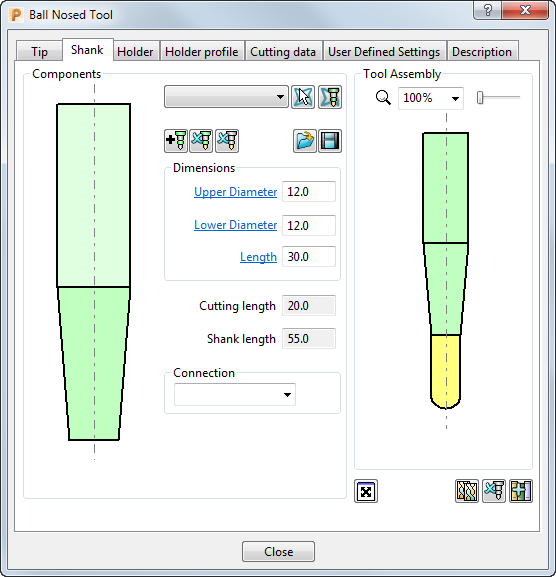
- Click the
button to add a second shank component. Enter:
- Upper Diameter: 12
- Lower Diameter: 12
- Length: 30
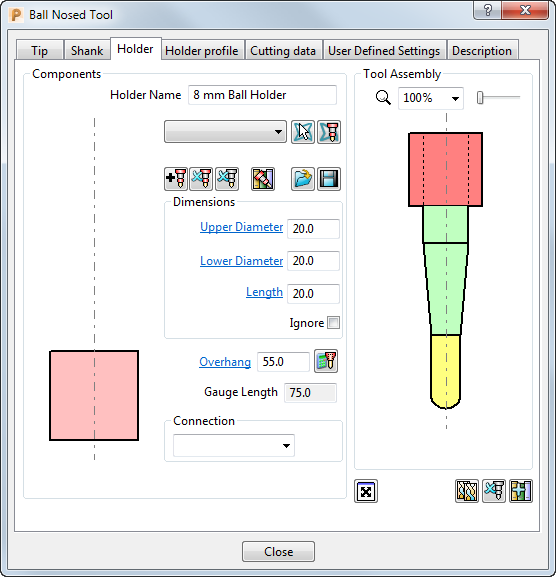
- Select the
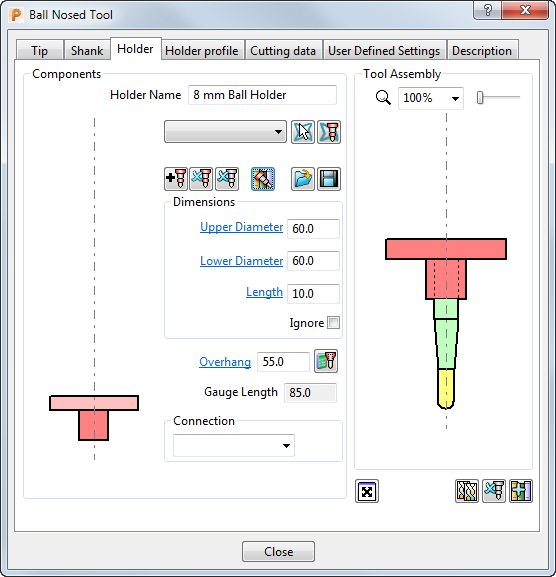
Holder tab, and click the
 button to add a holder component. Enter:
- Name: 8 mm Ball Holder
- Upper Diameter: 20
- Lower Diameter: 20
- Length: 20
- Overhang: 55
- Click the
button to add the upper part of the holder. Enter:
- Upper Diameter: 60
- Lower Diameter: 60
- Length: 10
- Overhang: 55
- Click
Close to update the
Tool
page with the new tool.
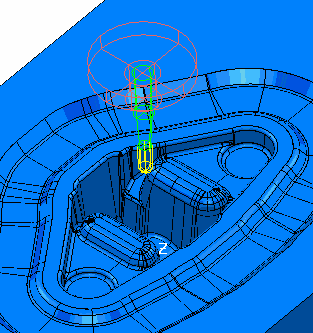
The new tool is shown in the Explorer and is drawn in the graphics window, where it is automatically aligned with the Z axis.
The toolpath is not yet complete because it must reference a boundary, but you can close the dialog without generating the toolpath.
- Click OK to close the toolpath dialog.