You can create a composite curve using surface edges. You do not need curves to create a composite curve.
With the Create Composite Curvetoolbar displayed, where you select the surface affects:
- the default direction of the composite curve.
- the surface used to create that section of the composite curve.
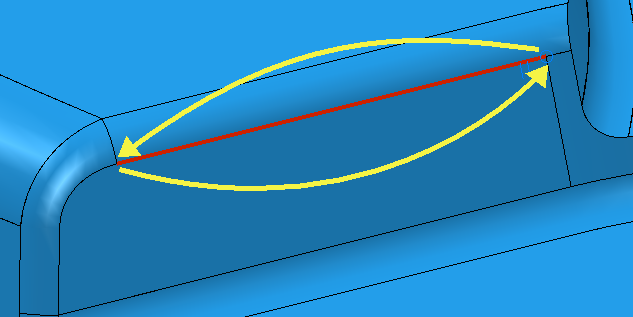
The forward direction is towards the surface corner closest to the selection point. Selecting a surface at point
 creates the start point at the bottom right corner of the fillet surface (
 ) and a current-curve-end at the bottom left corner of that fillet (
 ). The curve used to create the composite curve is the surface edge of the fillet.
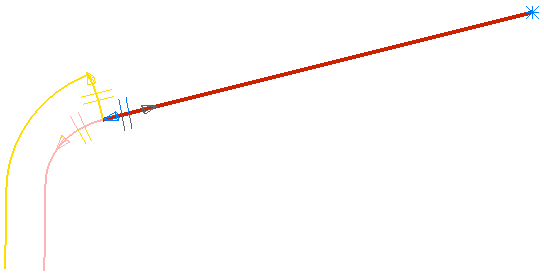
It is easier to see if you undraw the shaded model:
If you select the surface around
 , the composite curve looks the same, but the curve used to create the composite curve is the surface edge of the vertical face.
If you select the surface around
 ,
PowerMill selects the surface it considers best. It does this by inspecting the p-curves of the underlying surfaces, and then selects the surface that is least likely to produce a 'faceted' curve. For instance, the edge of a cylinder produces a much better quality curve than a circle trimmed out of a plane. For example, if you select a boss or pocket in the
powerdrill.dgk model,
PowerMill does not pick the trimmed plane.
,
PowerMill selects the surface it considers best. It does this by inspecting the p-curves of the underlying surfaces, and then selects the surface that is least likely to produce a 'faceted' curve. For instance, the edge of a cylinder produces a much better quality curve than a circle trimmed out of a plane. For example, if you select a boss or pocket in the
powerdrill.dgk model,
PowerMill does not pick the trimmed plane.
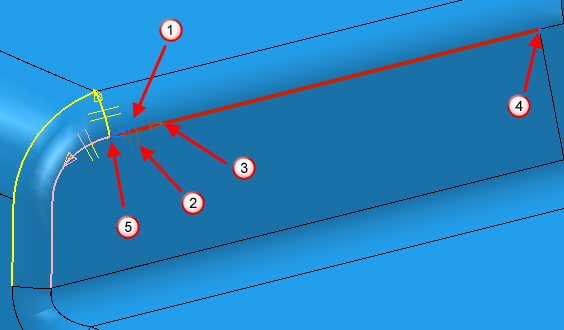
- The blue asterisk (*) indicates the start point of the composite curve.
- The blue arrow indicates the current end point of the composite curve.
- To extend or change your composite curve either click on the next curve, or use the play buttons.

When you have created the composite curve, click
 or
or
 to accept or cancel the curve creation.
- The red curve indicates the current extents of the composite curve.
- The pink curve indicates the direction
PowerMill follows if you click
 , or
, or
 . You can also select this direction by clicking the pink curve.
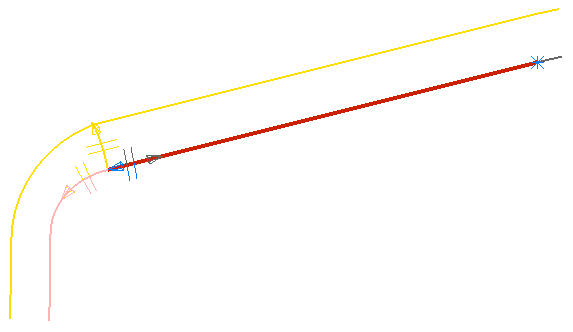
- The yellow curve and surface markers indicate alternative directions and alternative surfaces that PowerMill uses to create the next section of the composite curve. To select a yellow option, click on the appropriate yellow curve or surface marker.
- The grey arrow and surface indicate a possible, though unlikely, solution. Clicking it enables you to create a composite curve which has a start point at the bottom right corner of the fillet surface and goes along to the bottom left corner of the fillet and then returns to the start point by following the vertical surface edge.