
Tutorial - MQTT
This document provides a basic tutorial for how to use the Cloud MQTT broker to send data to Tandem.
- In the Platform Console, click MQTT Broker:

- Click New Broker and fill in the required parameters. Make sure to document whatever you typed in (you'll need this information later).
- Name: MQTT
- Description: My MQTT Broker
- Protocol: MQTT
- if using MQTTS, you must generate self-certificates for Private Key, SSL, etc. on your own.
- the current MQTT Broker version is 3.1.1
- MQTT Port: 1883 (default)
- User Name and Password: create a username and password that we will use later
- Click Create

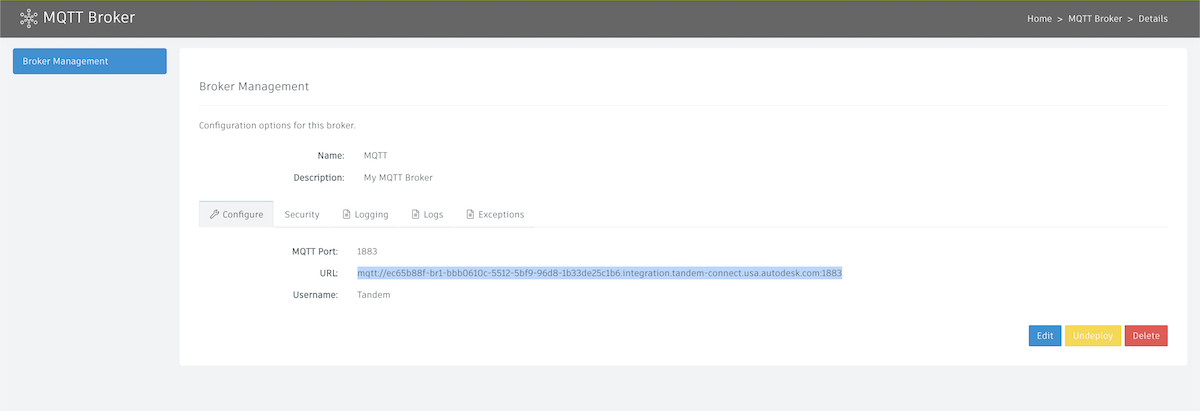
- After clicking Create, you will see our broker is now created:

- Initially, there is no URL assigned to our new broker, but if we wait a few seconds and refresh the browser, we should see it get assigned:

- If you click on the name of the broker (in our case "MQTT"), you can copy the full URL and document it to start building your pipeline
- Now in Pipeline Studio, we'll grab an MQTT Stream plugin and double-click to configure:


While configuring our MQTT Stream plugin, we want to match our MQTT Broker settings. (We can also configure this plugin to go to 3rd Party MQTT Brokers as well).
Name: MQTT Broker Data
Protocol: mqtt
Protocol Version: 3.1.1
Host: ec65b88f-br1-bbb0610c-5512-5bf9-96d8-1b33de25c1b6.integration.tandem-connect.usa.autodesk.com
Note: this will be the URL we copied in the previous step, but we need to strip off the "mqtt://" prefix and the ":1883" port number at the end.Topic: you will need to know how your MQTT Clients publish data. For example, you might:
- have the ability to tell your MQTT Clients to publish data to a static topic called "topic1". In that case, we would type in "topic1".
- Your clients might also have the ability to publish data to topics dynamically such as
topic1/device1/temperature,topic1/device2/temperature. In this case, we can use a wildcard such astopic1/+/temperatureto get all temperatures from those devices. The + symbol in MQTT goes up one level, and the # symbol allows for multi-level nested topic names. For example,topic1/#would get data from anything after "topic1", such astopic1/device1/temperatureORtopic1/device1/humidity.
Username and Password that we created earlier
Everything else we can leave as the default for now.
Our standard configuration looks like the following:


- Deploy out our new pipeline with the MQTT Stream plugin configured as above. After it is deployed, refresh the browser after a few seconds and make sure the indicator in the uppper left next to the pipeline name is green.


Next, double-clock on the plugin and go to the Logs tab. We should see that it has successfully connected to our broker. If it hasn't, check the Exceptions tab and see if there is an authorization error or some kind of other error that we need to fix. If so, fix the error and deploy the pipeline again.

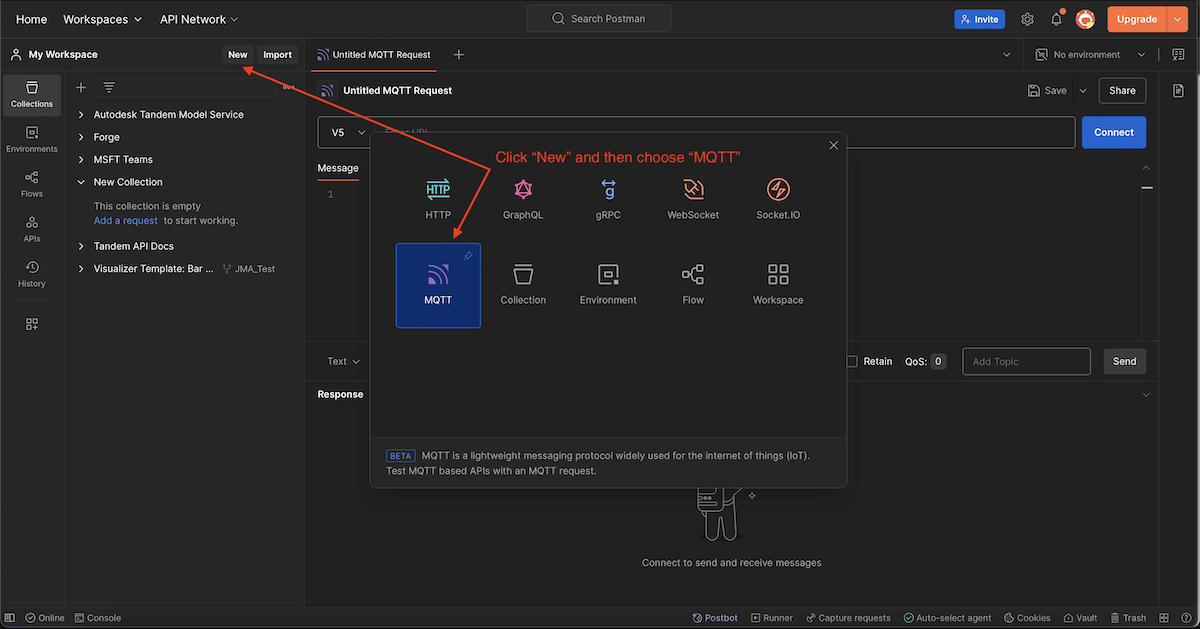
For testing purposes, we can use a program like Postman or MQTTx to send simulated MQTT messages to our broker and verify things are working properly. In Postman, make a new request:
Click on the New button and choose a new request of type MQTT
Then choose V3 and fill in the full URL that we originally used to configure our broker. You'll also need to pass in a valid JSON payload. You can copy and paste the following:
{ "device": "test-device", "temperature": 72 }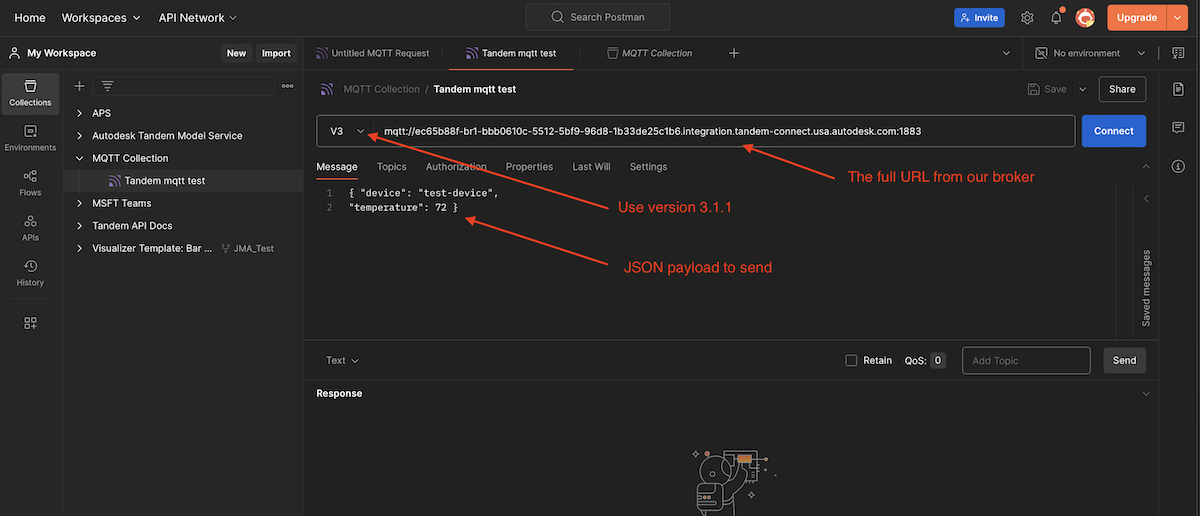
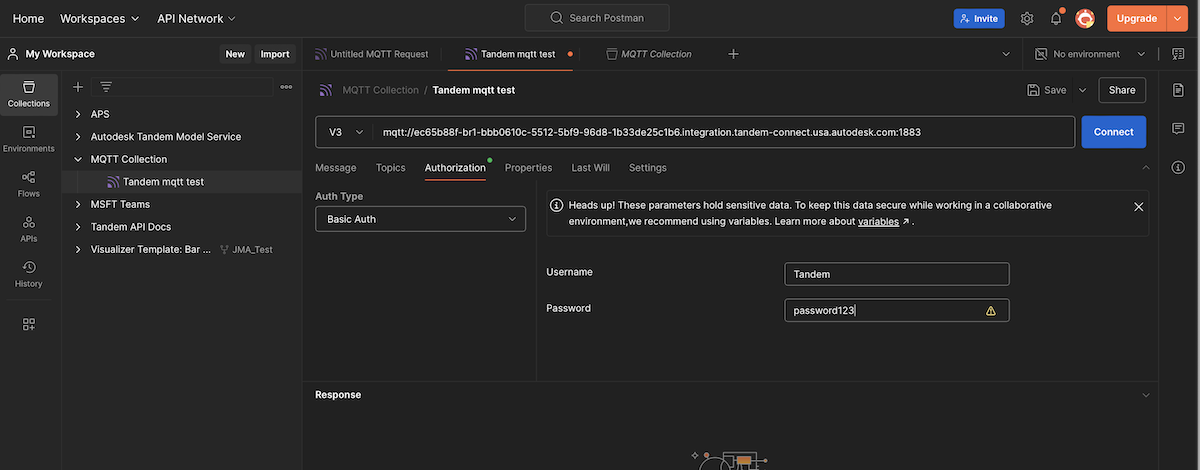
Click on the Authorization tab, choose Basic Auth and then put in our Username and Password that we originally used in Step 2 when we configured the broker.
Back in the Messages tab, we can now click Connect and then Send.
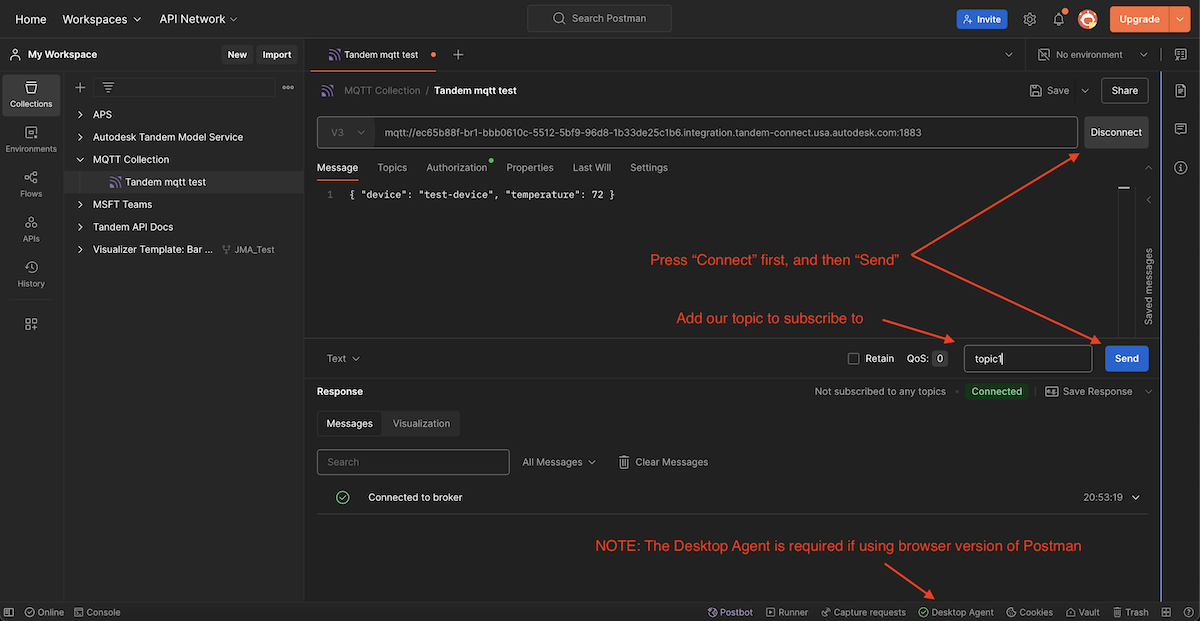
- Note: if you are using the browser version of Postman, you need to have the Desktop Agent browser extension installed. See Postman Help for detailed information.*
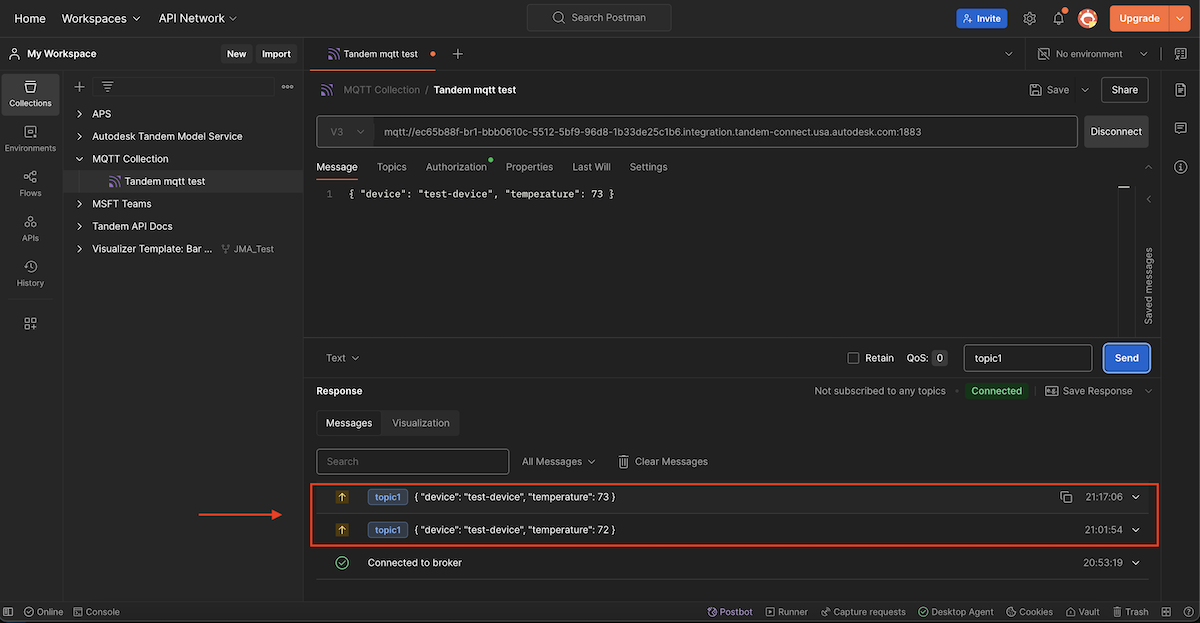
- Back in Pipeline Studio, you can Refresh the Logs and we should see a new message that we just sent in from Postman.
If you don't see the message, click on the Exceptions tab and look for a message such as "incorrectly formatted JSON".
- Now let's Edit our pipeline by putting a Converter after our MQTT Stream.
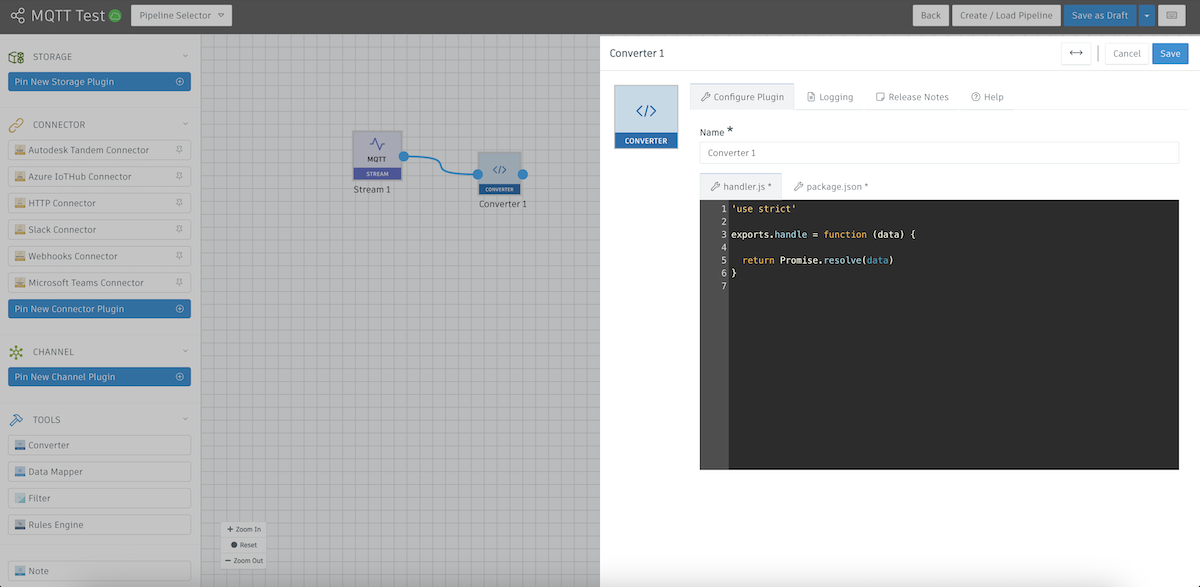
A converter is going to allow us to transform our MQTT payload to something that our Tandem Connector will understand. In the example above, we've deleted the unecessary code. You can copy in the folowing to make it easier to get to this point:
'use strict'

exports.handle = function (data) {

  return Promise.resolve(data)
}- Save the Converter and then choose Save and Deploy to post our new pipeline. Then go back to Postman and send in another message like we did at the end of Step 8.
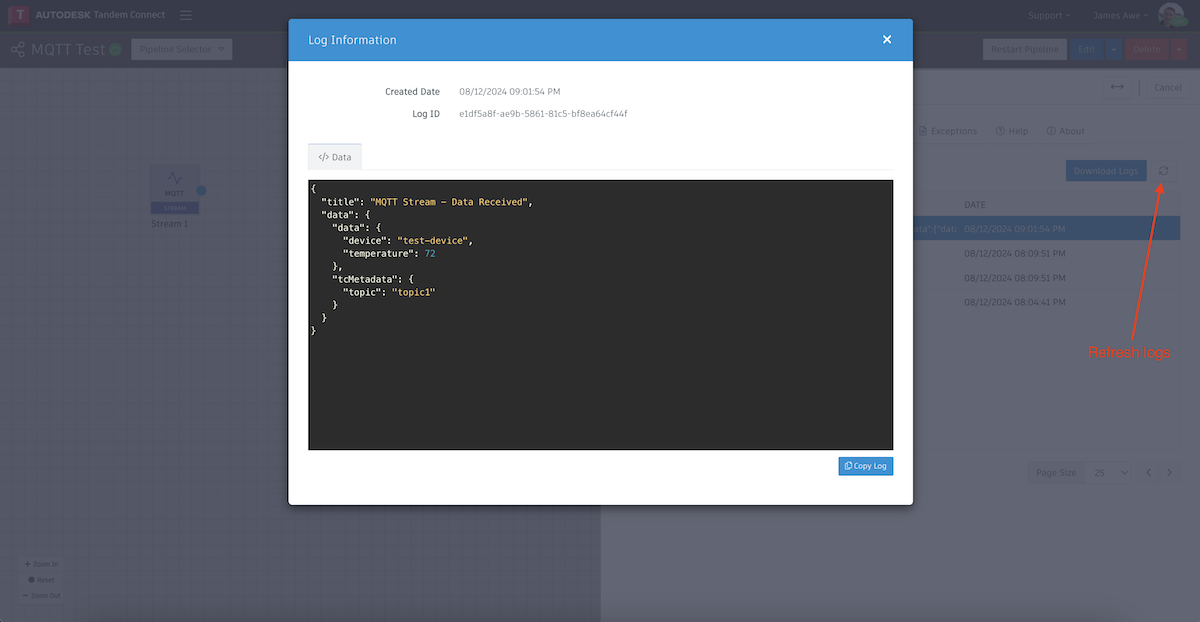
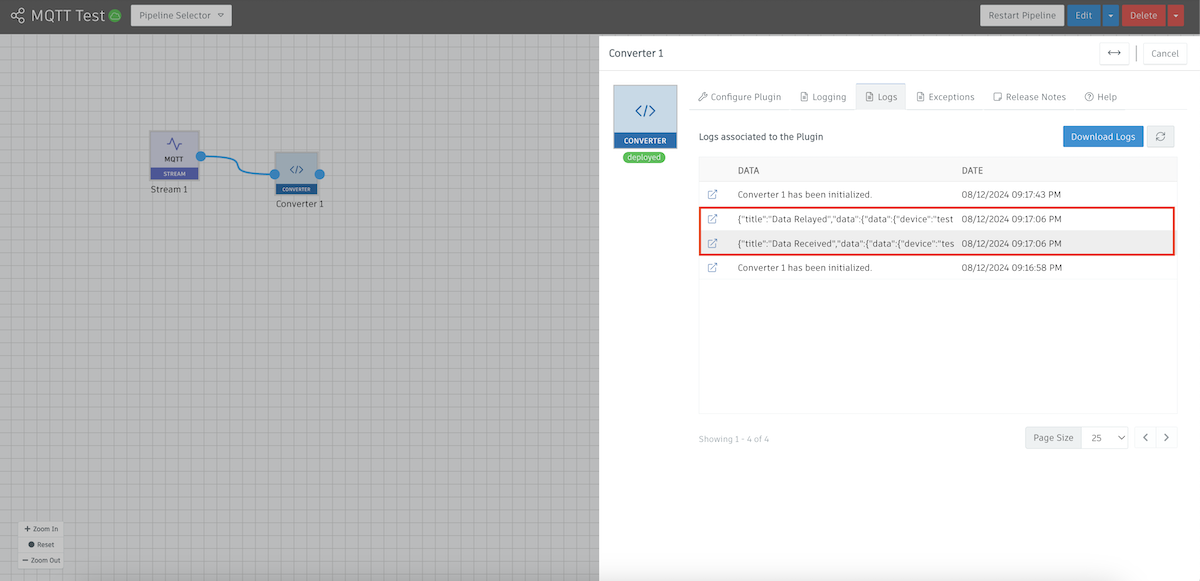
Back in Pipeline Studio, if we open up our Converter and check the Logs, we should see two messages:
- The raw incoming information from our MQTT messages (Data Recieved)
- The transformed data that our converter produced (Data Relayed)
At this point, we haven't done any data transformations, so other than the "title", the payloads will look the same.
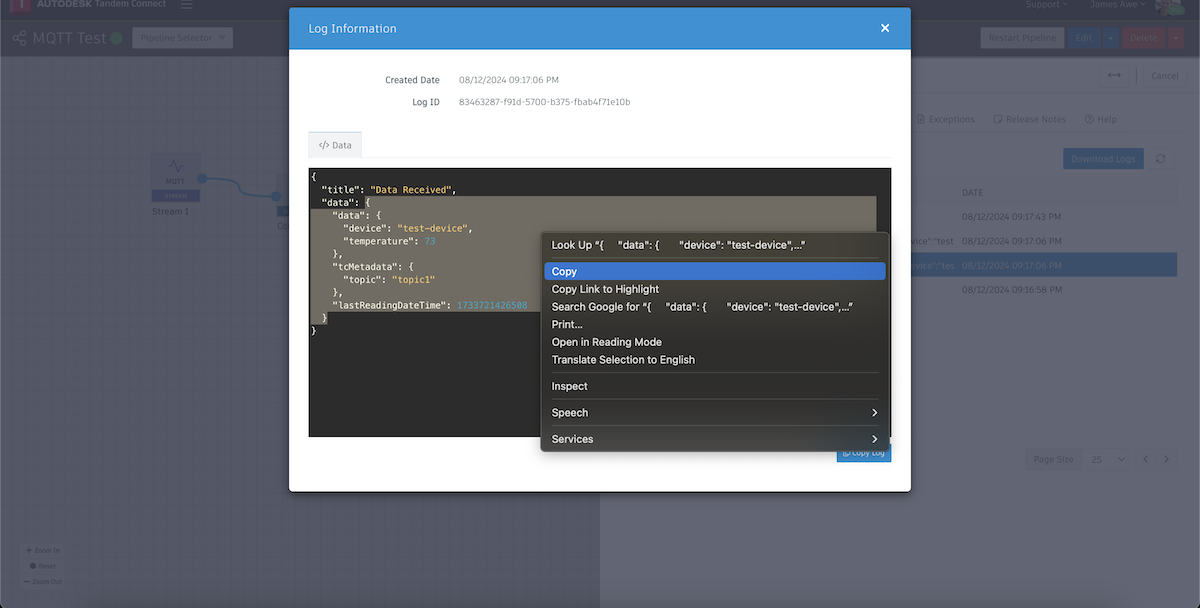
- This next part is optional, but will make your life significantly easier when it comes to data transformations. We can use ChatGPT to do the transformation for us if we just describe what we want. Double-click on the "Data Recieved" message and copy everything in the first "data" object as shown below, then right-click and "Copy" the payload:
Then create a prompt for ChatGPT that looks like the following:
my base code is:
'use strict'
exports.handle = function(data) {
    return Promise.resolve(data)
}

my incoming data is:
{
    "data": {
        "device":
        "test-device",
        "temperature": 72
    },
    "tcMetadata": {
        "topic":
        "topic1"
    },
    "lastReadingDateTime": 1730316871111
}

I want my data to look like:
{ "device-id": "test-device" (incoming device value)
    "data":{
        "name": same as "device-id",
        "temp": incoming temperature value
    }
}
If you copy that prompt into ChatGPT, it will figure out how to write the JavaScript code to do the conversion to our desired format.

Of course, if you are already familiar with JavaScript and JSON format, you can just write the code yourself.
Copy the new code and paste over the top of the code currently in the Converter node that we created in the last step.
If we paste in the new code from ChatGPT, then save the Converter plugin and then Save and Deploy our pipeline, we are set to test our transformed payload that we will eventually send to Tandem.
Send in a new message from Postman and then go inspect the Logs of the converter again.
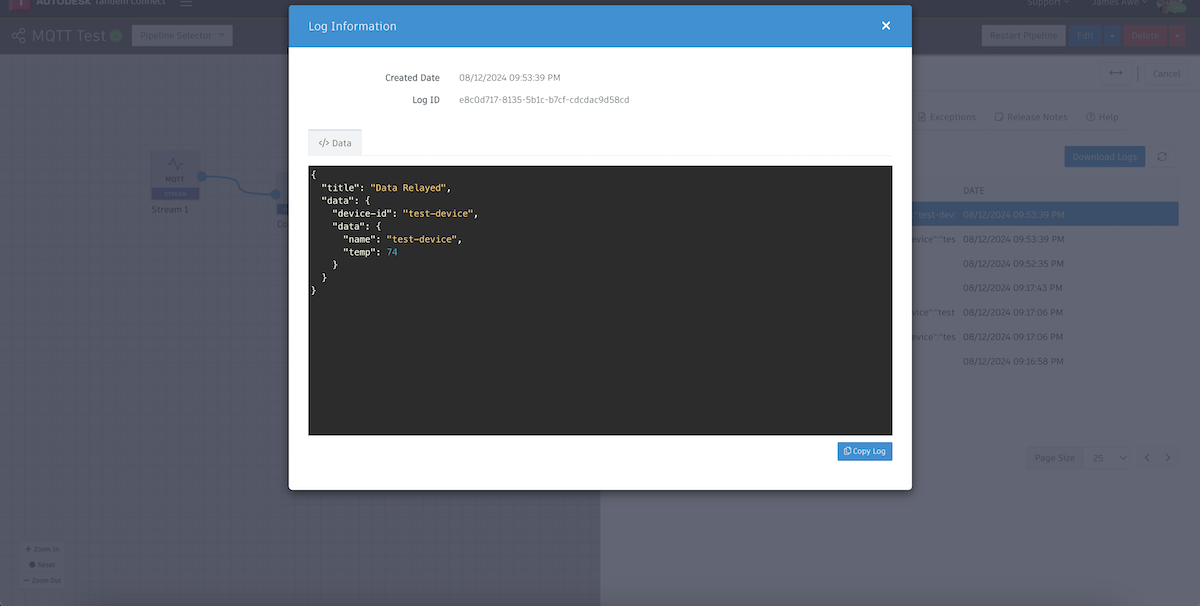
We now see our payload converted into what the Tandem Connector is expecting.
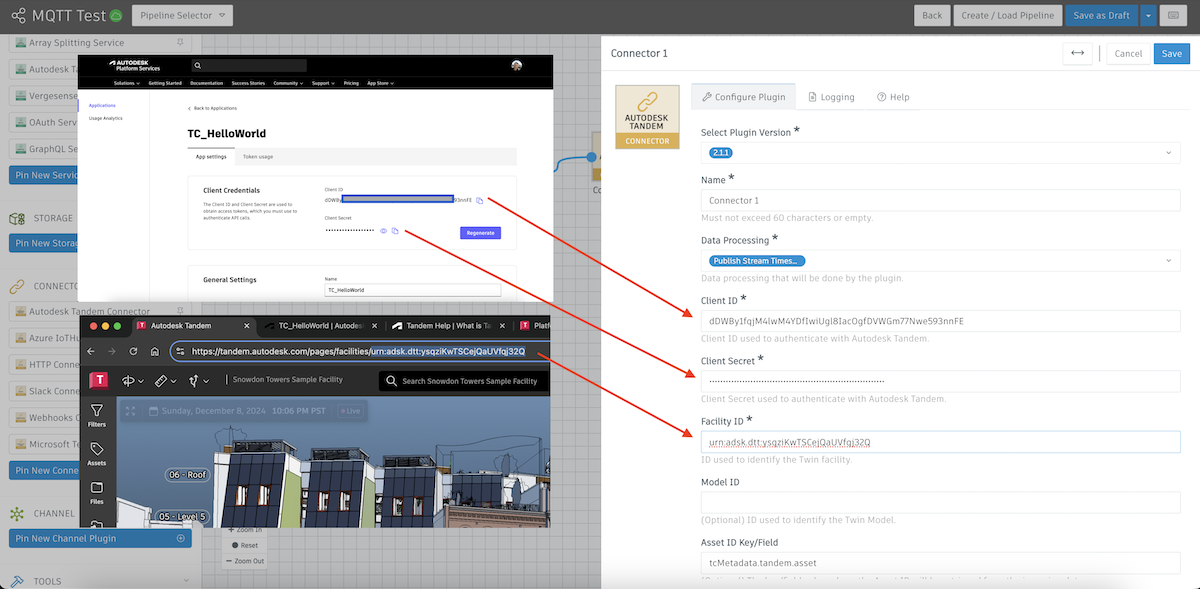
- Now we can hook up our Tandem Connector.

We will need to configure the Client ID and Client Secret (from APS), and our Faclity ID (from Tandem). All other options can remain the default.
- After deploying out these final changes, there a few remaining steps required to start seeing live data:
- As a new payload comes in and the plugin detects the
device-idanddata.namefield, a new Connection will automatically be created in Tandem. - Classify the connection in Tandem and Configure the connection based on your parameters.
- After the connections have been classified and configured, new JSON data will start being stored from your MQTT Integration and connections should be displayed as "online".