
Activity 1: Review and plan a change request
This feature is part of an extension. Extensions are a flexible way to access additional capabilities in Fusion. Learn more.
The Change Requests workspace manages all the change requests (CR) in your site. Use a change request to propose a change to an item. A change request states what needs to be accomplished and may initiate a change order (CO) to implement the change. In this activity, you'll play the part of the change coordinator to prepare the tasks that must be completed as part of this change request.
- It is assumed that you are performing these tutorials in your production environment. Therefore, we recommend that you read through the relevant help pages and activities so that you know what the result will be before creating or modifying anything.
- A change template is mandatory when creating a change request and change order. Therefore, in order for you to complete this and subsequent tutorials, you must either be given access to create your own change template or use one that someone else has created. The change coordinator must then assist you in completing your tutorials. Speak to your team and administrator to determine the best approach for you.
- The activities in this tutorial assume the chosen change template matches the one created in Admin Tutorial 4.
Prerequisites
Before you can complete this activity, you must:
- Complete Tutorial 6 so that you have a change request that has been generated from a problem report.
- Make sure your administrator has granted you or the person completing this activity the Editor [Change Requests] role.
- Be assigned (or have someone else on your team be assigned) as the CR Coordinator for the CR. This comes from the chosen change template.
Steps
Familiarize yourself with the purpose of change requests and change tasks.
- Read the help on change requests and change tasks.
In Tutorial 6 you generated a change request automatically from a problem report. Navigate to that change request.
Open your problem report.
Expand the Related Processes section.
Click the Change Request Process link.

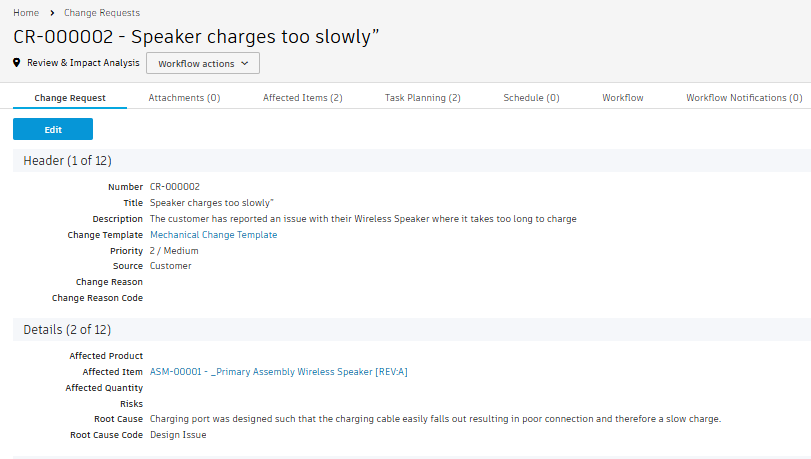
Notice the information that has been copied from the problem report into the change request.
The Header and Details section of the change request is populated with information from the related problem report.
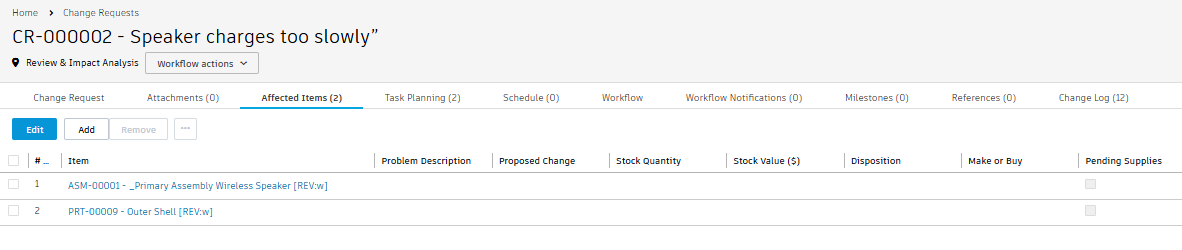
The Affected Items tab of the change request shows the Outer Shell and Wireless Speaker items that wer copied from the problem report.
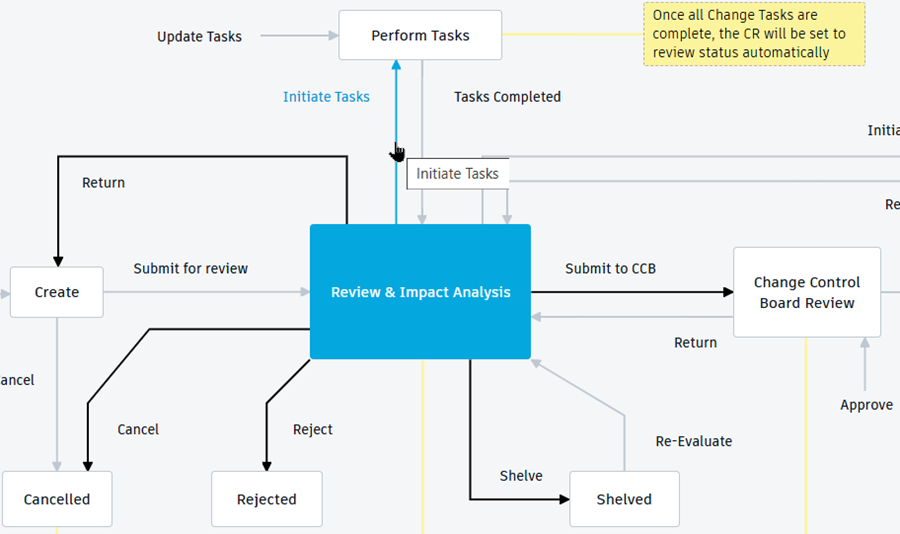
Observe that the change request is in the Review & Impact Analysis state as this request was generated from a problem report. In the Review & Impact Analysis state, the assigned change coordinator (defined by the selected change template) is notified and the request also appears in their My Outstanding Work list.

The Attachments tab contains any documentation that was added to the problem report and places it in the Related Attachments section (if you did this on the problem report).
Note: Change requests created manually start in the Create state.Note: If you determine this change request is no longer valid, you may reject it. You may only do this while the CR is in the Review & Impact Analysis state. For this activity, you will not reject the CR.
In addition to the change coordinator, which has already been set from the change template, the change request should have at least one approver to review the information contained in it. This forces the workflow to go through the Change Control Board Review state before it can be approved. Set yourself as the approver.
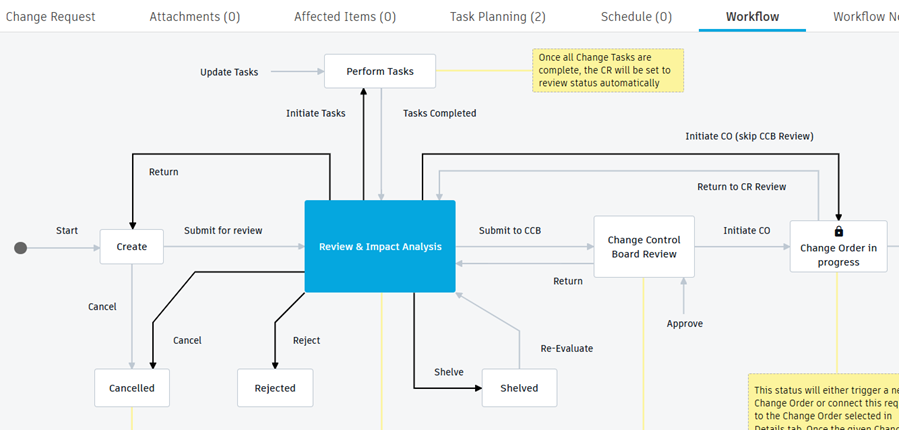
Open the Workflow tab and notice that the Initiate CO (Skip CCB Review) transition is available.
Switch back to the Change Request tab and click Edit.
In the Change Control Board Review section, click the Additional Approvers field and add your name.
Click Save.
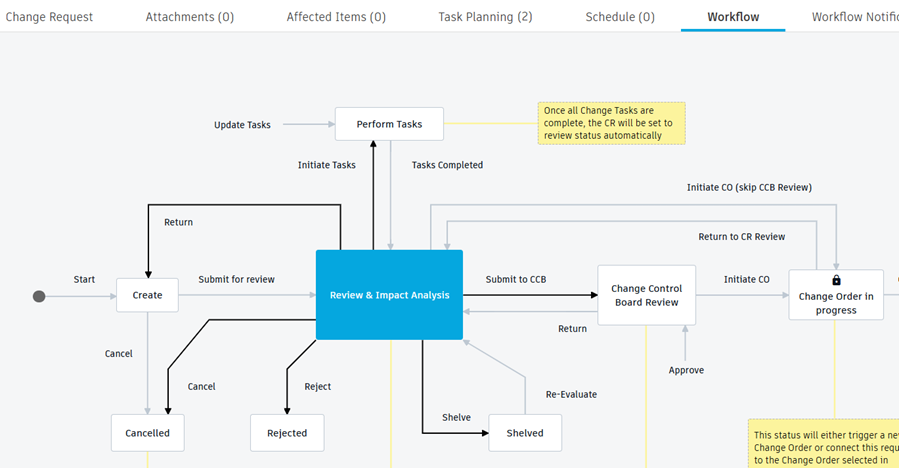
Switch back to the Workflow tab and notice that the Initiate CO (Skip CCB Review) transition is no longer available.
The Task Planning tab can be used to define the list of activities to be completed before the change request is submitted to the change control board. Once tasks are specified in this tab, you cannot send the CR for CCB Review until all tasks are complete. Since you chose a change template in the problem report, tasks from there have been copied into this change request. Assign the tasks to yourself and set a target completion date for each task.
In the Task Planning tab, click Edit.
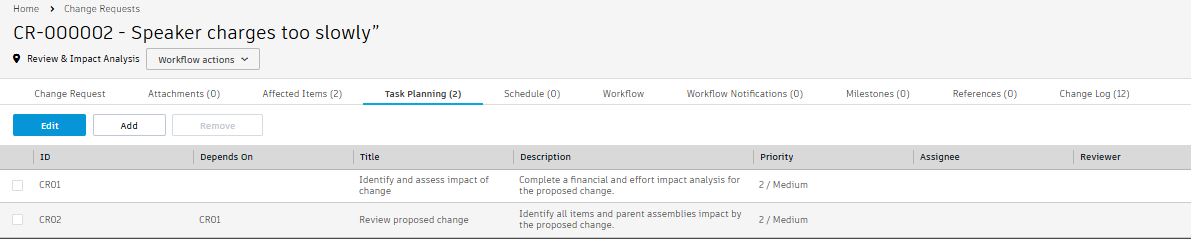
In the Assignee column, click to add your name to each task.
In the Target Completion Date column, click to set the date one week from now for both tasks.

Click Save.
Note: If the chosen change template does not contain tasks or you have different tasks to complete for this CR, you can manually modify tasks in this tab. Click Edit to make the changes.
Initiate the tasks.
Option 1: From the Workflow tab, click Initiate Tasks transition.
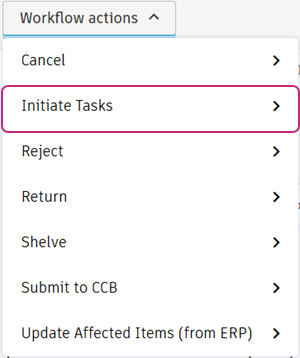
Option 2: From the Workflow Actions drop-down, select Initiate Tasks.
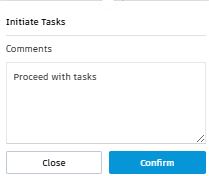
Enter a comment, then click Confirm.
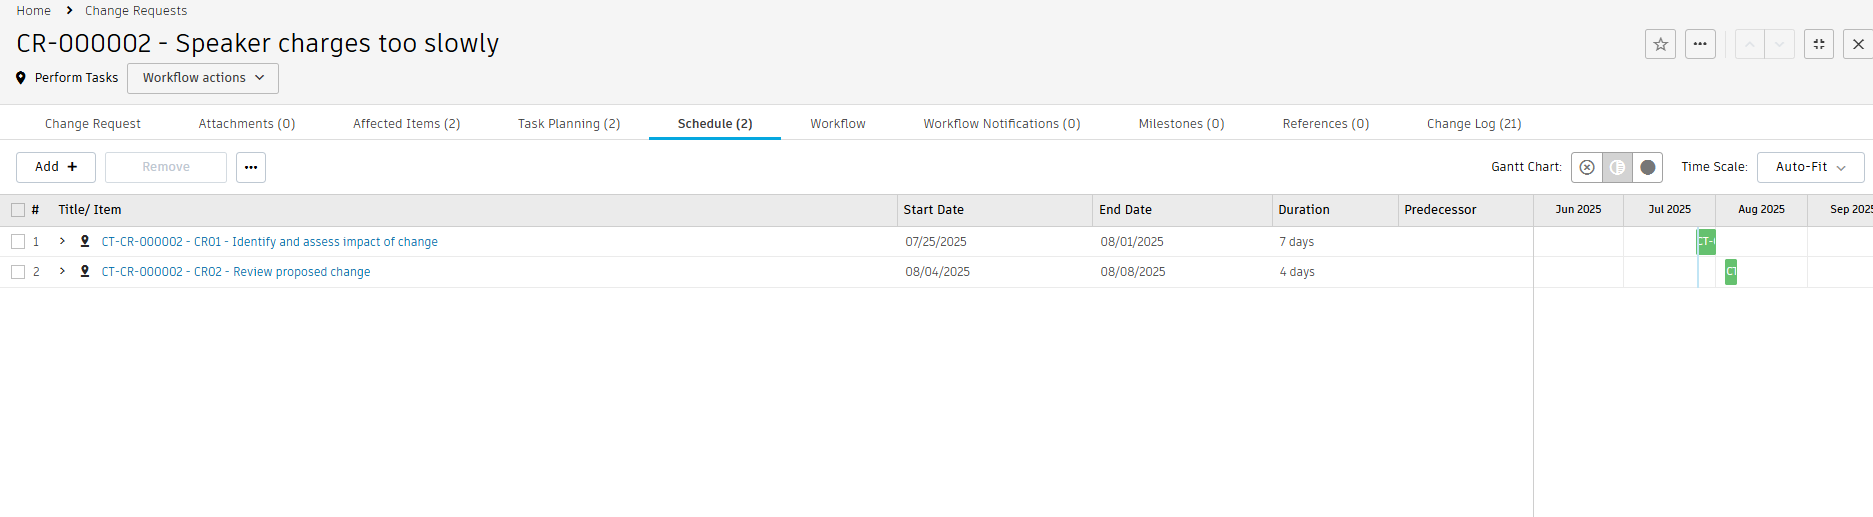
The workflow moves to the Perform Tasks state and change tasks are created for the two activities added in the Task Planning tab. These change tasks are placed in the Change Tasks workspace and receive a number in the format
<CT>-<CR number>-<ID>-<Title>.At the far right of the Task Planning tab of the change request, the Task column shows link to these tasks. Observe that these tasks are added to the Schedule tab according to their Target Start and Completion dates. Since you assigned them to yourself, you'll find these tasks in your My Outstanding Work list.


Activity 1 summary
In this activity, you explored the change request that was created from the problem report in Tutorial 6. You then planned and initiated the tasks that must be completed as part of this change request.