Animation clips
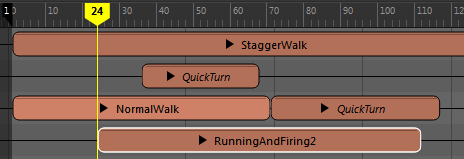
Animation clips are the building blocks of the Time Editor. Think of clips as a collection of animation curves for a keyable object, such as a character, camera, object, material and so on. If you can keyframe it, it can be an animation clip. See Edit Time Editor clips.
When you create an Animation clip in the Time Editor, ensure that you have select the object's complete hierarchy. You can select simple animated objects from the viewport, but if the object you want to create a clip from has any related attributes, such as a character rig, use the Outliner.To create an animation clip from a simple object or attribute
- Select the object/attribute in the viewport or Outliner.
- In the Time Editor, select from the Time Editor menu bar to open the Add Animation to the Time Editor options.
- In the Add Animation to the Time Editor options, specify settings such as the clip name, where the animation to is to reside, what animation you want the clip to contain (for example, keyed or constraint animation), and the animation clip length.
- Click Apply and Close. A clip is added to the Time Editor.
You can select simple animated objects from the viewport, but if the object you want to create a clip from has any related attributes, such as a character rig, ensure that you activate the Include Entire Hierarchy option in the Add Animation to the Time Editor options to import all the currently keyed elements. If you object has keyable elements that are not animated but you want to include in the Animation clip (for potential animation later) also activate the Static (i.e. edited but not Keyed) option.
- Expand a clip's hierarchy
-
Note: While expanding clip hierarchies is done in the Track's Roster controls, it is considered a clip operation as it shows the associated keyframes.You can view a clip's hierarchy, exposing the keyframes in the animation.
-

-
To expand a clip's hierarchy
- Click the arrow next to the clip name. In the Roster controls, a new series of hierarchy arrows appear, colored the same as the selected clip.
- Expand each arrow to progress through the selected clip's animatable attributes.
- Change a clip's color
-
- Change the color of individual clips in the Attribute Editor Clip Color setting. See Time Editor in the Attribute Editor.
- Change the color for all clips in the Default Clip Color option in the Color Settings Time Editor area.
Pose clips
A Pose clip is a single-frame capture of an object or attribute state that you can use to create animation. You can blend Pose clips with transitions to create animation.
To create a Pose clip, click
 in the
Time Editor toolbar.
Audio clips
Audio clips are green in the Time Editor Time View.
To create an Audio clip, select from the Time Editor menu and browse for an audio file, or right-click the Track area and select Audio Track from the Time Editor Track contextual menu.
- Only .wav and .aiff formats are supported by the Time Editor.
- You can only hear audio playback in the Time Editor when the Playback Speed is set to Real-time. To do this, right-click the Maya Time Slider to access the Animation Controls menu.

Clip Layers

Layer clips have a Clip Layer icon
 next to the name. Click this to expand the Layer view.
- Select the layer clip and click the Create Override Layer
 or Create Additive Layer
 icons in the
Time Editor toolbar.
- Right click a clip and select Create Override or Create Additive from the Clip Layer contextual menu.
To key on a Clip Layer, select the Layer so the Active Clip field in the Time Editor toolbar displays the correct layer, or right-click a layer clip and select Set Active Layer. See Key on Clip Layers. The active clip layer is outlined in red.
You can group-select multiple Clips/Group clips and/or the appropriate scene objects and create a Layer clip.Drag a Clip Layer in the track view to rearrange them. Remember that reordering clips affects clip evaluation, which is also dependent on the blend mode and weighting. Right-click a layer to set blend modes and merge layers in the Clip Layer contextual menu. You can also edit a layer's attributes.
See Add Clip Layers to the Time Editor.
Group clips
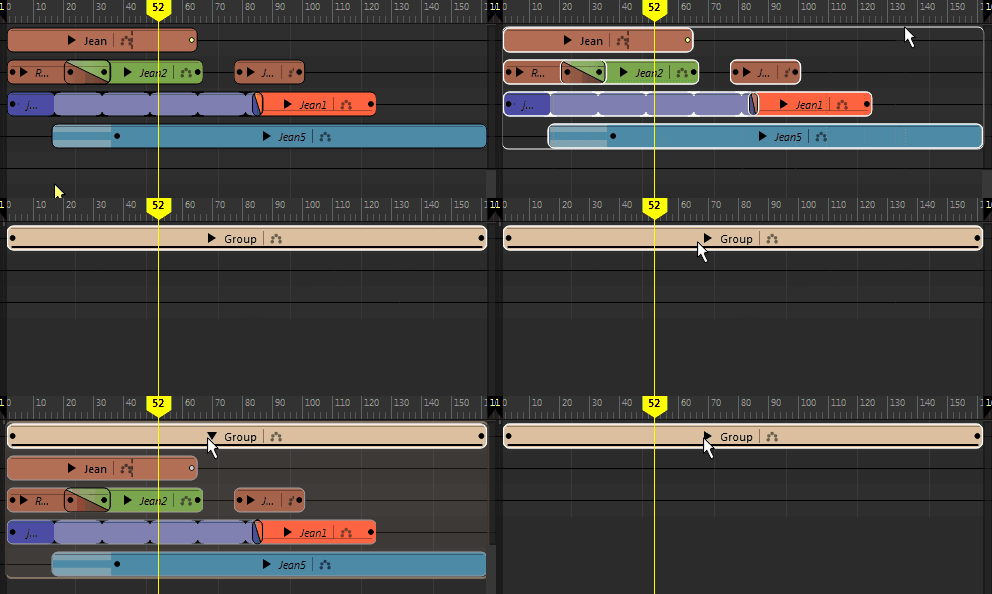
A Group clip is clip made up of many clips packaged together to which you can apply edit functions. Shift- or drag-select to grab clips, and click Create Group
 icon on the Time Editor toolbar or select
from the
Time Editor menu bar.
Click the arrow on the Group clip to view the contents. For how to create a Group clip, see Combine clips into Group clips.

You can import FBX files with multiple takes into one Group clip. See Import Multiple Takes in the Time Editor.
Once you create a Group clip, you can move, scale, copy, loop, and create transitions for it. The position and any transitions, clip effects, etc. you applied to the individual clips inside the Group remain intact.
To ungroup a Group clip, click
 , or select
from the
Time Editor menu bar.
